Archives for February 2019

How Do I Come Up With a Business Idea?

It’s one thing to decide you want to run your own business…and it’s something else entirely to know exactly what that business is going to be! Likewise, it’s easy to dream about “one day”, but picking a starting point in order to get to that destination is a little trickier.

At this stage, it’s really important to take some time to discover your WHY – your foundation, your guiding light, your raison d’être. Once you become clear on that, the next steps will take shape before your eyes. You’ll begin to see how your purpose, passion, and income can all come into alignment so that they can all fuel each other, and create the business of your dreams.

Your Top Talent

Together we’re going to explore what makes you unique and I’m going to help you define your top talent. I’m also going to suggest some resources for you if you’re really unsure about your direction and need some in-depth exploration.

Do NOT rush this stage of the process! It is far better to take the time and effort to define what it is you want in the beginning, than to set up a business and have to change it all later because you realize that’s not actually what you want to do! Or, that although you want to do X, or already are doing X, you haven’t come up with the best way to position yourself, or offer X to your potential customers.

This is not something that anyone else can do for you, or give you the template for! It can only come from you – your desires, your dreams, your passions and interests.


So grab a notebook and take some time to answer these questions as honestly as you can:

 What do friends or family say about you – what do you often hear them repeating? (Note: If you can’t think of anything, go to 5 friends or family members and ask them: What are the 3 best things about me and what are the 3 worst things about me? Then write their answers down.)

 What do people always ask you to help them with?

What do people often ask your advice about?

What are your top 3 interests, or hobbies – what do you read books about, take courses in, spend time doing, or really enjoy doing?

 What could you talk about for one hour with no problem?

 What do friends and family say you’re really good at? (Note: Again, if you can’t think of anything, go to 5 friends or family members and ask them: What are my top talents, what are the three things I do best? Then write their answers down here)

 What do you wish you were really good at, or better at?

 If money was not an issue, what would you spend your days doing?


Now go over your answers to all those questions. Look for any common or repeated elements. Which of those things leap out at you? Which things make your heart sing? Distill it down further into your top 3 talents, skills or interests. The top three things you have to offer the world, or are passionate about, or good at, or interested in.


Your Top 3 Talents or Interests:

1._________________

2._________________

3._________________


Turning Talents Into Income

Are you inspired and excited, or nervous and apprehensive, or a little of each? Now that you’ve nailed down what your top three talents are, you may be wondering: Fine, but how do I turn these talents into money? Or, if you’ve already built a business or blog around your top talent, maybe you need more ideas for how to monetize (generate revenue) from that talent, skill or interest…

I didn’t start out as a health expert – I lived the journey, and I shared as I learned (and still do!). What did I do to kickstart my business (though I didn’t know that’s what I was doing at the time)? I wrote a book. I wrote down everything I could remember about my intense, seven year recovery from Chrone’s disease, and I published it as an eBook. That’s all I had time for (I was raising kids and breastfeeding babies – I just wanted the information to be out there for whoever needed it). When, much to my surprise, the book took off in a real way, I started to build up more infrastructure to support it, and to answer questions from my reader. I began adding more eBooks & healing protocols; then I had to start selling other company’s products that I was recommending, because people were having trouble sourcing them. Eventually, I started formulating and manufacturing specific products that nobody else could make to my standards. I now have ____ books and _____ products in my health shop; I produce webinars and teleseminars, audio courses, how-to videos; I used to offer one-on-one consulting… the list goes on.

So even if you’re not ready to offer a million different products, can you see how your business will grow organically the more you work with it? All that started with one eBook back in 1997…

But what if you aren’t an expert on anything (yet)?

I’ve chosen this next example, using my own children, to illustrate that the concepts I’m teaching you here are nothing to be afraid of, or intimidated about. In fact, they’re so simple and easy-to-implement that even a child can follow them. Like my son Oscar.

When Oscar was 10 years old he started complaining of headaches and stomachaches at school. So we took a look at his diet, took him off wheat, started him on probiotics, increased his water intake, etc.

But what was definitely unusual for a kid, was the headaches. Before the advent of wireless technology, kids just did not get headaches. And they had recently installed a WiFi network in his school.

Oscar became very concerned about this, to the point that he did not want to go to school. Dad thought he was just looking for a reason to skip school! But what I suggested to Oscar was that he stay home for a week, let his body calm down and spend the week researching electromagnetic radiation (EMR) so he could make an educated decision about his body and his exposure levels. Since Dad was so resistant, I suggested he write his research report in the form of a letter to Dad.

Oscar’s story is a prime example of how your interests, or personal journey can lead to a business idea. And how, if there’s something you need or want, and it doesn’t exist… then likely there are others who need it too and would buy it from you. So back to the story…

Oscar and I soon realized that for him to research EMR was impossible, since all the information and experiments were written for someone with a university level education. So what we ended up doing (and I lost a week of my work time!) was I sat next to him and basically ‘translated’ everything we read into 10-year-old English.

Alright, here comes the business idea: What about all the other parents and kids in the world who were concerned about the effects of this technology? The kids who were now getting headaches, or heart palpitations, or nosebleeds at school and they too were listening to their body?

Since Oscar was already taking a week off school, I saw this as an ideal opportunity to teach him how to set up his own website. His sister Zara also wanted in on the deal. I wanted them to really get a hands-on feel for the process of setting up their own site, but I also knew they would not be able to write ongoing blog posts on this topic (so I didn’t choose WordPress for them).

I chose a static website template site for them to use (GoDaddy Website Tonight) that did not require blogging. This also gave me a chance to test how a template site would fare in search engine rankings vs. a WordPress or PHP programmed site (more on this later).

Oscar used his “Dear Dad” letter as the basis for the site and the kids wrote everything in their own words. They chose the domain www.RadiationEducation.com:

I taught them how affiliate links work and how they could use them on their site to make money. Affiliate links are basically images or text that links to another site or product for sale. If a person on your site clicks that link and then purchases something, you receive a commission on the sale.

They also decided to do T-shirts; which they designed themselves. We searched for an online T-shirt service where all they had to do was upload their t-shirt designs, and the company would handle everything else; production, payment, shipping, returns and customer service inquiries. The kids would just receive a commission on every sale. We found and used Printfection in the U.S. and Wordans in Canada to handle this. I then sent their designs to my graphic designer in India to output.

In addition, I taught Oscar and Zara the value of having an opt-in offer to build a list of people’s names and emails. So they came up with an opt-in offer called Radiation Education Action Pack and they now have over 300 names on their list:

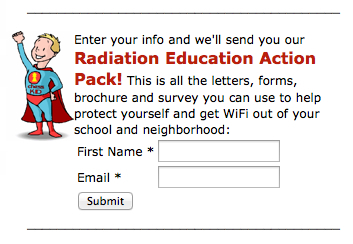
That means they have 300 people who are interested in their topic, like what they’re doing and would be open to hearing more from them. So if they upload a new, helpful video, we can email the video link to their list (more relationship building). If they find a fantastic product (for which they would receive a commission on sales) they can shoot a video demo of the product and email it along with a purchase link (and perhaps timed coupon offer, “10% off coupon, valid for 7 days”) to all 300 people.

Since the site launched, the kids have received emails from people in other countries asking to translate their material into different languages. A group in San Francisco used Oscar’s ‘Dear Dad’ letter as part of their package to lobby for a bill on mandatory SARS ratings on cell phones – which they got passed.

Here’s something else noteworthy: Since the kids launched the site (total of 2 weeks work), they have done nothing else with it, yet they earn about $200/month. Their work was all in the set up and they haven’t touched it since. They’ve agreed to receive a percentage of their monthly revenues in cash and the rest goes into their education savings account.

Sure they had me guiding them every step of the way, but they did all the actual work themselves… hmmm… sound familiar? Yes, I’ll be guiding you every step of the way, but you’ll need to do the actual work – from the emotional work, to the physical work, to the organizational work. Of course, you’ll also need to do a bit more work ongoing than my kids, because it’s likely you’ll want to earn more than $200/month!

Your Turn

So now that you’ve learned exactly how three other people turned their top talent, skill, or interest into a business (or two!), it’s your turn to do the same! Let’s go back to the process where I asked you to distill down your answers into a list of your top 3 talents, interests, or skills, or desires….


Your Top 3 Talents or Interests:

1._________________

2._________________

3._________________


NOW…For each of these three options (these are 3 things you are interested in and passionate about – and either have the skills to do something with, or are committed to developing those skills), use the space below to list out your ideas for how you could turn each of these into a new business, or use them in your current business. Don’t worry about how “good” your ideas are, or whether they’re way out there, or impractical. This is a brainstorming session! So just write down whatever comes to mind. Let your thoughts roam, brainstorm with friends, ask for dreams before you go to sleep, do whatever it is that connects you to your soul and/or a higher power. And if you have further thoughts later, maybe you do some brainstorming with a supportive, or wise person in your life, then come back and add more ideas.


How I can turn my Top Talent #1 into a new business, or expand my existing business:

___________________________________________________________
___________________________________________________________
___________________________________________________________

How I can turn my Top Talent #2 into a new business, or expand my existing business:

___________________________________________________________
___________________________________________________________
___________________________________________________________

How I can turn my Top Talent #3 into a new business, or expand my existing business:

___________________________________________________________
___________________________________________________________
___________________________________________________________


At this point, don’t worry too much about how viable your business ideas are, or fret about the details of turning these ideas into a new business, product, or service. Remember that you’re on a journey and these points are all a vital part of the process!

Is there one idea that really makes your heart sing? Or are they all exciting possibilities? Now that you have some ideas, I bet you’re wondering, “but how do I choose my best idea…and build a real business out of it?” …click to find out!


WordPress “How-To” Videos

WordPress can feel like a lot to figure out when you first start using it, but once you learn the basics you’ll really pick it up – it’s actually pretty user friendly. And because it’s open source and used world-wide, you can almost always find the answer to your question. Below are some of the most important things you need to be able to do to run your blog smoothly. You can click on the link that best matches the question you have, or you can just scroll through the videos to find the one you need. And remember…for everything else, there’s Google!


How do I…

  • get started with WordPress?
  • install WordPress on my server?
  • manage my WordPress “Dashboard” (control panel)?
  • figure out the difference between “Posts” and “Pages”?
  • edit my blog posts and pages?
  • create a new blog post?
  • create different types of blog posts?
  • “Quick-Edit” my blog posts?
  • organize my posts into topics?
  • create and edit “Pages”?
  • add photos to blog posts or pages?
  • add a video to blog posts or pages?
  • upload PDFs and use advanced photo editing?
  • manage visitors’ comments?
  • link to other sites from text or photos?
  • install or customize my WordPress “Theme”?
  • set up the sidebar on my blog (“Widgets”)?
  • set up my site menu/navigation?
  • how to install Apps (“Plugins”)?
  • add other authors or admin people to my blog?
  • set up my blog basics (“Configuration”)?
  • What is WordPress?

    How to Install WordPress On Your Server

    Your WordPress Dashboard (Control Panel)

    The Difference Between Posts and Pages

    How to Edit Your Blog Posts and Pages

    How to Create a New Blog Post

    How to Create Different Types of Blog Posts

    Various Ways to Quick-Edit Your Blog Posts

    How to Organize Your Posts Into Topics

    How to Create and Edit Pages

    How to Add Photos to Blog Posts or Pages

    How to Add a Video to a Post or a Page

    Uploading PDFs and Advanced Photo Editing

    How to Manage Visitor Comments

    How to Install or Customize Your WordPress Theme

    How to Install Plugins (Apps)

    Adding Other Authors or Admin People to Your Blog

    Setting Up Your Blog Basics (Configuration)

    How Do I Move Past All This Fear and Resistance?

    How are you feeling as you get closer to your dreams becoming a reality? Are you excited? Are you scared? Funny how those two emotions – fear and excitement – often go hand in hand. The really interesting thing is that when you look at the biochemical expression of these two emotions in the body… there is only one molecule of difference between fear and excitement.

    You may have noticed, fear (also known as resistance) does not go away. It cycles, it spirals, it varies in length or intensity, it may even change shape, color, or identity – in this audio exploring the subject, Lisa Marie Cabrelli shared how she created a comic book creature to represent her resistance?

    You may have heard the saying: Feel the fear and do it anyway.

    But what is the first directive there? FEEL the fear.

    You cannot pretend the fear is not there, or minimize it, brush it off, or ignore it. And it doesn’t say: Think about the fear. It says FEEL the fear.

    Free Flowing Fear

    Let that fear run freely through your body. Take a moment now and close your eyes, invite whatever fear or resistance is coming up for you to flow through your whole body. Truly feel it. And as it runs and cycles around your body, see if you can sense your way around it, see if you can feel how right on the edge of excitement that fear is.

    Free-flowing fear is liberating. It’s what animals do instinctively and why a horse can run for it’s life one minute and relax and eat grass the next. It’s only when you try to contain fear – by ignoring it, trapping it in your mind, or denying it – that fear turns toxic and can ruin your dreams, or your health, or your relationships.

    Fear is the signal from your ego that you are going into uncharted territory, because your ego’s primary mandate is to keep you safe. But the ego only knows what it has already encountered. So when you venture into new territory, the ego feels unbalanced, it feels you tipping into the unknown and so it pulls you back saying, “Whoa! Be careful!”

    Take a moment now and thank your ego for doing such a great job of working to keep you safe. Thank your ego for using fear to effectively deliver the message to you. And take a breath.

    I like to use an analogy to illustrate the ego’s motivation when it creates fear or resistance against new or expansive things. In the physical body, there is a function called the Homeostatic Mechanism. This means that the various systems of the body are hardwired to maintain equilibrium (or balance), no matter what challenges or extremes occur.

    In the blood, for example, if calcium levels drop below the normal (balanced) level, your body will pull calcium from your bones to maintain equilibrium, or homeostasis, in your blood.

    The Ego’s Job – Balance

    I feel the ego works together with the subconscious to maintain psychic, emotional and energetic homeostasis in the same way. So when you’re faced with an unknown, or challenging, or expansive possibility, the ego feels you tipping forward and says, “Yikes, out of balance! Here we go, let’s yank you back here into balance. Let’s maintain homeostasis, because that’s our evolutionary imperative. That’s what we’re hardwired to do.”

    So it’s really important not to beat yourself up, or get frustrated when fear and resistance rise up again and again. Our conscious mind understands that these new steps will make our world better. But our ego, working together with our subconscious, cannot understand future possibilities. They are anchored in the present and the past and all they know is that you are no longer in balance and their primary job is to maintain homeostasis!

    This process below is designed to reassure your ego that although you are tipping a bit – because you’re taking a step up – balance will soon be restored and all will be well again.

    Feel Your Fear & Dialogue With Your Ego

    Take a breath. Spend some time now dialoguing with your ego about whatever fear or resistance you’re feeling and while you’re talking (out loud or in your head) also tap with 3 or 4 fingers on the fleshy part of the side of your hand. This is an acupuncture meridian point that will help integrate your emotions and your visceral body during this dialogue.

    Woman doing EFT on the karate chop point. Emotional Freedom Techniques, tapping, a form of counseling intervention that draws on various theories of alternative medicine.

    STEP ONE: Because you are allowing your fear to run freely through your body, you will also be able to access all the thoughts, beliefs and feelings connected to your fear. Perhaps you just want to call them out, one by one, as you tap on the side of your hand. Perhaps you want to talk about each feeling, or belief, or fear and where it came from and how it makes you feel and the effect it has on your life, or your relationships.

    For example – tap on the side of your hand as your speak:

    I hear that I’m really scared about being seen.

    I understand that I am scared that people won’t GET me and will judge me; but then they won’t even be judging me, they’ll be judging their assumptions about me and that REALLY pisses me off.

    I recognize that I don’t feel safe trying new things… I’m flashing to a memory of when I was 7 years old and I came to my Mom, so proud of the machine I just built and she screamed at me, so angry, and then she cried because I’d wrecked her clock and her toaster. I was devastated. I never wanted to hurt my Mom. I decided that I mustn’t ever act exuberantly on my ideas again. I made a vow never to risk my creativity and offer my pearls to the world again.

    and so on. Go into your own life, your own experiences, go as far back as you need to go. Allow all your fears to flow through your body freely and speak them out, one by one. All while tapping on the side of your hand.

    And when you’re finished speaking out everything that arises for you (keep tapping the side of your hand the whole time) and all your hopes and dreams for how things could be different, take a breath – keep tapping – and then say, “And I love and accept myself anyway.” If you cannot say those words, then change them to, “And I would like to someday love and accept myself anyway.” Take another breath and relax your jaw, roll your shoulders, and stretch your neck.

    Just sit quietly for a while now and feel into your body, feel the sensations. Feel whether your heart feels open, or closed. Feel your back. Feel your feet and your knees, feel your neck and your head. Take a few breaths.

    STEP TWO: Now speak to your ego and your subconscious like you would speak to a scared child. Tap on the side of your hand again as you speak. Explain what is happening in your life and at this point in your journey to freedom and explain why and how this is all for the good.

    For example (take a relaxing breath) and tap on the side of your hand:

    My dearest ego, I thank you so much for taking care of me and for doing such a good job of keeping me in balance. I totally understand that you are just doing your job right now. And you are trying to hold us back where you know it’s safe, because this new direction, this opening, this expansion feels scary and risky. It is the unknown and it is messy. It is not calm and safe… yet. And I want you to understand that we are in transition. I am asking you to trust me. To release your hold, to release your control and allow me to take us to this next level of openness and expansion and expression.

    I promise that when we arrive in our new place of being, I will welcome you wholeheartedly to help us be balanced and centered in this new space.

    STEP THREE: Now move from tapping on the side of your hand, to tapping or lightly thumping on your chest, like this:

    As you tap with four fingers, or gently thump on your chest with your knuckles (thymus meridian point), explain why and how this temporary imbalance is actually moving you to greater safety and even more secure balance. Feel free to repeat things you’ve already said.

    For example – tap on your chest as you speak:

    I hear your fears Ego, and I understand you are just doing your job – and I need you, I don’t want you to stop doing your job. I just need you to trust me for this short, transition period, to step aside and let me take care of us during this shift.

    Because I am moving us to greater alignment with our life’s work and purpose. I am taking a step along the pathway to bringing us into greater expression of our true self and I want us to work together.

    I am open to this new way of us working together to keep us safe. I am open to trusting you and having you trust me. Thank you.

    And if you feel new fears arising at this point, just keep feeling it, letting the fear run through your body and speaking it out.

    Keep going until you have nothing left to say and you have felt everything there is to feel. And wrap it up by saying (while tapping on your chest or the side of your hand): And I love and accept myself just the way I am, right now. Again, if you can’t say that truthfully, then say: And I would like to someday love and accept myself just the way I am.

    Fear As Teacher

    Use this same process whenever you feel fear arising. Even just allowing your fear to run through your body – instead of tamping it down, boxing it up, or willing it away – will have a profound effect on how you experience your life. Allow yourself to feel around the edges of that fear and maybe you’ll be able to feel how excitement is hovering there too.

    Maybe you’ll even get to the point where you feel that fear coming and you welcome it, as a teacher, as a signpost, as a messenger, and you even enjoy the rush of it! If you’ve ever galloped a horse, or jumped off a high diving board, or driven really fast, you’ve already experienced how fear and excitement can be a rushing, exhilarating place to be – some may even find it enjoyable.

    And once you’ve used this process to take care of your ego’s needs, you will likely feel a whole lot more excitement than fear!

    Here’s another EFT Tapping video where I help you release some of the fears that may be stopping you from moving forward.

    In this video, I help you clear some common fears around taking risks; financial scarcity and resilience, changing (as you grow into your brilliance) and perhaps losing friends. So that you can feel freed up to live a great life of creativity, adventure, ease, sharing your gifts, and helping others. All you have to do is repeat what I say, and tap along!

    EFT Tapping is a powerful healing tool because it interfaces between the mind/body and thus can shift things at the energetic, or subconscious level. It also involves your bodily sensations and fears or memories that may be stored in your tissues or organs – so you may feel butterflies in your stomach, or heaviness in your chest. Don’t worry! These are all good signs that your body is speaking to you and signposting the way to your healing.

    Note that you cannot just listen to this video! You must tap along with me on the acupuncture points for this therapy to work its magic.

    In the beginning, we are going to start by venting, and voicing out loud all the negative crap that may be carried in your subconscious, or that other people have spoken over you, or beliefs absorbed from your parents without conscious awareness (often before the age of 6).

    So even though it may feel like we are focusing on the negative and you probably don’t want to dwell on that, it is an important part of the process for unlocking these limiting concepts and moving them into flow; so they can be transformed into life affirming, positive beliefs and feelings that make your world bigger. So if you’re feeling uncomfortable, just stay with me, keep tapping, and know that we have to go down into the depths to bring these things up into the light, where we can then shift and transform them. Stick with the video and know that the positive affirmations and life-enhancing re-frames are coming!

    Follow along with me; tap on the acupuncture points I’m tapping on and say (out loud or in your head) the words I’m saying:

    Here are the tapping points I use in this video:

    EFT Tapping is a mind/body healing tool that dialogues with the subconscious (where your bedrock beliefs and foundational experiences are held) and integrates the clearing/healing with your physical body via the acupuncture points meridian system. So don’t be surprised if you also experience some positive shifts in your physical body after following this video – although initially you may feel quite tired, as processing big shifts like this can use a fair amount of energy!

    Okay, now that you’ve got yourself clear, or at least created some breathing room – let’s get back into action! What’ll it be next…?

    How Do I Use Keywords on My Site (and Why Should I)?

    What Are Keywords?

    Keywords is the short way of saying: The words people type into search engines (like Google or Yahoo) when they are looking for information or answers.

    So keywords consist of both single words and short phrases. For example, What is twerking? is the keyword phrase and twerking is the keyword.

    Or, the best contact form plugin for WordPress is the keyword phrase
    and the keywords are: contact form, plugin, WordPress.
    In addition, contact form plugin or WordPress contact form could also be keyword phrases.

    Wherever you need to use keywords (webpage, blog post, vidoes, etc.), it is best to use 1 to 3 words for each keyword (or keyword phrase) and then use a maximum of 5 keywords (or phrases) total.

    If you use dozens of keywords, just to make sure you don’t miss any, then this will have the reverse effect – because you’re sending search engines the message that you are trying to manipulate them and don’t actually have anything of value to offer! Internet marketers who tried to trick Google this way quickly got slapped for ‘keyword seeding’ and their sites were either dropped down in rank, or blacklisted.

    Remember, general information is not considered very valuable by search engines. Specific, targeted information, help, answers or solutions provide great value to the viewer and therefore to Google, or other search engines. If the search engines think you are providing valuable content, they will rank you higher in search results, thereby sending more people to your site.

    So how can you find out which of these keywords and keyword phrases people are typing into search engines? Because once you know which keywords people are using, you can include those keywords or keyword phrases that apply to your content in your site copy, your blog post copy, etc.

    Conveniently, Google provides us with a keyword search tool that is completely free to use and enables you to find out how many people are using a certain keyword, or keyword phrase to search for things, it’s called the Google Keyword Planner.

    Have you signed up for a Google AdSense account? It can be useful even if you don’t want advertisements on your site. Once you’re registered and signed in you can use the Google Keyword Planner to identify good keywords to use in your site copy, your blog post titles, blog post descriptions, video titles and descriptions, book titles and descriptions and so on. Here’s a short little video (about 2 minutes) that shows you how easy it is:

    How To Use The Google Keyword Planner

    The other way you can determine which keywords people will use to search for your stuff is simply to pretend you are them! If you offer organic cotton, handmade, tie-dyed yoga pants on your site, then pretend that’s what you’re searching for. And what would you type into Google to find those? Keywords that immediately come to my mind are:

    • Organic cotton yoga pants
    • Colorful yoga pants
    • Tie-dye pants
    • Cotton yoga pants
    • Best yoga pants
    • Cool yoga pants
    • Organic yoga clothes

    Now, you could either just use those, or you could take it one step further and test your assumptions. Use the Google Keyword Planner to see if people actually are using those keywords to search for your product – or if there are any better keywords Google can suggest you use. You could also ask four friends or family members what they would type into Google.

    How To Use Hashtags

    Hashtags look like this: #. And they are simply placed in front of keywords so that things like photos, graphics, on short posts (one or two sentences) can also be optimized for search engines.

    Currently, most people are using hashtags incorrectly and just placing them in from of everything! You’ll see Facebook posts or Twitter tweets tagged like this:

    #amazing #my boyfriend #you’ll love #wow #go here.

    So, do you think anyone is typing “amazing” into Google? Or how about “go here”?

    Also, like keywords, if you use a pile of hashtags, your post will just be dropped as spam, so stick to two or three hashtags that are the same keywords someone would be searching under to find the topic of that post, pin, or tweet.

    Ask Friends and Fellow Enthusiasts

    Here’s another reason it’s good to check in with what other people would type in when they search for your stuff: It’s really important to make sure that what you call your stuff is the same as what the majority of people searching for your stuff would call it.

    A friend of mine, Lisa-Marie Cabrelli – who also happens to be one of the Top 25 Sellers on Amazon at Christmastime – once told me a story about her Dad. Her Dad had a website that sold fishing bait specifically for carp fishing.

    Because he was English, her Dad called this bait, “boilies.” So his whole site talked about boilies, all his metatags, keywords and site copy listed boilies. But when Lisa-Marie took a deeper look, she discovered that 90% of his site visitors were coming from the USA. And in America, they called this bait, “carp bait.” No one in America even knew what a boilie was!

    So Lisa-Marie had her Dad change all his site copy, keywords, titles, etc. to carp bait and his site traffic skyrocketed 10x – because he was now showing up for the keywords his market was actually searching for! And his sales also increased accordingly.

    You can make keywords as complex and scientific as you like and if this area turns your crank, there are entire blogs, reports and online courses dedicated just to understanding and utilizing keywords to maximum effectiveness.

    However, many of my blog posts are on page 1 of Google – sometimes twice! – using only the techniques I’m teaching you here. The most important thing to remember about keywords is that at the end of the day, if your content is excellent, highly targeted and directly solving people’s problems, pain, desire etc. (using the words they would use!) then your pages and your site will automatically get good search engine rankings over time.


    Ask Google

    You know how when you start typing something into a search engine bar, you’ll get an automatic drop-down list of search suggestions? These are predictive phrases that Google (or whatever search engine you’re using) thinks you might be looking for based on the words you’ve already written. Sometimes they’re totally absurd, and sometimes they are so on-point that you end up picking one of those instead of what you meant to write. Those suggestions are built out of data from the gajillions of searches typed in every day, and guess what – they can be used as a secret weapon when you’re trying to come up with keywords and keyword phrases. Here’s how:

    1. Pretend you’re someone looking for your solution or product. Start typing in the main key words that you would use to find what you’re looking for.

    2. Screen shot the suggestions for each of those terms

    3. Add any of these suggested keywords that make sense for your product, solution, answer, etc. to your post.


    So let’s take some time to figure out what your people are typing into Google – so that they can find you! Grab your notebook…


    Now that you know who your customer is and which problems you solve, which solutions you are offering, which desires you fulfill… take some time to brainstorm what you think your customer is typing into Google (keywords or keyword phrases) when they are looking for the answers that you have:


    Now call 2 people and ask them what they would type into Google if they were searching for your stuff:


    This will give you a ready-to-go list of keywords to use when you are writing your site copy and your blog posts! Remember, you need to use the same words on your website and blog posts that people are typing into Search Engines (like Google, or Yahoo) so that they can find you. But you’re not done yet…

    Bonus Points!

    Now take 3 of the keywords from the lists you just created in your notebook, choose the ones that you think are the best of the bunch, log into your Google AdWords account and plug those into the Google Keyword Planner to see what Google thinks of your choices:

    https://adwords.google.com

    Write down any keyword suggestions Google has for you that look good, and compile your complete keyword list:


    If you want to, you can photocopy or type up this final keyword list onto a sheet and slap it on your computer or bulletin board for easy reference when you’re writing your blog posts and web copy.


    The Quick and Easy Method

    Type each of your chosen keywords or keyword phrases into a search engine, like Google, Yahoo, or Bing, and see if any of them turn up useful content similar to what you would offer. Write down the good ones here:


    Tracking Your Site Visitors – Google Analytics

    Okay, we have one more element that is crucial to get set up before we can close out this module. Google Analytics is a free service that you can install on your site and it will give you feedback on things like:

    • How many visitors (hits) your site gets each day.
    • Where your visitors (site traffic) are coming from – search engines, Facebook, advertising, etc.
    • Which page most of your visitors are landing on when they first come to your site – don’t expect this to be your homepage, it might be a really great blog post.
    • How long visitors spend on your site and which pages hold them the longest
    • Which page are your visitors on when they decide to leave your site – are you consistently losing site visitors at a certain place?

    When you have this data, you can then start to test out different things to see if they result in people staying longer on your site. Maybe you realize you need to re-locate your opt-in, because it’s only on your homepage and not many people are landing there.

    You can also try different techniques to see if you can bring in more daily visitors – maybe your Facebook promotion drove 20% new traffic to your site and resulted in 20 sign-ups per day, whereas Pinterest only generated 1% new traffic. Well, now you know where to focus your efforts.

    As you might imagine, like keywords, playing around with your site metrics can be a full-time job in itself, if you want it to be! For now, the only important thing is to install Google Analytics on your site, so the data will be there when you’re ready for it. If you want a concise guide with details on how to use Google Analytics when you first get your site up and want to track the basics, check out this quick tutorial.

    Personally, I don’t pay a whole lot of attention to Google Analytics anymore because I’ve realized that as long as I continually provide excellent content and help, all the site metrics just take care of themselves. In addition, I use a very advanced back-end CRM (Customer Relationship Management) system that provides me with most of the data I need.

    I consistently appear on page one of Google search results (and sometimes even twice on page one) for my targeted topics – so I know the people who are looking for that specific information can easily find me.

    Of course, the fact that I have been occupying real estate on the web for 13 years also greatly contributes to my search engine ranking – I have proved myself reputable and the search engines know they can rely on me for excellent content that engages people and gives them the answers they’re looking for.

    Go ahead and set up your free Google Analytics account now – we will enter the Tracking ID code on your site later, when you’re ready to launch.

    http://www.google.com/analytics/index.html

    Note: When I give you blog setup instructions for your programmer, Google Analytics will already be included in your blog setup instructions. So just make sure you register for your account at this stage and write down your Google Analytics Tracking ID somewhere you’ll be able to find it again. And of course, also file your login information for your Google Analytics account somewhere safe.

    TIP: As you accrue more and more accounts and login information (usernames and passwords) it helps to store them all in one document for easy access on your desktop, in alphabetical order. Then every 3 months or so, PRINT that list out. This is the simple technique I use to organize all my Internet accounts and logins. Do not just store them in digital form and don’t store them on your phone or other mobile device that you could lose! Also, don’t use the same password for all your accounts and avoid using your name, birth date or other easily recognizable info for your passwords.


    How Do I Shoot a Site Intro Video?

    As you’re thinking about your website design and flow, you may want to consider using a video or slideshow presentation – usually at the top of your homepage.

    Many people prefer to have a short video on the homepage of their site, that tells people in 1 – 2 minutes who they are, why they are here and what SOLUTIONS they have to share that will benefit viewers, or solve their problem, or meet their need.

    This is what I did for Listen To Your Gut:


    Others prefer to use a slideshow; which is a series of slides, usually infographics (pictures and text), that flow from one to the next in a viewer window – this is called a Slider:

    [get embed code for LTYG slider]

    Or, if your message is simple or you have only one or a few products, a still header image or banner is cool too:

    If you have a product-based website, then a quick video showing exactly the same things about your product – how it will benefit me and solve my problem, what it is, why it’s great – is also a great option. Both Squatty Potty (product) and charity:water (service) use videos to quickly educate visitors and they are very successful.

    Remember, that people have different learning styles and preferences, so it’s always good to have methods other than written text to communicate with your visitors, like video or audio. If you don’t want or need a video on your homepage, then consider putting one on your About Me page – or somewhere else applicable.

    Kelly Rae Roberts has one of the best About pages I’ve seen – and she uses both video and written text to communicate exactly who she is and what she’s about in the most fabulously authentic way – go to her site and study it!

    Now, obviously Kelly ($10 million in licensing deals) has the resources to shoot and produce a pretty cool video. But when you’re just starting out, this does not have to be a complicated endeavour – people are more concerned with your authenticity than your production budget.

    You can use a simple Flip camera, or your iPhone – just make sure the lighting is nice and bright and you speak loudly and clearly. It’s best if you can match your outfit or background to something that matches or complements your site colors.

    If the thought of making a video about yourself stymies or scares you, then simply answer these questions in front of a camera (in this order), and you’ll have your video:

    1. How I can help you….
    2. What I have learned that I can now share with you…
    3. Who I am. Where I have come from, the journey that’s led me to this place…
    4. Why I am here today…

    Notice the order I gave you… most people start off their videos talking about themselves – because logically that makes sense. But that’s not going to make your viewer keep watching your video!

    You have to start out talking about THEM. This point is of utmost importance – you must have a clear benefit for people, or why should they waste their time on your site? Nobody is going to spend time on a site just to admire your brilliance, there has to be something in it for them, there has to be a clear benefit to them.

    You might think, well that’s not true, what about the site for an artist, dancer, singer, or performer? Like the video on Kelly Rae Roberts site? I’d spend time watching their videos, looking at their paintings, listening to their songs… Ah yes, because you have enjoyed their art, been entertained by their videos, moved to tears by their songs – you see, you have already received a direct, clear benefit!

    Remember that the number one reason people buy something is because it solves a problem they have. The biggest benefit you can give your site visitor is to tell them that you understand what their problem is, tell them why you have the solution to their problem, and tell them how you are going to solve their problem.

    Feeling Shy?

    Now let’s say you are completely uncomfortable in front of a camera (you’d rather eat worms) or you don’t have any kind of device that can shoot a video. No problem! You just make a screenshot video of a powerpoint slide presentation, with your voice narrating. Here’s a very clear simple video by Greg Habstritt that shows you exactly how to do that in only 7 minutes! Greg actually shows you how to use PowerPoint and other detailed steps:

    http://www.simplewealth.com/2011/01/19/how-to-create-a-high-quality-video/

    Note: If you have an iMac, you can use the Quick Time Player software to record your screenshot video and don’t need to download Jing. Quick Time also allows you to save the video in whatever format you want – for web, mobile, etc.

    Here’s the quick version (quicker than Greg’s) of how I create my videos using PowerPoint (or Keynote) and iMovie. If you don’t know how to use PowerPoint, then watch Greg’s tutorial above – this one just shows you how to turn the PowerPoint slides into a video:

    Animated Video

    Animated videos used to cost a LOT to have done, but Fiverr.com changed all that. Check out this video I had done for only $25 – you may have seen it before you joined LTYF:


    For a video like this, you just need to provide the text (words) and they can either add stock music, or you can have them add your own music. Be sure and take a look at the different kinds of animation videos you can have done for $25 or less!

    Alternatively, instead of having a video at the top of your site, you may want to have a series of photos. Perhaps you would like to have words on top of your photos? And then have the photos fade from one to the next…

    Add A Slideshow To Your Header

    This is called a slider. It is basically a slideshow comprised of a series of images, but you can also get sliders that allow you to combine video with photos. Or, perhaps you want a slider that rotates through three or four of your top videos.

    After much searching I found a plugin called MetaSlider that also has a number of slideshow formats – some of which you can combine images with videos, or just have video, or add text to your photos, etc.

    If you just want to have photos or still images in your slider, the plugin is free. If you want to have video, or have your photos alternate with video, then you have to pay for an upgrade.

    You can download this plugin for free from the webpage.

    OR the easier way (also free) is to go to your Blog Dashboard:

    Click on Plugins –> Add New –> Search: Metaslider –> select it and click INSTALL NOW –> click ACTIVATE Plugin

    Here I walk you through how easy it is to install MetaSlider and exactly how to set up your slideshow on your site. NOTE: To have your images show up full width across your site, make sure your images are sized to 1280×350 pixels:


    Adding Custom Music

    The music that plays at the beginning of all the Listen To Your Freedom videos is a ‘video logo’ that I purchased from AudioJungle. Video logos are very short (around 20 seconds) so sell for under $20. The longer tracks of 2 – 3 minutes are more expensive ($30 – $80). The cost of the music varies depending on whether you want to use it only for free content, or whether you’ll be charging for the end product. Or whether you want to use it for one purpose only, or multiple purposes.

    If you’re ready to brand your videos by creating a Video Intro that appears at the beginning of every video, then you can either buy music, create your own music, or use free music.

    The music tracks on these sites are either completely free or very low priced (as low as $1.99): SoundCloud, Vimeo Music Store, Free Music Archive, FreePlay Music, and StockMusic.

    Don’t forget Garage Band on iMac– that is a very easy way to start creating your own music and I’m sure there are other apps and free software for easy music creation – just Google it!

    If you can afford it, I feel it is worth buying a music track from somewhere like AudioJungle.net which will give you some high quality music, but also help to maintain exclusivity (i.e. less people will use paid music vs. free music). For example, this composer on Audio Jungle will give you a good idea of the variety available and how it all works: MojoMusic

    In my LTYF videos, I use the same music for each clip. This is because I’m using the unique music as part of my brand identity – what you feel when you think of LTYF. Licensing music from AudioJungle or Vimeo Music Store is much cheaper than paying someone to compose a piece of music for you. I paid about $30 for the clip I use.

    Publishing or uploading your videos to YouTube or Vimeo is also very easy as most video editing software (and some video cameras) have one-click uploads to YouTube and often Vimeo.

    If you’re excited to start making videos right away, I have more resources and tips for you on creating YouTube and Vimeo videos.

    In case you’re feeling a bit overwhelmed at this point, remind yourself that things are ONLY scary and overwhelming the first time you do them. Then they magically become easier and the process feels more exciting than scary. Watch the delightful Jody Jelas show you the super-fast way to put together a site intro video in only 7 minutes!

    NOTICE how Jody gives you the really helpful, free content first, then she makes her sales pitch. You are far more likely to trust her and check out her offer after she has shown you who she is and given you something for free – tuck this away in your brain closet for later.

    One last point: In the case of Kelly Rae Roberts’s video below, a lot of her video is actually just photographs, with words added on top of the photos. She may also have added some of her text letter-by-letter as a slideshow in PowerPoint, then imported it to her movie editor – as I showed you in my video above. I can also show you exactly how easy it is to add words on top of photos or artwork. So you could also do an entire video this way, if you prefer:

    How About You?

    Is your mind swimming yet? Do you feel overwhelmed with ideas and choices and you don’t know what to create for your site? No problem. Let’s grab your notebook and I’ll help you figure out what kind of video, or slideshow you’d like to have on your site…


    So which of the following methods of presenting your key message appeal to you? Which media gives you that tingly, excited feeling? And which delivery method do you think would work best for your stu , or your audience? Feel free to check o more than one – remember there are a number of places you can put this “grab your site visitor” video or slideshow; your Homepage, About page, Contact page, Product pages, etc.

    • PowerPoint or Screenshot Video
Live Video – featuring you and/or your product
    • Photo Series Video – featuring words on top of photos or artwork, maybe a voiceover by you, and/or some music
    • Slider (photos, or video, or combination slideshow) in the header section of your homepage
    • Animated Video – perhaps done by someone on Fiverr.com

    Choose one for now and then start planning it out. Either write down or sketch out your plan now. What words do you want to say or write? Remember the guide I gave you in this unit:

    1. How I can help you….
    2. What I have learned that I can now share with you…
    3. Who I am. Where I have come from, the journey that’s led me to this place…
    4. Why I am here today…

    Just speak to these sentences one after the other (in this same order) and you will have the text for your video or slideshow! Yes, it’s that easy. Do it here:

    1. _______________________________________________________
    2. _______________________________________________________
    3. _______________________________________________________
    4. _______________________________________________________


    Where do you want to shoot your video? Inside, outside, against a background, do you have enough light? Feel free to sketch it out here… Or are you going to hire someone on Fiverr.com to do an animated version of your video for around $25?


    What photos or look/feel of images do you want to use? If shooting your video live, then what colors do you want to wear and show in the background – do these colors look good with your site? Write or sketch your ideas:


    Are you going to have music – at the intro and outro (end), or during the video? Are you going to find a free clip, or pay for a more unique clip and use it as part of your branding (your specific look/feel):


    Now remember, when you’re ready to work on your site video, expect it to be frustrating, scary and take a bit of trial and error. All these things are NORMAL when doing anything for the first time. So prepare yourself for some hassle and treat yourself with compassion!


    How Do I Set Up My Business Emails?

    In order to get your business emails set up, you’ll also need to be ready to buy your domain and hosting – ideally, you will buy them all at the same time through the same service provider. I suggest you read both this page and the page on registering your domain and choosing a hosting package before actually purchasing anything. Getting the right systems for you in place at the same time is going to save a lot of hassle in the future.

    So let’s talk about how you’re going to finish the process of setting up your site infrastructure by getting your email boxes organized and set up. You’re going to:

    • Get personalized email addresses with your domain name and get them set up for easy access
    • Appoint a fictitious VA (virtual assistant) who will handle all customer service issues.
    • Set up your email accounts on your computer for easy access.

    If you’re currently in business but using a different email system than what I’m suggesting, read through the material to compare – maybe you’ll want to swipe some tips that will make your life and business easier! Like this Freedomite who’d already been in business for 6 years, managing a full client load, when she implemented LTYF tips and switched her emails to this system:

    “Implementing this email system was phenomenal! I can’t believe I put it off for so long because it changed everything for me! I spend WAY less time dealing with emails now, emails are not falling through the gaps, my friends and family are not complaining anymore. It’s actually had the most impact of anything I’ve done on my business this year – it really is phenomenal!!!”- A.S., Cornwall, UK

    Step 1: Get your emails set up

    You will need to sign up for email addresses with your hosting package. This means that your email addresses will contain the name of your site, rather than gmail or yahoo, or some other free email service. This makes you look like a proper business and builds customer confidence that you are legitimate and in it for the long-term.

    I like to set up separate emails for the basic customer service categories and then these can also stay the same no matter who is answering that email box. For example:

    service@listentoyourgut.com

    orders@listentoyourgut.com

    info@listentoyourgut.com

    and then you can also set up your own email that’s more personalized:

    lucy@listentoyourgut.com

    NOTE: I strongly recommend you keep your personal and business emails separate. This may not make a lot of sense to you now, but trust me, as your business grows and expands, it will lay a strong foundation for both time management and customer service.

    So if you already have a personal email, like Ralph@gmail.com, keep that email and continue using it for all of your friends and family. Do not even give friends or family your business email! This way, when you go to check your emails, you’ll only look at your business email inbox and deal with business concerns promptly. Later on in the day, or after you’ve finished working for the day, you can check your personal email.

    This system also safeguards against the biggest drain on your time and energy: Emails! You can waste half or a whole day answering emails that do NOTHING for your bottom line. They don’t expand your business, obtain or service existing customers, set up joint-ventures, etc. But because they’re sitting in your Inbox with an urgent-feeling sign next to them, you feel they are important.

    Then you get caught up in the interesting email from your brother who’s trekking through Nepal. And the urgent request from cousin Sally, whose mother is going into hospital… you get what I’m saying?

    If your business and personal emails are completely separate, there is no temptation or even chance of you getting distracted and moved to action by anything other than business concerns.

    Likewise, if your family members need to reach you, they know they have a private and dedicated way of communicating with you. There’s nothing worse than having to send personal emails to someone’s business email where their virtual assistant or other people might see them.

    For my email system, I take it even further. Here’s an example of how I’ve set up my email inboxes. Let’s use Ralph again as the example:

    BigRalph@bigboxes.com – since Ralph didn’t already have a personal email account with gmail or yahoo, this is his personal email address.

    RalphG@bigboxes.com – this is a business email, but only for select business clients, colleagues, joint-ventures, etc. who are very important to Ralph that he wants to respond to within 24 hours. Ralph NEVER uses this email to sign up for anything online, or to shop, etc. That way he keeps this mailbox clean for only the most important stuff and never gets flooded with spam or junk.

    ContactRalph@bigboxes.com – this is a business email that Ralph uses for two purposes. First, he gives it out to 2nd tier business contacts, or certain customers he’s chosen to enter into personal correspondence with. He also uses it to sign up for any newsletters or online business offers. If he makes any online business purchases, he use this email for his Amazon or Fotalia photography accounts, etc. This email box is not as important as RalphG above, so when he is pressed for time, Ralph knows as long as he checks RalphG, he can let this one slide for a bit.

    service@bigboxes.com – this is the contact email that’s given out on Ralph’s site, his newsletter, advertising, and any other communication from his company. He also uses this email when setting up social media accounts with YouTube, Twitter, Facebook etc. that he is going to want his customer service manager to handle the admin for. His customer service manager, or virtual assistant (VA), takes care of this email box on her own and only forwards Ralph things she feels need his personal input.

    When his customer service manager forwards him stuff, she sends it to his RalphG@bigboxes.com email, that way Ralph knows it’s important. When he replies, he writes his response, then sends it back to his VA (service@bigboxes.com) and she then forwards it to the customer. Ralph and his VA do not give the customer, or any other person, his top tier business email. And Ralph wants them to keep communicating with his customer service manager, who he has trained and trusts to only tag him when needed.

    orders@bigboxes.com – this is the email connected to Ralph’s online store and any purchases made, follow-up, shipping etc. Ralph’s VA checks this email box before she checks the service@bigboxes.com box. Because once someone has paid Ralph money, or is trying to pay Ralph money, they become his number one priority and any problems or questions about their order need to be dealt with first. After the product or service has been purchased, the stellar customer service must continue because how you take care of them will determine whether they ever buy from you again – and whether they ever refer anyone to you, or warn them off!

    Step 2: Use Your Email Boxes as your Filing System

    As you read through the email set-up above, it may appear to be complicated. But when you realize that setting it up this way also acts as an automatic filing system for your business, you realize that it’s actually a really efficient system. If you find yourself wanting to brush off this section, or put it off until later, then read this email again from a fellow Freedomite:

    “Implementing this email system was phenomenal! I can’t believe I put it off for so long because it changed everything for me! I spend WAY less time dealing with emails now, emails are not falling through the gaps, my friends and family are not complaining anymore. It’s actually had the most impact of anything I’ve done on my business this year – it really is phenomenal!!!”- A.S., Cornwall, UK

    Watch this video where I walk SuZen Maureen through this exact same process and see how easy it is to set up and use this system:

    Feel free to copy this system, or alter it to fit your individual needs. Even if you don’t need all these email boxes right away, you might as well get it set up as you will indeed be needing them soon! Here’s the shortlist:

    Nickname@mysite.com – Personal email, family and friends

    Firstname@mysite.com – Top priority biz email

    ContactFirstname@mysite.com – Normal biz email, also used for opt-ins, affiliates, shopping carts, etc.

    service@mysite.com – customer service questions

    orders@mysite.com – order management and questions

    You may want to print this shortlist out and tack it to your computer to make sure you use them correctly until you get to know them – remember, this system will only work if you keep them separated according to task.

    So also make sure you configure your computer email software so that it automatically SENDS from whichever mailbox you’re working in. So if you’re reading emails in your service inbox, you want your replies to be sent from service – not BigRalph, for example.

    Some people prefer to use a web-based mail. But for filing, sharing and organization I’ve always preferred Apple Mail on my computer. So use whichever system you prefer, but make sure you use the email tutorials (provided by whichever hosting company you choose) to get your email boxes set up correctly and start using them right away.

    Step 3: Assign Yourself a Free VA Immediately!

    When I first started my business, I used this exact same structure, even though I was the only one working! I called my customer service person by a pseudonym (I combined my middle name with my mother’s maiden name).

    This is also a good idea because if you are selling a book, or a personalized service, if a customer or caller knows they are talking to the author or ‘big cheese’, they can tie you up for an hour with their personal story and it is very difficult to cut it short without offending them. But if they think you are just the customer service person, they won’t get into such detail and they won’t try to ask you all kinds of questions they should be paying you to answer!

    Remember the importance of setting things up properly from the start? That way you manage your time and you also train your customer’s expectations. Trust me, your business does not need to be very big before you are going to need to hire a virtual assistant. A virtual assistant (VA) is like a personal assistant, but she/he can live anywhere in the world, as long as she/he has access to a phone and Internet connection.

    You can hire an excellent VA without breaking the bank, especially if you can leverage the differences between worldwide currencies. We are based in Canada and have several VAs in the Philippines who work for $4/hr (in Canadian dollars), and they are managed (and trained) by our VA in California, who we pay $22/hr.  It’s win-win, because $4/hour in the Philippines works out in the local currency to be comparable to the salary an electrician makes, and puts our VA firmly in the middle class – while being very affordable for us. You may eventually have several VA’s in different countries, all working part time, so you can cover different time zones.

    You are the most valuable person in your business, no one else can do what you do. Is your time better spent marketing, setting up joint-ventures, consulting and whatever else increases your revenue, or is it better spent helping Alice figure out how to download Adobe so she can open the pdf she requested from your site yesterday?

    We have detailed instructions on how to outsource just about anything, but for now, just keep in mind that throughout Listen To Your Freedom I am teaching you how to set things up properly right from the start, for the least amount of money, so you can expand easily as you grow. Believe me, you will not save time or money by scrimping on set-up.

    Step 4: Choose Your Email Names

    Take some time now to think about your email system and how you want to set it up. You might use the same system outlined above, but you may want to make the descriptors more unique. Instead of using “service” for example, you may want to use “concierge” – because it fits your business better.

    Make sure you also set up and start using these emails right away. Don’t know how to do all this? O-ho, that’s why the 24/7 live customer service offered by your hosting company, like GoDaddy, is so important! Whatever you don’t understand, or don’t know how to do, just call them! Whether you use a Windows or Apple computer, they can guide you on how to set up the email inboxes on your computer. Also, watch the video above as I walk through the process and make it really easy to understand.

    Okay, grab your notebook and write down the email boxes you want to set up, so that you will have them all ready when you go to register your domain and purchase your hosting and email package all at the same time!