How Do I Create & Host A Teleseminar?

What Is A Teleseminar?

A teleseminar is simply a seminar (training or information) conducted via the telephone, or Skype, or webpage. Teleseminars often involve some kind of interaction. Either you are interviewing someone else, or your listeners can call in (or submit their questions via a webpage).

Many people also use teleseminars as a vehicle to host and record their coaching sessions. If you have 10 people or less in a group coaching call, it is very easy to answer individual questions, or give everyone a chance to speak within a 1-hour call.

But if you want to use a teleseminar primarily to create and promote a product, then here’s an easy way to do that:

1. Select a Profitable Niche. Use your current knowledge and expertise – you should know who your customer is by now! Or you can select a new niche by doing market research – use Clickbank, Youtube, Amazon, Competitors Websites, etc. to see what’s selling or in demand. Make sure whatever you choose aligns with your expertise and passion. You do NOT need to create the product or program you’re going to sell yet, just select the product (concept) you wish to create.

2. Identify a Problem in That Niche and a Way to Solve the Problem. Or identify a need in that niche and a way to fulfill that need.

3. Create a Teleseminar Registration Page for a FREE Teleseminar about this topic. Your registration page can either be a Page on your site, or a blog post, or a Facebook Page. Your registration page needs to contain the bullet points of what you’ll be covering – the problem(s) you’ll be solving for attendees.

The registration form can either be a Name and Email -> Submit form that is organized by your email management platform (GetResponse, 1ShoppingCart, etc.). Or it can be a customized Contact Form widget on your blog – that is then just emailed to you.

4. Promote the Teleseminar. Email it out to your list, post it on Facebook, Twitter, Pinterest, Instagram, etc. Get your friends and associates to post it to their Facebook, Twitter, blog, etc. Advertise it on Facebook. Ask other people in your field to email it out to their email list (best if you can offer them an affiliate commission on any sales). Give out the weblink that leads to the Registration page on your site – where they can sign up.

5. Host the Free Teleseminar and Record it. You can either use a free teleseminar service provider (although I don’t recommend it as the line quality and recording quality is often poor), or you can use a multi-purpose provider, like InstantTeleseminar.com. I use Instant Teleseminar because I already use them for my webinars, podcasts and interviews and it is a flat monthly fee no matter how many events you use it for.

If you are absolutely strapped for cash, and you think you have a forgiving audience, then you may want to attempt to host a call using Skype, which is completely free. You can then record it using Quick Time Player or Free Video Call Recorder for Skype for PC (you can specify Audio Only for the record function), available here: http://www.dvdvideosoft.com/products/dvd/Free-Video-Call-Recorder-for-Skype.htm

Skype also has a directory of free apps which can record your call: http://shop.skype.com/apps/Call-recording-audio-only/

The downside of using Skype, as you may know, is that the audio quality can be glitchy and people can get dropped from the call. It also has a bit of a “cheap” feel to it compared to the paid teleseminar platforms. This may matter to your audience or it may not.

At the end of the day, you need to start with what you can afford. If your heart is in the right place, you will find your ‘tribe’ who will support you and be willing to grow with you, rather than expecting everything to be great right off the bat. The other factor to consider is that if your information is fantastic, or life-changing, then people will be glad to have it, no matter what the delivery method.

Either come up with a teleseminar format that involves lots of questions and participation from your audience (who can participate via phone, Skype or web) or use a format that involves you interviewing an ‘expert’ and then open it up for questions after the interview.

Note: In both formats, because people are often shy, make sure you have a bunch of good “questions” ready to go that you can pretend people submitted.

Be sure to give your best stuff away during the teleseminar. Over-deliver on the content, share a great story or two, and help them get results. If people can solve a problem or get results from your free teleseminar, they will be far more likely to buy your product or program (or coaching, or consulting) because you will already have proved to them that your stuff is great!

6. Offer Your Bootcamp or Special Product Offer, or Your Consulting or Coaching Package etc. Whatever you are offering, make it a special discounted offer for people who buy right away, from your teleseminar offer. Tell viewers this is a special deal ONLY for teleseminar attendees.

Make it EASY for viewers/listeners to purchase directly from the teleseminar. Also send everyone who registered for the teleseminar an email immediately after the teleseminar with the same offer in it – tell them it’s valid for only 24 hours and make it easy to purchase from the email.

Don’t wait until right at the end to make your offer, as this makes it easy for people to just click off. Give your offer about half-way or 3/4 way through the teleseminar. Keep it short and sweet, no more than 1 – 2 minutes, then carry on with the good content and give the offer again at the end, where you can spend more time talking about it, or answering questions about whatever you’re offering.

If you’re selling a program, keep in mind that you don’t have to create the entire program at once! All you need is the first chunk, first installment, or module. If you plan it as a weekly package or program, that will then give you an entire week to create the next piece.

7. Create the Training or Package or Product. Use the bullet points you listed on the registration page to create your outline for your program and then just create the first installment, or session, or module. If you are selling a physical product, you need to set up your special or bundled offer (e.g. 2 full-size bottles, plus a free sample for the price of 1) – and your shopping cart help desk will direct you in how to do that. As I mentioned above, all you need is the first installment, or Part 1 of your program/package ready to go. If you plan it as a weekly package or program, that will then give you an entire week to create the next piece.

8. Host Your Live Training and Record it. If you offered a bootcamp, or coaching, or other training program that involves live events, you can record your live calls, videos, training webinars etc. the first time you do them for customers. Then you do not need to do them live again, as your content has already been created! So for subsequent purchasers – because of course you are going to run this whole promotion again (starting with the free teleseminar) and again – they will receive these pre-recorded training sessions.

9. Package and Brand the Product so you can Sell it at Any Time. Once you have recorded the first time you offered your program, you now have a packaged, ready-to-go product to sell. By now, you also likely have enough money to invest in some good branding for your product/package – to make it look nicer.

You can use the initial free teleseminar (which you recorded in Step 5) to market your product again and again.

10. Deliver the Content. Now, you simply set up an automated way of delivering the weekly content (video, webinar, teleseminar, pdf workbook, etc.) directly to your customer. You can either email them links to webpages, or email them download links for content, or send them to a password-protected membership site – where all your content is hosted. Head over this way to learn how best to deliver content.


Brainstorm your ideas for how you can use a teleseminar to create a great freebie, or online course, or other audio product. Here are some questions to ask yourself to stimulate some ideas:

Who would I love to talk to?


Who has more specialized info or experience in one of my FAQ’s (frequently asked questions) than I do?


Who’s got a really cool idea or product I want to explore?


Who could answer a bunch of the questions that I have at this point? Now write down your answers/ideas:


How Do I Create & Host a Webinar?

What Is A Webinar?

Think about a webinar as a way to attend a conference without leaving home. Using your computer and telephone, you can hear a presentation and also see the presenter’s slides (watching over an internet connection). You won’t be able to see the presenter or the moderator, or others attending the program – and they won’t be able to see you (a bonus if you want to attend in your pajamas!). You can submit your questions to the presenter via email or the internet, or you can ask them using your phone (like a conference call). Of course, if you are hosting a webinar, then YOU are the presenter and your attendees will be submitting their questions to you.

Here’s a powerful, yet easy way to use webinars to sell your product, program, bootcamp, coaching, or consulting in 10 easy steps – even if you don’t yet have anything to sell! You’ll notice the process is very similar to creating and promoting a teleseminar:

1. Select a Profitable Niche. Use your current knowledge and expertise – you should know who your customer is by now – and identify a very specific group of people from your niche who need a very specific solution to their problem, or pain, or desire.

Or you can select a new micro-niche by doing some market research – use Clickbank, Youtube, Amazon, Competitors’ Websites, etc. to see what’s selling or in demand. But make sure whatever you choose aligns with your expertise and passion and fits with your business plan. One website ~ One message. Remember?

Note: You do NOT need to create the product or program yet, just select the product (concept) you wish to create.

2. Identify a Problem in Your Niche and a Way to Solve the Problem. Or identify a need in that niche and a way to fulfill that need. Identify what’s causing people pain and then give them a solution to that pain. Map out – very specifically – their desire and how you will fulfill that desire.

3. Create a Webinar Registration Page for a FREE Webinar about this topic. Your registration page can either be a Page on your site, or a blog post, or a Facebook Page. Your registration page needs to contain the bullet points of what you’ll be covering – the problem(s) you’ll be solving for attendees. And it needs to contain some kind of registration form.

The registration form can either be a Name and Email -> Submit form that is organized by your email management platform (GetResponse, Mail Chimp, etc.). You can go to your email management platform and get detailed instructions on how to set the form up.

Or it can be a customized Contact Form plugin on your blog – that is then just emailed to you. Again, follow the instructions for your plugin to configure your sign-up form. If you don’t have one installed already on your blogsite, then Contact 7 is a good one. You can install it directly from your Dashboard (search Contact 7 from your Plugins dashboard). You can install it directly from your Dashboard (search Contact 7 from your Plugins dashboard). Here are instructions on how to install a plugin.

Or download it from here: http://wordpress.org/plugins/contact-form-7/

4. Promote the Webinar. Email it out to your list, post it on Facebook, Twitter, Pinterest, Instagram, etc. Get your friends and associates to post it to their Facebook, Twitter, blog, etc. Advertise it on Facebook. Give out the weblink that leads to the Registration page on your site – where they can sign up.

5. Host the Free Webinar and Record it. You can either use a customized webinar service provider, like GoToWebinar or WebinarJam OR you can use a multi-purpose provider, like InstantTeleseminar to host and record your webinar.

I use InstantTeleseminar because I already use them for my teleseminars, podcasts and interviews and it is a flat monthly fee no matter how many events you use it for.

You simply create your webinar presentation using PowerPoint slides and then upload the pdf or jpg slides to your account. Be sure to give your best stuff away during the webinar; over-deliver on the content, share a great story or two, and help them get results.

If people can solve a problem or get results from your webinar, they will be far more likely to buy your product or program (or coaching, or consulting) because you will already have proved to them that your stuff is great!

Remember to record your webinar as you are giving it!

If you are absolutely strapped for cash, and you think you have a forgiving audience, then you may want to host the webinar using Skype, which is completely free. You can then record it using Quick Time Player (Mac) or Screencast-O-Matic (PC), both free software.

The way you would do this is to set your screencast recorder (Quick Time or Screencast-O-Matic) to record just your PowerPoint slides. It will automatically record your voice and any questions from Skype attendees that are coming over your speakers as well, at the same time.

The risk with Skype, as many of you know, is that the audio quality can be glitchy and people can get dropped from the call.

6. Offer Your Bootcamp or Special Product Offer, or Your Consulting or Coaching Package etc. Whatever you are offering, make it a special discounted offer only for people who buy right away, from your webinar offer. Tell viewers this is a special deal ONLY for webinar attendees. Remember, you can create your training or program later, it will actually force you to create it faster, HUGE BONUS for you if you tend to procrastinate.

Make is EASY for viewers/listeners to purchase directly from the webinar. Also send everyone who registered for the webinar an email immediately after the webinar with the same purchase offer in it – tell them it’s valid for only 24 hours and make it easy to purchase from the email (have a direct link to your shopping cart or paypal link). Keep in mind that you don’t have to create the entire program at once! All you need is the first chunk, first installment, or module. If you plan it as a weekly package or program, that will then give you an entire week to create the next piece.

Don’t wait until right at the end to make your offer, as this makes it easy for people to just click off. Give your offer about half-way or 3/4 way through the teleseminar. Keep it short and sweet, no more than 1 – 2 minutes, then carry on with the good content and give the offer again at the end, where you can spend more time talking about it, or answering questions about whatever you’re offering.

7. Create the Training or Package or Product. Use the bullet points you listed on the registration page to create your outline for your program and then just create the first installment, or session, or module. If you are selling a physical product, you need to set up your special or bundled offer (e.g. 2 full-size bottles, plus a free sample for the price of 1) – and your shopping cart help desk will direct you in how to do that.

8. Host Your Live Training and Record it. If you offered a bootcamp, or coaching, or other training program, you can record your live calls, videos, training webinars etc. the first time you do them for customers. Then you do not need to do them live again, as your content has already been created! So for subsequent purchasers – because of course you are going to run this whole promotion again and again – they will receive these pre-recorded training sessions.

9. Package and Brand the Product so you can Sell it at Any Time. Once you have recorded the first time you offered your program, you now have a packaged, ready-to-go product to sell. By now, you also likely have enough money to invest in some good branding for your product/package – to make it look nicer.

You can use the initial free webinar (which you recorded back in Step 5) to market your product again and again.

10. Deliver the Content. Now you simply set up an automated way of delivering the weekly content (video, webinar, teleseminar, pdf workbook, etc.) directly to your customer. You can either email them links to hidden webpages (a hidden page is not listed in your site navigation menu), or email them download links for content, or send them to a password-protected membership site – where all your content is hosted.

10 Reasons To Use Webinars

  • Webinars are one of the best ways to increase sales (without having to spend much) because they don’t “sell” your product. They give excellent value, position you as the expert, give people trust and confidence in you and THEN they want to buy from you. Listen to this Audio with Ian Thompson to really understand how this process works.

  • Few things convert better than a webinar (not even video)
  • Few things generate more interested people (qualified leads) than webinars
  • Webinars help you connect with your audience better than anything (except live events)
  • When done well, webinars position you as an expert in your community
  • You can sell anything from a webinar (products, services, software, live events, memberships, coaching, and more)
  • Webinars help you connect with other thought leaders (even the biggest names in the world)
  • You don’t have to be a great speaker or have any tech skills to be successful with webinars
  • Webinars are extremely cost effective (even for the tightest budget)
  • You only have to do a live webinar once, and then just keep replaying it for each event (means less work and automated revenue)

There are lots of free resources on the Internet if you want even more detailed instruction on hosting webinars. If you just want to buy an all-in-one detailed guide, then Lewis Howes has a good one available on Kindle called The Ultimate Webinar Marketing Guide.

How about you? Do you see any webinars in your future…?


Brainstorm your ideas for how you could create a webinar, or use a webinar as part of your free content, or education series. If you still don’t have a good grasp of what this would actually look like, then listen to this audio with Ian Thompson first, then come back here and brainstorm, sketch or doodle your ideas:


How Do I Create Membership-Based Training, Courses, or Programs?

If you want to sell an entire course, or training program, or you want a platform that can present various media all in one place – perhaps video, combined with private articles and/or audios to listen or download – then you may want to set up a membership-based site, or a membership section to your existing site.

A membership program or site is one where people pay to become members of your group, or program, or club, or training course and that content is delivered online.

Each member is given a private username and password  to login. Perhaps they pay a monthly, or yearly, or one-time membership fee – you get to decide which. In some cases, your membership site may be a bonus add-on to another product you sell.

Listen To Your Freedom is a membership-based program. Here are some other examples of membership-based products:

  • Environmental spill clean-up certification course
  • Language tutoring course
  • Home haircutting course
  • Marketing program
  • Art tutorials
  • Hoof trimming course
  • Bathroom reno course
  • Healing certification course
  • Nutrition certification course
  • Community gathering and support program
  • Cooking tutorials
  • Meditation course
  • Health information site
  • Investor information/tips site
  • Support and networking site for people who have bought your book or audio course
  • And so on!

There are very few training, teaching or certification programs that cannot be turned into online membership-based programs. Even for those programs where some hands-on, in-person training is crucial, there is likely to be an entire chunk of the training that can be automated content delivery.

The other type of membership site is one that is based upon either community (a private club or group), or advanced, or proprietary information, rather then a training or teaching program.

For example, let’s say that you are an investment advisor. On your public site and in your free newsletter, you give away great advice and opinions. But you also offer an inner circle membership site where people get access to specialized information that is not publicly available. Maybe that’s where they get a list of what you’re privately investing in that month, for your own account. Or maybe there is a ‘hot tips’ section where you share your hunches, or ideas about the next big thing. Or your site hosts a lively discussion forum, where you post your comments or answers from time to time.

For my health business, I have an information-based membership site called LTYG Wellness Circle where people have access to:

  • Free eBooks
  • About 20 issues of an InfoLetter (this used to be quarterly, until I no longer wanted to do it)
  • My entire roster of teleseminars (otherwise you have to buy them in my Shoppe)
  • Case studies (from when I used to do private consults)
  • Videos (which are also publicly available on my YouTube channel)
  • Podcasts (which are also publicly available on my blog)
  • Special articles written by me
  • A community forum
  • Discounts on all LTYG Shoppe purchases for Gold members (10% discount) and Platinum members (15% discount)

This membership site was created before WordPress existed, so I had the whole thing custom-programmed in PHP, along with a forum softward called Vbulletin – which cost me about $4,000 at the time. It was never wildly successful, but it has generated about $2,000/month since 2005, so I can’t complain!

Bookmark this link if you want to talk more about turning physical products and processes into digital ones and how that saves you both time and money. Well, imagine how many more students or members you could have if most or all of your current in-person training was in the form of online, digital content?

Add Value To Your Content

A membership program can also be a way to add a greater perceived value to an existing course. Imagine you have a course that is currently delivered via email. So people purchase your course, and then each module, or section is delivered once a week as a PDF download link in an email.

This is a perfectly good way to deliver a course and if your PDFs have great covers and are nicely formatted, with great content, people will be well pleased with your course.

But now imagine that the exact same course is hosted on a dedicated site (or section of your site) online. The hyperlinks to other webpages immediately open up in another window. Your members have to complete a multiple choice quiz before they have access to the next section. You have online chat as well as a real-time forum available for any questions, along with another forum for networking, where your members can interact with each other. Your videos play instantly at the click of a button and your customers can listen to your audios live online, at any time. This online course is instantly accessible from any mobile device, in any country.

Which course do you think has a higher perceived value in the mind of your customer? Which course could you charge more for? Now let’s see if there’s any of your content that can be monetized further…


Take a few moments right now to jot down any current training, or information, or community support you currently offer that could be automated into a membership-based, online site?


And here are some different ways you can present your course or program:

  • Audio course
  • Video course
  • Written course (text)
  • Online Combination program (e.g. text with mp3 audios, or audio + video, or video with text, etc.)
  • Physical/Online Combination course (part of the course content is online and then part of it is live, in-person group workshops, or one-on-one sessions)

You also may not need to create a whole lot of new content to set up your membership course. Maybe you take an eBook you’ve already written and break it into chapters; each chapter is one module or unit. Or perhaps you already have 20 articles on one topic or teaching – just gather them together and you have 20 sections or modules ready for your membership training program. How about adding a few videos here and there and an audio download from you with each module – now you’ve got a super value-packed program!

The great news – since your site is a WordPress-based site – is that you do not need to purchase separate software to run a membership site or section. Nor do you have to pay a programmer to code the entire thing from scratch!

WordPress Membership Plugins 

You simply need to install a WordPress membership plugin to your existing blog! Or, you could dedicate a separate domain (site) for your membership program, install WordPress there and then install the membership plugin on that new blogsite.

If you want to set-up the membership area yourself, using a free plugin, then it would probably be better to set up a separate site (separate domain name) and host it there. That way you can take your time getting it set up, without your main site being affected.

The other big reason you would want to set up a separate site/domain for your membership program is that once you install a Membership plugin on your WordPress blog, the search engines will no longer spider your free/public blog posts the same way. This is because Membership sites are password-protected, so the search engines cannot scan them properly and your search engine rankings for your blog/site will plummet.

For this reason, I have BrainstormYourBiz.com as my public blog post site that search engines can scan/index as usual, and ListenToYourFreedom.com as my private membership site (which is also a WordPress blog). Again, yes, I tested this! Originally I did try to keep them together as many advise it is no problem. But it is only no problem from a software/functionality perspective. For search engine rankings it is a big problem.

Note: You do not need to buy additional hosting to set up another site/domain – you can sub-host it under your existing account, so your only additional cost is for the domain name. Call your hosting provider (e.g. GoDaddy) and ask them to set this up for you.

Also, if you plan to offer multiple membership-based programs, courses, or tutorials, then you’re going to need a different URL (domain) for each one. Because you can only run ONE membership program off of each blog.

Here’s how it works: Your blog becomes your membership area (or membership site). Your blog posts become your password-protected membership content. So all your content (text, video, audio) is presented in the format and layout of a blog post. BUT these blog posts are password-protected and can only be viewed if the person has logged in to the site, or members area.

If you decide a membership site would work well for your products or services, you have two options: free or paid.

1. Free Membership Plugin – The cheapest option is to combine Vimeo Pro ($199/yr) with a free membership plugin for WordPress, called Members. This will allow you to password-protect your entire site.

Of course, if you don’t need to have private videos, then you don’t need to pay for Vimeo Pro and you can embed your public videos from YouTube – or don’t offer video. And, it’s perfectly fine to stick with just text and/or audios, if you prefer.

The big difference between free membership plugins and paid plugins is the number of features available and the different ways you can structure your membership levels and present your content. See the chart below for more details.

 2. Paid Membership Plugin – If you want a premier membership plugin, then you may want to use the same one I use for LTYF, WishList Member ($97), and then you can combine that with Vimeo Pro if you want to host private videos. You may have noticed that in LTYF I have a mix of both public and private videos that I offer.

More Membership Site Ideas

Here’s a great video from WishList Member, showing you the Top 10 Membership Models you could use to structure and offer a membership program. This video is a GREAT source of ideas, so even if you’re not thinking about doing a membership program at this time, try watching it anyway, so the ideas can percolate in the back of your head for when you’re ready.

Free vs. Paid Membership Plugins

As I mentioned before, the main difference between a free membership plugin and one like WishList Member that you have to pay for, is the number of features available (cool things you can do) and the ability to present your content in different ways.

Here’s what I mean – and these are just some of the key differences, there are many more features available in WishList Member that I have not covered here. So for a complete picture, please visit the webpage of each plugin for the details:

Free vs. Paid Membership Plugin Comparison Chart

Members – Free WishList Member – $97 (one-time fee)
Can only password-protect entire blog site. Can choose which parts of the site (pages or posts) you want to have public and which private.
Cannot have some content private and some public. Can have a public blog and private member content on same site.
Once someone has logged in, they have access to all the content. Can offer different types of membership according to how much people have paid. Each level only has access to certain content. E.g. Silver members access Modules 1 – 6; Gold members access Modules 1 – 14.
Cannot split the content into levels; where members cannot have access to the next level until passing a test, or getting approval. Can limit advancement to the next module depending on whether member has passed the test for that module, or been manually approved by you.
Cannot offer quizzes, or tests. Can offer multiple-choice quizzes or tests.
Cannot set different levels of membership (e.g. Silver, Gold, Platinum) there is only one type of membership available. Can set up as many different levels or types of membership as you wish (Silver, Gold, etc.) and each can only access certain content

As I already mentioned, I used WishList Member with this Listen To Your Freedom site. I used a programmer to install and configure the plugin cause I’m just not a techie-gal!

Whether you are using a programmer, or configuring the membership plugin yourself, you need to get the structure and organization of your content worked out first. This is not hard, since there are only 3 elements to play with: Widgets, Blog Post Categories, and Blog Posts.


Then you, or your programmer, can set up the membership section or site according to your plan. After it is set up (configured) you can start uploading your content (create your blog posts).

Of course, you can also pay someone to upload and format your content if you already have it in Word .doc format, and this certainly makes the process quicker! Make sure you double-check all the work, though, as you are sure to find incorrect links or typos.

Okay, so now you know all the details about setting up a membership site, or a membership section on your existing site, let me tell you about one more thing you can add to really enhance your membership program.

Community Forum

You can also add great value to any type of membership site by adding a community forum for your members to connect, discuss ideas, support each other, and ask and answer questions.

You can also decide how active you want to be on the forum. Perhaps you only go on there for an hour a few times a week, or month. Or maybe you like to spend an hour a day and really be the hub of your community. It’s totally up to your personal preference. Perhaps you don’t go on there at all, and you just have your VA (virtual assistant) keep an eye on things and answer questions.

The interesting thing about adding a community forum to a membership site, is that your members just may find this the most valuable thing about your program! Since each of these is free plugin, you might as well offer it as an added value to your membership site and see how your members like it and utilize it.

The most full-featured, free community plugin for WordPress is BuddyPress.

A simpler version of BuddyPress, if you just want more of a forum is bbPress – also free. Or SimplePress is another free, full-featured, yet simple forum. Here’s what a SimplePress forum can look like:

Another really streamlined free WordPress forum plugin that is beautiful in it’s simplicity is Moot. Here’s an example of what a Moot forum looks like:

And just in case you want a super full-featured forum, you can use Vbulletin. BUT be aware that Vbulletin is not a WordPress plugin. It is a piece of software that you have to pay for, download and then link to your main site – so you will need to pay a programmer to set it up for you.

Setting Up Your Membership Site

Whether you choose the free membership site plugin, Members, or the paid plugin, WishList Members, both are plugins that run on your blog.

Remember that if you choose the free plugin Members, you cannot also have public blog posts, as well as the private member posts. So in that case, you will just have the fixed pages of your site and your membership section (private blog posts). With the paid plugin, WishList Members, you can run both public and private (members-only) blog posts on the same site.

But as we discussed, if you want to get good search engine rankings for your content (and of course you do!) then you may want to keep your existing site as is, and run your membership site on a different domain (URL). For example:

Main Site: www.GreatPlugs.com

Membership Site: www.GreatPlugsProgram.com or www.PremiumPlugs.com

Tip: As I mentioned before, you do not have to pay for separate hosting for this second domain and membership site – you can set it up as a sub-domain under your main hosting account. So the only thing you have to pay extra for is the domain registration.

Now let’s brainstorm ideas for a membership-based site (or sites) that you would like to offer your tribe…


Write down here any ideas or thoughts you have about a membership-based site (or sites) that you would like to offer your tribe. And your structure for how you would like to set it up:


How Do I Offer Coaching or Consulting?

Coaching and consulting services are particularly easy to add to your product roster because they do not require any production time – but keep in mind they do take your actual time to deliver, and therefore you’ll be limited in how much you can offer.

That said, you can also charge a premium for consulting sessions since they involve one-on-one physical time. And no matter what your current business, talent, or skill is, you can often add consulting or coaching to your product line-up, if you wish.

Who Can Offer Consulting?

Anyone. I really mean that: No matter what your business is, there is often some way you can add consulting to your product offerings. We’ve all heard of business coaches, life coaches, and health coaches, but how can YOU offer coaching or consulting?

Let’s get you brainstorming about your own business by going through some examples:

Horse Trainer or Dog Trainer: Not everyone can afford to hire you personally to come out and work with their animal and many people just need some advice, or a fresh perspective. So you could offer:

Problem-Solving Phone Consult (30 minutes)
and/or
Training Advice Phone Consult (60 minutes)

Home Renovation: What about the people who are in the dreaming or planning stage and just want to get some professional input at this stage?

Brainstorm Your Reno Consult (1 hour)
and/or
Your Reno Ideas & Advice Consult (1 hour)

Professional Artist or Photographer: Instead of just selling your own work, how about helping other artists with your expertise?

5-Painting Art Critique (1 hour) – Submit up to 5 works and then we will discuss your strengths, what needs to be developed, easy tips for improvement that yield big results and what direction you should go in next.
and/or
Sell More Art! (1 hour) – We’ll talk about your unique situation, assess your strengths and constraints and I’ll share my ideas for how you can take your art marketing to the next level.

Do you see what I mean?

Also keep in mind, that your consulting sessions do not have to be stand-alone sessions. You could offer them in conjunction with your eBook, or audio course, or tutorial. This would turn a single item into a package and allow you to charge a lot more for it.

Your consulting session could simply be a one-on-one support session to implement everything they have learned in your eBook. Or perhaps it is a critique and feedback session where you take a look at what they have created from your tutorial.

Here are some examples:

How To Plan Your Secure, Sexy Retirement eBook by Emilly Jones, CPA plus a 1-hour Personal Mastermind Session with Emily Jones

Art Deco Your Bathroom! DVD by Josh Mulligan and 1-hour Personal Consult with Josh to go over your ideas and design.

21 Days To a Healthier, Slimmer You CD by Annette Walters includes a weekly 1-hour compassionate group support, advice and cheerleading session with Annette (maximum 15 participants to ensure quality!) for 3 weeks in a row.

Now let’s brainstorm what YOU could offer for personal consulting, or group coaching sessions…


Take some time right now to brainstorm how you could offer personal consulting services:


Write down your ideas here for how you could package up a digital or physical product (that you have, or that you would like to create) with a personal consult, or group coaching session(s):


To offer coaching or consulting sessions, all you need is Skype – which is free – or Instant Teleseminar. Then you need a webpage telling people about your consulting services and how they would benefit from purchasing a session, on that webpage you either need a Contact Me form, or a Buy Now button (that links to your shopping cart, or PayPal) and that’s it. Could it be any easier?

Consulting services are usually one-on-one sessions. You can offer single sessions and packages of 3, 5 and/or 10.

Coaching services can be one-or-one, or they can be group sessions – for which you set a maximum number of participants. Mastermind groups are just a fancy name for group coaching sessions.

Coaching is often an ongoing, or fixed-term kind of arrangement. For example, you may offer a Mastermind Group with a maximum of 5 people, that runs for a full year and people have to pay up-front. Or you may offer one-on-one life coaching, or health coaching, or business coaching, that runs for a 3-month or 6-month term.

If you’re a counselor, or therapist you may only accept clients who will book and pay for a 5-Session Package – because that’s the number of sessions you know people need in order to see results.

Don’t just take whatever you can get! You are the expert and you know best the number and duration of sessions someone needs to experience positive results from working with you. Do not set yourself and your clients up for failure by accepting less than you know they need.

Strategic Pricing

You can also use pricing to encourage people to choose the session package you want for them.

For example, let’s say Magnus is a life coach. And he knows that people need to book a minimum of 3 sessions to see any kind of positive change in their daily life. But if they really want to be able to break habits that are no longer serving them, and cultivate new life-affirming habits, then 10 sessions are ideal.

In that case, Magnus would structure his pricing to service his goals. Maybe his price list would look like this:

Single Mini-Session (20 minutes) – Come try me out! $FREE

10-Session Package (60 minutes per session) – $1350 (Save $900!)

3-Session Package (60 minutes per session) – $599 (Save $75!)

1 Session (60 minutes) – $225

So the price Magnus is charging for his 10-Session Package is his ideal price per hour for a committed client – $135/hour. He has inflated the price on the 3-Session and Single Session in order to give people a strong motivating reason to book 10-Sessions.

Of course, his copy on his Coaching page (sales page) is going to go in-depth as to WHY his clients have found 10 sessions to be the best arrangement and all the benefits they have received from making that commitment to themselves.

He is also giving away a free consult so people can connect with him and see if they click with him – something they would definitely need to do before making a purchase of that magnitude. The hyperlinked text, Come try me out! links to his Free Consult Opt-in Form.

This is just a brief foray into pricing and positioning your services to get you thinking. When you’re ready for the nitty-gritty, we go into much greater detail on how to decide what to charge, and then how to position (present) that to your site visitors over here.

Hosting Consult Sessions

If you’re only conducting one-on-one sessions, many prefer to use Skype or Zoom so you can see the client and they can see you. It is more intimate and they can also show you things, or you can demonstrate things. While Skype has been around longer, I prefer Zoom – better connectivity, and a more robust interface with more options.

However, some people may be concerned with privacy, or they are not comfortable with you seeing how they look. For those reasons, you may want to offer (or also offer) sessions that are conducted via voice only.

Also, maybe you have a preference! Maybe you don’t have an office, so you have to conduct your sessions in your living room, or kitchen, and you don’t want people seeing your home. Or maybe you don’t want to have to get dressed, or do your hair every day!

You can use Skype for audio calls, but the audio quality may not be very good – especially if the session is being recorded. In these cases, it would be wise to consider using a teleconference service that can also record your sessions directly to MP3 files – like Instant Teleseminar.

You can also use Instant Teleseminar for webinars – which can be very handy for sessions that are tutorial-oriented.

Record Your Calls

The other great thing about Instant Teleseminar is that your client can call in using Skype, if they prefer. Or they can go to a page that has a listing of local numbers they can dial in on to reach the centralized call center. Either way, the recording is much better quality than Skype and both of your voice levels will be similar on the call and on the recording.

If you are recording from a Skype call, then Skype provides a list of recording software that is compatible with Skype.

Just Starting Out

If you’ve never given consulting or coaching sessions in your field of expertise before, and you don’t have a steady stream of visitors coming to your site yet, I’m going to give you a handy trick to get you started with no advertising cost.

Find someone in your field or niche who has either good traffic to their blog, or podcast, or steady book or product sales. Put yourself in their shoes, and think about how you would like to be approached… And then get in touch with them.

Think about how you can start building a relationship with that person in your niche. And is there anything you can do for them, or give to them? If you can start building relationships with other people in your field, you will then be able to interview them for your blog, or your podcast, or do a teleseminar with them, or even a joint-venture with them.

Then they will likely share that interview or offer with their audience and presto, you can get exposure to hundreds or thousands of targeted people instantly.

A sincere, heartfelt email to reach out to that person in your niche can have a remarkable effect. If you can’t think of what to say, or how to say it, then we have a wonderful audio exercise to help you connect to your own (real, future, or ideal) customers.

For example, here is an email I received from someone just starting out, who wanted to connect with me – how do you think I responded to this?:

Hi Jini,

I hope this message finds you and your family well and that you are enjoying this holiday season upon us.

I am writing for two reasons. First, I wanted to extend my heartfelt thanks for your work. I am a gal who healed my Crohn’s (like you!) and went on to become a certified health coach helping others do the same.

Your profound work with LTYG and your personal healing story played an absolutely critical role for me in finding my way back to health. You were a shining light during the darkest time of my life and you gave me hope that there was even the possibility that I could get well. I had no other role model for this radical thing I wanted to do and there you were calling me forward. You should see my tattered copy of LTYG – it was like a bible to me! And for all that, I sincerely thank you.

I wanted to see if you might be open to having a short phone conversation with me in the near future? Looking forward into 2014 I am currently in the process of getting quiet and searching within for the “voice” that wants to emerge in my work with Crohn’s & Colitis patients. Knowing that it all runs much deeper than the dis-ease itself I have a long-term vision of really getting into the spiritual and emotional aspects of illness for those who are ready to look at those places and heal.

That said, this trailblazing stuff can be a bit intimidating and lonely at times and I find myself longing to connect with others who are on a similar path. I absolutely marvel at what you’ve accomplished as a solo-preneur and would be so grateful for an opportunity to connect with you in the sprit of support for one another’s work. My thought is that when you’re up to something as revolutionary as healing body, mind and spirit it’s important to symbolically “link arms” with like-minded individuals to create a collective force that drives this purpose.

For that reason, I would sincerely appreciate a phone conversation with you if you have some time available in the next few weeks. I would be ever so grateful for any wisdom you might impart to me on this journey and I’m also curious and interested to know what’s next on the horizon for you and how I might support you in that.

Please let me know what you think. I can be reached at the email below and my availability is flexible to whatever your schedule may be.

Thank you again and Happy Holidays!

With Love & Light,
T.R.

Do you think I just pressed “Delete” on this email and never bothered responding? Of course not! Her email was absolutely heartfelt, she spoke in true vulnerability and good faith, and she was not self-serving, nor manipulative.

And notice how she just asked to connect via a phone conversation – she left it to me to decide when and how long. And then she expressed an interest to also discuss what I was up to and if there’s any way she can help me.

Notice that this email does not contain any website traffic numbers, or product sales, or any other attempt to position herself as “worth” my attention. She merely included her website, so I could go check it out if I wished.

Needless to say I did respond to this email and I not only had a conversation with her, I gave her a trial membership in LTYF so she could use it dig down and define her new direction and learn how to position herself so that the right people will find her. I also listed her on the Recommended Health Practitioners section of my site.

So find someone in your niche, whose work you love and who has had an impact on your journey. Reach out and connect with them.

Snail-Mail or Phone!

If you don’t get a reply to your email, send a hand-written letter. Hardly anyone gets snail-mail anymore, so it will definitely get opened! If that doesn’t work, then pick up the phone. I’m serious! So many people are so busy and are approached by so many people wanting to liaison that they will only respond to people who show they are committed and sincere. They purposely wait for the flaky ones to fade away.

Like the email above, you could ask for a phone conversation, or a podcast interview, or a teleseminar. Let them set the length, ask them what topic they are passionate about and suggest a few that you would be very interested to hear them speak about.

Even when I was just starting to do teleseminars, I rarely had anyone turn me down! In the decade I’ve been doing teleseminars, I only had one doctor who said no, due to time constraints. This was Dr. Jonathan V. Wright – who was busy lecturing worldwide and appearing on TV shows since he was featured in Suzanne Somers’ books. But even then, he referred me on to his right-hand doc instead – Dr. Wendy Ellis – and I did two fabulous teleseminars with her instead.

The only other person – also a medical doctor – who did not respond to my emails, nor return my phone calls, lived in Australia and was a world-renowned gastroenterologist who also lectured worldwide and headed up the GI department at one of the top hospitals in Sydney. Totally understandable that he would have zero time to respond back to me.

BUT, nothing is ever wasted… about 5 years later he emailed me requesting samples of one of my health products and then requested a phone conversation with me to discuss patient outcomes on the product.

So don’t get discouraged, even when you don’t hear back from people, you have planted seeds. And when your name pops up again, they will get a tingle of recognition. And when they hear about you yet again, or someone talks about you, or they see your book in the same category as theirs on Amazon… you never know what can happen.

Also, do not be afraid to let some time pass and then contact that person again! Sometimes you just have to wait for the timing to be right.

Once you have made some kind of contact with someone in your field, you could offer to provide free mini-consults to their people. As long as your consults would not directly compete with what they are offering, they will likely be open to this. This could be structured in the following ways to provide a win-win for both of you:

  1. They can offer a free consult with you as a free bonus to purchasers of their book, or program. This increases the ‘value’ of what they are selling. And they can position the offer like this:

Free Bonus #1 (Value: $75)
20-minute consult with life coach, Magnus Ferguson…short bio, etc.

  1. If you’ve done a teleseminar with them, then provide them with a download link to the audio to share on their blog. Below the teleseminar, they can offer a free consult with you as a special gift to their listeners. So then there would either be a link to your free consult page/form, or you give them the code for your form and they embed it right into the blog post.
  2. The other thing you can do, if you’re doing an interview with them on your podcast, or your blog, or a teleseminar, is to arrange your offer with them before the interview. Tell them that you will be offering a free consult to all listeners or readers at the end of the interview and ask if they would like to offer anything as well? Then, you give out your free offers at the end of the interview. When your guest links to your blog post, or makes your podcast or teleseminar available to his/her audience, your free consult offer will automatically be extended to their audience = free promotion for you to their list!
  3. In any of these scenarios, you could also offer them a commission if anyone from their list purchases a session or session package with you. In that case, then the link to your free consult webpage would be an affiliate link.

The Power Of A Free Consult

Why have I been talking for pages now about offering a free mini-consult? Well, let’s go back to the Golden Rule of Business: What would you like to receive? How would you like to be treated?

If I were just starting out, so I didn’t have much of a reputation yet; you weren’t hearing about my fabulous work from other people, and there weren’t dozens of podcasts and teleseminars out there where you could hear my voice, or get a sense of me… Would you just go ahead and pay $100+ for a session with me, just based on my website and perhaps a few emails you’ve received?

I know I wouldn’t! For something as intimate as coaching or consulting, I need to have a real sense of the person before I will book with them – or their reputation has to precede them. And when you’re just starting out, you don’t have a lot of social proof.

Annabel Fisher, EFT Practitioner, built her practice off of free consults. The main purpose of her website for many years was to accomplish one thing: Get the site visitor to sign up for a free 20-minute consult. Why? Because her conversion rate from her free consults was 80 – 85%. Yes, you read that correctly! Out of everyone who received a free consult in any given month, roughly 83% of them booked a paid session, or session package.

I also offered a free consult with Annabel as one of the bonuses my readers received when they bought my Listen To Your Gut book – my readers received a total of 7 bonuses that included a consult with Annabel, and another free consult with a life coach. As the author, both these bonuses supported the aim of the book and provided tremendous value – it was a win-win. Her conversion rate from these ‘free bonus consults’ was also very high: 80%.

Annabel’s conversion rate was so high because she only offered her free consults to very targeted niche prospects: People with a chronic illness; which was her specialty at the time.

She also ensured that the free consult was NOT just spent chatting and getting to know the person. She was very rigorous with ensuring that the person actually experienced the therapy method (EFT Tapping) during the free consult.

Her intake form for the free consult got the person to narrow down their top 3 problems at the time. And also asked them if there was something pressing they wanted to address during the consult. Annabel then made sure the initial chit-chat lasted no longer than 5 minutes – she would not allow people to get ‘into their story’ – and that left a solid 15 minutes for the client to experience the therapy and actually get some relief. She purposely set the consult at 20 minutes, so that she could stretch it up to 30 minutes, if she chose. But 20 minutes managed the client’s expectation nicely and then of course, they always felt pleased if they got some extra time.

The third reason Annabel’s conversion rate was so high is that she actually asked for the booking! Do not leave this up to the client. You do not have to be pushy in any way, but you do need to ask for the booking. Something like this works well:

“Okay, so would you like to book a session now? [leave 4 second pause of silence – don’t get nervous and jump in, wait the full 4 seconds!] Or would you like to think about it and check your schedule?”

Fourthly, for those people who did not book immediately, Annabel sent them a feedback, or follow-up email after a week. They were also added to her regular email list as soon as they signed up for the consult, so they continued to receive ongoing emails and offers from her.

Don’t minimize the importance of the follow-up emails as many people just need some time to get the money together, or things have to get bad/painful/difficult/motivating enough that they finally give themselves permission to book with you! Also, if they receive an email from you a few weeks later offering group coaching at a much lower price, then that may be the way they need to start with you, or it may suit them better. Let’s recap:

  1. Offer your free consults only to targeted, specific audiences.
  2. Treat the free consult like an actual session; make sure it is exactly what they would experience if they worked with you in a paid session. Stay in charge! Don’t let the client chatter on with their stories or small talk.
  3. At the end of the consult, ASK for the booking in a nice, respectful way.
  4. Follow-up with an email sequence (autoresponders) after the session.

So let’s take a few moments now to quickly map out how your free consults will look…


Brainstorm a list of people in your niche, or who have complimentary services, that you would LOVE to interview or feature, or even just reach out to:


Who will you offer your free consults to? And how many minutes do you want to give?


How will you present your free consult offer; email, webpage, teleseminar, etc.?


How will you structure and manage your free consults so that you will really give people a taste of what working with you will be like? What can you accomplish in the time frame you have chosen?


Use your email platform right now to create your sign-up form (see Module 10) for your free consult and paste the code into a Notepad or TextEdit file (plain text only).


How will you ask the person if they would like to book a session with you? What specific wording will you use? NOTE: Have this wording in front of you during the sessions, until you have learned it fluently:


How will you follow-up with people after their free session? Map out 3 emails here that you will send to the person who did NOT book a regular paid session with you.

Make sure you enter them into your email platform as automated emails (so they are automatically sent out on the days specified).

Treat the day you gave the person the Free Consult as Day 0.

Thereafter, have them receive your normal emails for your newsletter, or blog post, or whatever you normally send to the rest of your list.

Note: The day the person uses your opt-in form to sign up for their free consult may need to be designated as Day 1 or Day 0 in your email system. If this is the case, then make it your protocol to have that person booked for their free consult within 2 weeks of signing-up. Then set the first email to go out on Day 21 – that way you will ensure they have had their free consult by then and had at least a week to mull things over. Adjust the timing of the other emails accordingly. Let’s go map it out…

Now let’s create your email autoresponder series for AFTER someone has signed up for your Free Consult session, you have booked the session with them, and you have also already had the session with them. You may want to just jot your framework here for each email, then create the actual email text in your email program, to save yourself time.

Email #1 (Day 7) → Touch base, ask how they are and ask for Feedback on the free consult


Email #2 (Day 14) → Give them something for free. An eBook, or Report, or video, or MP3 audio. Remind them gently that whenever they are ready to book a session, you would love to interact with them again. Give a link to your consult booking page. Include a couple testimonials from past clients in the email.


Email #3 (Day 21) → Send them to a blog post that contains one of your tribe’s top pain points, or common struggles, or challenge. Let them know that you SEE them and you KNOW them. At the end of your blog post, make sure you talk about how/why a personal session (or session package) with you is so powerful and link to your consult booking page.


Group Coaching

If you’re curious to hear more, listen to this audio with Annabel Fisher, where she talks about how she started off charging $150/hour for one-on-one consulting, but then she leveraged that into group coaching – which was cheaper for each participant, yet netted her $492/hour.

Well, that story right there is an excellent reason why you would want to do group coaching whenever possible. It’s cheaper for your client, which makes them happy; and it’s more money for you, which makes you happy! Depending on your type of business, this is not always possible, or you have to think a little ‘outside the box’ to make it happen.

For example, if you are a doctor, you couldn’t offer group coaching for personal health consults. But, you could offer group coaching for people you’ve already had private sessions with. Let’s say you have a bunch of patients who are all struggling with diabetes. Well, you could set up weekly group coaching for the first 6 weeks that you are trying to get them all to switch to a healthier diet. Then perhaps you could offer them monthly coaching on-going, just to keep them on track.

Don’t forget the power of the support and camaraderie people feel with others in the group. This can be a powerful glue that holds your group together – because you are also providing community.

Anytime you have a few people in your tribe working on the same thing, or needing the same type of help, or who would benefit from the support of a community – you have the opportunity to offer group coaching.

Here are some of the different ways you can label it:

  • Group Coaching
  • Mastermind Group
  • Support Group
  • Class
  • Training
  • Clinic
  • Group Session

Hosting Group Sessions

If you’re only conducting one-on-one sessions, many prefer to use Skype or Zoom so you can see the client and they can see you. It is more intimate and they can also show you things, or you can demonstrate things.

However, for group sessions, people are often concerned with privacy, or they are not comfortable with a group of people seeing how they look. For those reasons, many group coaching sessions are conducted via voice only.

You can use Skype for audio calls, but the audio quality is not very good – especially if the session is being recorded. For group coaching, it would be wise to consider using a group teleconference service that can also record your sessions directly to MP3 files – like Instant Teleseminar.

You can also use Instant Teleseminar for webinars – which can be very handy for group sessions that are tutorial-oriented.

Record Your Calls

The other great thing about Instant Teleseminar is that people can call in using Skype, if they prefer. Or they can go to a page that has a listing of local numbers they can dial in on to reach the centralized call center. Either way, the recording is much better quality than Skype and everyone’s voice levels will be similar on the call and on the recording.

Don’t forget, that for group coaching, there will often be one or more people who don’t show up, so you need to record every session for that reason alone. Let’s figure out what you can offer for group coaching…

Think now about your audience, the products you have, or would like to have, what your people need, and brainstorm ideas for how you can offer a group coaching component to your existing stuff, or as a stand-alone, new product:


Write down how you are going to host and record your solo or group consulting or coaching sessions (which system or equipment are you going to use?):


In the next module, we’re going to talk about membership-based groups, courses, or programs, and this is an ideal service or product to offer your coaching or consulting clients!


How Do I Keep My Digital Content Secure?

Make Sure Only People Who Have Paid For Your Digital Products Get Access

In this unit we’re going to look at different methods you can use to secure your digital content – whether you’re emailing it out, or hosting it on your website.

If you have charged money for a product, or, if you are positioning it as valuable content, then you definitely want to secure that content or product, so that it is not available to Joe public.

eBook Security

Ebooks can be sold and delivered to your customer using exactly the same process you just learned in the last unit, and you can set some Security options on your eBook when you save it to PDF.

The only way you can really deter people from sharing your eBook with lots of friends and family is to lock it with a password. But keep in mind, they can still email it to their friends, along with the password.

To do this, you simply click on SECURITY OPTIONS when you are saving your .doc as a .pdf and here’s what pops up:

You can then select which actions you wish to password-protect.

Personally, I find it super annoying to have to enter a password every time I open an eBook – annoying enough that I would really hesitate to purchase again from someone who I knew was going to put me through that hassle.

Also be prepared to have your customers emailing you endlessly because they have forgotten or lost the password; if you choose to password-protect anything.

I don’t think you should ever restrict printing an eBook, because many people (especially older people) always print their eBooks out.

It does, however, make very good sense to use the Security Options box to prevent people from copying text, images and other content. I check this box and then I do not give the password out to anyone. Because I don’t mind if people share the eBook, I do not mind if they print it, but I don’t want them to be able to copy/paste sections of it into their blog, or emails, or anywhere else.

As another option, some shopping carts, like 1ShoppingCart, have an eBook sales facility automatically included, with a built-in security feature. Here’s how it works:

  • Immediately upon purchase of your eBook, the customer is sent to a download page for your eBook (which you have uploaded to your account as a PDF).
  • The customer also automatically receives an email giving them the link to the download page.
  • However, the security feature is that the link/download is only live for 24 hours.

This makes it harder to ‘share’ an eBook, since the link expires in 24 hours, they’re unlikely to pass the link around. Of course, they can still email the eBook to their friends, but this may be difficult due to file size. Then again, why not? I loan my printed books out to friends all the time, why should an eBook be any different?

How To Deliver A Private Video To Your Customer or Sign-up

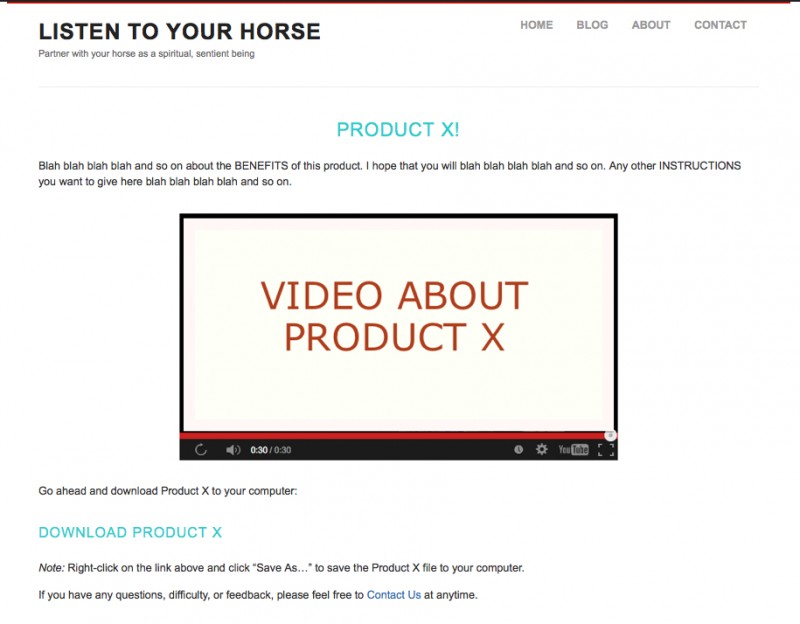
Let’s say you have made a video to go along with your eBook, or MP3 audio. Because people have paid money for this product, you don’t want to just put the video up on your regular YouTube channel where all your people can see it. So how do you get that video to your customer – or the person who opted-in to your offer – yet keep it private, or ‘more’ private?

There are two ways you can set this up, one is completely private, and the other just makes your videos harder to find:

1.  If you want the video to only be available to your customers or opt-ins, then you need to get a Vimeo Pro account ($199/year) and upload your video there. Then you can set up a hidden or password-protected page on your blog (see instructions below) and embed the video on that page. When you set up your Vimeo Pro account, you are able to specify which URLS or webpages the video can be seen on. Your videos will not appear/play anywhere else.

2.  Your other option – that doesn’t cost any money – is to create a second YouTube channel under a pseudonym. Upload the video to this ‘cloaked’ YouTube channel and don’t use any keywords (or use 1 or 2 nonsense keywords) to help make sure your video doesn’t show up in Internet searches. Then create a hidden or password-protected page on your blog where you have your text about the video and the video itself.

A hidden page (instructions below) means the page does not appear on your website navigation. So the only way someone would get to the page is if they have the link (which you would email them), or they stumbled across it on a search engine listing. See this video for instructions on how to add a video to a page.

Watch my 7-minute video (hosted on Vimeo Pro) where I discuss when and why you might want to make your paid product videos private, or public. I go through the options and then show you how to email the video link to your customer or opt-in:

Note: If you do not need your video to be private at all, then you can simply upload the video to your regular YouTube channel. Then do a blog post about the video and embed the video into the blog post – here’s how to add a video to a blog post or page, if you don’t know how to do that.

How To Set Up A Hidden or Password-Protected Webpage

A hidden page means the page does not appear on your website navigation. So the only way someone would get to the page is if they have the link (which you would email them), or they somehow stumbled across it in a search engine listing.

A password-protected page means that no one can view the content on the page without first entering a password.

You can have a hidden page, a password-protected page, or both!

Hiding a Page

Hidden pages are a great way to host your content online – like a video, MP3 audio, a link to download a PDF, etc. – without making it public.

By the way, if you don’t know how to set up a basic Page on your site, we’ve got you covered!

Now here’s how to install a super simple plugin to your blog that will enable you to hide pages whenever you want (takes about 40 seconds and no configuration required!).

You can either download the plugin from here:

http://wordpress.org/plugins/exclude-pages/

Or the easy way is to go to your blog dashboard: Plugins -> Add New. Then type: Exclude Pages into the Search box. When the search pulls it up, click INSTALL. If you need help, check out this video showing you how to install a plugin.

This plugin adds a checkbox: “[ ] Include this page in menus”, that appears in the right side column of your Page Editor. The box is checked by default. Simply uncheck the box to exclude the Page from the menu navigation that users see on your site. It looks like this:

Then click Publish, or Update (if you already published it), and you’re done!

For YOU to be able to get the URL (weblink) to that hidden page, you simply go to your Dashboard. Click Pages -> All Pages then click Edit for the hidden page. When the page opens up in your editing window, click View Page and it will show you that hidden page, live online. Then you simply copy/paste the URL (web address) of the page.

Password-Protecting A Page

1.  Set up a regular page or a hidden page (see instructions above) on your site. Let’s call this page “Great Book”, this will ensure the URL for that page is: www.mysite.com/great-book

2. When you go to publish that page, here’s what the PUBLISH box on the top right hand side looks like. See where the Visibility is set to Public?:

You can change this and set the Visibility to Password Protected. Simply click on the Edit link next to Public and enter your chosen password (I chose lederhosen), then click OK:

Then click Publish. Or, if you’ve already published the page, then click Update.

When someone enters the URL you gave: www.mysite.com/great-book

Here’s what they’ll see:

How easy is that?? I SO love WordPress! When they enter the password, lederhosen, they will then be able to see your /great-book page.

Remember that you can use hidden, and/or password-protected pages on your site to deliver all kinds of free or paid content – like articles, videos, audios, teleseminars, tutorials, online courses, etc.

What The Customer Receives

Just to help you get really clear about what this kind of delivery method looks like when it’s put into action, I’ve prepared a mock sequence to show you. Let’s pretend the digital content you want to deliver (audio file, PDF, etc.) is called Product X. I have used my website ListenToYourHorse.com to demo on, so keep in mind that all weblinks, emails, email signature, etc. will need to be changed to reflect your site and your business.

1. After your customer purchases Product X, here is the email they will receive from you:

2. When your customer clicks on the weblink in that email, here is the first thing they see:

3. After entering their password (LoveYou88) they see this webpage:

And that’s it! Your product has been delivered to your paying customer. Remember, it only seems complicated until you’ve done it once! So just take a breath and follow the process I’ve outlined here, step-by-step. Be prepared to take it slow and fumble around a bit, and you’ll be a pro in no time!

Now let’s look at a way to use these password-protected pages to deliver private content even if it’s tied to a physical product – like a book, CD, or DVD that sells in a physical bookstore.

How Do I Get My Digital Products To My Customers?

Once you have your digital content ready – an MP3 audio file, or a PDF eBook, or a Video tutorial, a photo tutorial, a webinar (video), or teleseminar (mp3), or online course, etc. – you’re going to be asking yourself: Now how do I get this great product (or freebie) to my customer?

There are a number of ways you can deliver content digitally once the person has paid for it, or, in the case of a freebie, signed up for it. Or, perhaps you want to go against everything I’ve been teaching you and just make it available as an instant, one-click download in your blog post! No problem, these fulfillment methods will work in every scenario.

Three Ways To Deliver Digital Content

I’m going to go through each of these in detail as we go through this unit, but here’s the overview. Whether you are fulfilling a paid order, or sending a freebie, there are three easy ways you can deliver your eBook, MP3 audio, webinar, teleseminar, online course, report, manual, etc.:

1.  For eBooks, PDFs, or audio downloads: You can send the person an email with a download link for the digital content right there in the email.

2. For free content hosted online: You can send the person an email with a weblink (hyperlink) to wherever the digital content is hosted online. This method is usually used to deliver free content, like a blog post, a YouTube video, or an online article.

3. For video, audio, or membership programs: You can email the person a link to a hidden webpage on your site. You can also make this page password-protected. On the page is the download link(s) for the digital content. Or if it’s a video, the video is embedded right into the page, so they can watch it there. This method is usually used to deliver video or audio content. In the case of a membership program – the entire program contents is hosted online on a password-protected site. So customers just need the URL (website address), their username, and password emailed to them upon purchase.

Rules Red MarkerDigital Content Ground Rules

But first, here are your ground rules to keep in mind for EVERY piece of digital content you offer people:

1) File Naming – Make sure your file names do not have any spaces in between words – this can result in broken links during download and you will get a much higher number of customer complaints and frustration. Newer computers can handle download links with spaces between words, but people using older machines cannot – that’s where your customer service complaints will come from. So best just to format your file names (whether mp3, or pdf) with no spaces between words – use a hyphen or underscore instead of a space.

For example:  Part 1-How It All Began – Turning Inward 1.mp3

Should be: Part-1-How-It-All-Began-Turning-Inward1.mp3

But personally, I find this file name too long and would change it to: part1-turning-inward.mp3

That way, I could see the file name in my viewing window on my device, or in my car. ALWAYS think about how people will be USING your stuff. And then use it yourself and get it out to friends and family to test it for you as well. Pay attention to the details.

2) Audio File Format – For audio files, make sure your files are in MP3 format (not .wav or .m4a etc.). If you convert your audio files to mp3 format, you will be able to get them much smaller, with the same quality. For example, a WAV file that is 117 MB can be reduced to an MP3 file of 16 MB with no loss of quality. So your files will take up much less space on your customer’s iPods, computers, etc. Also MP3 has greater compatibility across all devices – so everyone will be able to play your files on their device. Here’s a tutorial on how to convert your audio file format.

3) Print File Format – Make sure all your digital print products (eBooks, reports, white papers, charts, slideshows, PowerPoints, artwork etc.) are in PDF format. Do not make any of your written text available in it’s original format, example: a .doc or .txt or .jpg file as these file formats can be changed without your permission and they also make it really easy for people to swipe your content – just copy/paste as is! When you save your content as a PDF file, you can click on Security Options and also:

  • Password-protect the pdf, so that no one can open it up unless you give them the password.
  • Password-protect the pdf contents against being copied (no copy/paste allowed) or printed.

For my own content, I do not password-protect the ability to open or print the pdf. However, I do password-protect the ability to copy/paste content from the pdf. I also have a legal copyright notice on my PDFs and I also give people instructions on what they need to do (credit me and give out my website) if they want to share or quote from my stuff. Note that I am using ‘PDF’ and ‘pdf’ interchangeably, as both are correct nomenclature. Here’s a tutorial on how to convert your documents to PDF format.

4) Video File Format – Most people will not have a lot of memory free on their Computer and Cinema - 3Dcomputer (or device) to actually download a video for viewing. And it also takes a long time to download a video file, so this is best avoided. In the coming units I am going to show you the best ways to deliver video-based courses, or content and how to host your video files. But in the rare case they do need to actually download the video, and for whatever reason you need to do this, then .MOV is the best file format to use and the most compatible across devices.

You can also easily upload your videos to YouTube, or Vimeo, or other online players as .MOV files. Here are the detailed instructions for formatting your .MOV file at the best settings for upload to both YouTube and Vimeo.

Detailed Instructions – How To Deliver an MP3 Audio, eBook, or Report

Okay, now that you’ve got your product saved in the correct format and ready to go, I’m going to guide you through the steps needed to be able to deliver that product to your customer in the simplest way:

  1. Upload the product to your server.
  2. List the product for sale in your shop or on your sales page.
  3. Set up your autoresponder email(s) to go out to the customer upon purchase.
  4. Make a test purchase.

Let’s go through each of these steps in detail and then I also have a video where I will walk you through each step – feel free to watch the video first!

data center design1. Upload the product to your server. This is where you first upload your piece of content (MP3 audio, PDF eBook, report, etc.) to your server. Your server (ISP) is where you have your site hosted. You can either upload PDF files using your blog interface – see Tech 2 for detailed instructions.

Or your server’s helpdesk will be able to instruct you in how to upload a file (mp3, pdf, doc, etc.) to your server and then how to get the download link to that file. This is why you need to make sure you’ve chosen an ISP with 24/7 live help. So call them, or ‘chat’ with them and have them walk you through it, step-by-step.

If you expect to be uploading a lot of large file content – like audio files – then you may want to also get an account with Amazon’s Cloud Server. A cloud server never runs out of room and you can have hundreds or thousands of people downloading content simultaneously with no glitches or slow-down. This is called Amazon Web Services (AWS) and you can learn more about their very cheap cloud hosting (I pay about $3/month) here: What Is Cloud Computing?

It is VERY easy to upload files to your Amazon cloud server (and then copy the download link) using a free plugin for Firefox Internet browser, called Amazon S3. No logging in each time, a couple of clicks and it’s done. You can download it from here:

http://www.s3fox.net/

Here’s a great video that shows you step-by-step how to set up your Amazon S3 Organizer for easy uploads to your Amazon cloud server:

Now that you’ve got both your Amazon cloud server account, and you’ve set up your Amazon S3 file uploader, here’s the video I promised: Where I show you exactly how to upload an audio file, or an eBook, or PDF Report to your Amazon cloud server and then deliver that digital content to your customer. This video is about 30 minutes, but it is packed full with useful strategies, including approaching affiliates with your first product and why you should ask for feedback after each purchase:

This video is packed with step-by-step explanations, along with marketing and positioning advice, but if you’re computer savvy and you only want the fast-track instructions, jump to 25:16 mins.

I prefer to use Amazon Cloud to host my content because it can handle unlimited file size and unlimited traffic, but also because the Firefox S3 plugin makes it so darn easy! Even though I use Chrome for some of my Internet browsing, I still keep Firefox just for that use.

But of course, you could use your existing server, if you prefer – the one that hosts your domain and website – to host your digital products. You simply go to the Help Center for whichever hosting server you are using and find the instructions for your hosting plan, or you can phone them and get them to walk you through it.

For example, the instructions or help for uploading files to GoDaddy hosting are here. Note there are different instructions depending on which type of hosting you have, and which type of file manager. There are also restrictions on file size – which shouldn’t be an issue, unless you are uploading video files.

And as we discussed, you could also upload PDF files using your blog interface – see the instructional video for how to do that in Tech 2.

2. List the product for sale in your shop or on your sales page. If your shopping cart has an eBook delivery system, then grab the download link for your PDF product – after you have uploaded it to your server (see the video above for instructions on how to get the download link). Then follow the instructions provided by your shopping cart.

If you don’t have a shopping cart yet, see Module 10.7.

Here’s how we list a new product for sale on my health site, where we use BigCommerce for our shopping cart. You can follow the same steps with whichever shopping cart you are using:

If you cannot afford a shopping cart yet, then use a PayPal “Buy Now” button on your webpage to process the sale and use step 3 below (your email platform) to deliver the product via an email with the download link. PayPal has easy instructions for how to do that.

Here’s a video showing you exactly how to add a PayPal “Buy Now” button to your WordPress page or post:

Note: Remember when pasting code to your site, paste it in TEXT mode, not Visual mode. See the WordPress tutorial videos in Tech 2 if you have any difficulties.

Here’s a tip for you: When you’re creating a sales page with your PayPal ‘Buy Now’ links, try to make the page visually appealing with photos (or even video), not just text. And always have a photo of what your product looks like – this is very important!

Remember, you can always create your own covers for your products – then just take a screenshot of it at the size you want for your sales page, or product listing.

Large photos slow down your page load time (time it takes to appear in the browser window), so always use the smallest image you need to keep your site fast – no more than 2 seconds maximum load time. You can check your page load speed with this free service from Google.

If your eBook or printed book is for sale on Amazon, then you can put a full book listing and description on your Shop Page, but have the title, image and Learn More… buttons link to your Amazon book (be sure and use your affiliate link!).

3. Set up your autoresponder email to go out to the customer upon purchase. I show you exactly how to do this in the video you watched above. But here it is again and for just the part on creating your order fulfillment email, start watching at 11:20 minutes.

After you have written your fulfillment email (the email that delivers the product download link or instructions to your customer), enter it as an autoresponder (pre-set, automated email) to your email marketing platform (like GetResponse).

4. Place a test purchase. Your final step is to go ahead and buy your own product yourself. This will reveal any glitches (and there will be at least one!) in your process and give you a chance to fix things before your customers get peeved and leave your site! Make sure that:

  • It is easy to purchase
  • You receive the order fulfillment email quickly
  • You can download the file
  • The file works (open it) and looks the way it should
  • There is a way to contact you in case of any problems
  • All your sales writing and instructions are clear, free of typos, and easy to understand

Testing rigorously – and I’ll say it again throughout the program – is so important. You will find glitches and issues everywhere when you test, especially when you’re new to your systems. I’m saying it now, because if you’ve made it far enough that your customer is actually buying from you, it is your job to make that process seamless for them.

good-jobDTA smooth purchasing experience will increase the chance of your customer returning to buy something else, or recommending you or your product to someone else. Specifically, because the perceived value of a digital product can be less than a physical product (and many buyers might be new to digital products), you need to deliver something convenient to buy, download and use. This makes the speed and ease of digital delivery into an added bonus, instead of a hassle. Every complication, error, or time-suck in your process, even if it’s fairly benign, will frustrate your customers – and that’s the last thing you want to do!

This isn’t just about sales – though that’s a big motivation to test, test, test your shopping cart, buying sequences, digital delivery, and autoresponders – it’s also about building the integrity of your brand and product, and it’s about maximizing the experience of that brand and product for your customers…which of course, still translates to sales at the end of the day (or at the end the email sequence!). Seamless delivery, access to support, attention to detail (even, or especially, when you’re using an informal tone) and ease of use translate to respect and care for your customers. If they’re giving you their money, you owe them this much. And the best thing is (I don’t think this will ever get old for me)… all this care and precision can be automated, so it doesn’t take any extra effort to provide that high level of customer experience for every single customer!

On the flip side, once your products and sequences are out there, they represent you and your brand. So if you haven’t tested them and they go out to your list, any glitches and issues are on you to clean up, apologize for, and compensate your customers for if necessary. That said, you have to be willing to make a few mistakes or you’ll never get into action! Not to mention, cleaning a mistake up really well can sometimes be an opportunity to deepen a relationship – have you ever had a small complaint at a restaurant or store, and received a sincere apology and an upgrade you didn’t even expect? Sometimes the grace with which a business responds to a complaint not only makes up for the mistake, it increases the customer’s loyalty. So do your best, but don’t let perfectionism interrupt your progress – when you invariably make a mistake, don’t get defensive: take the feedback with gratitude, and follow your intuition to not only fix the mistake and meet your customer’s needs, but also to improve your systems for the next buyers.

Okay, now go ahead and get your first product set up for sale and delivery to your customer! Don’t forget to also send an email asking for feedback as I showed you in the video. Let’s plan it out in your notebook…


A product or freebie I’m going to set up for digital sale and order fulfillment is (eBook, report, audio, video) and how I’m going to do that:


*Don’t forget to set up your email asking for feedback a week or two after you’ve sent the freebie!


Your Content Delivery Plan

No doubt you will refer back here as time goes on and as you create new and different kinds of content or products.

So let’s just boil it down to the basics, take out the how-to details, and hopefully crystallize digital content delivery for you.

Basically, when you are deciding how to deliver digital content to your customer or opt-in (someone who has opted-in, or signed-up for a free piece of content), you have 3 ways to deliver that content:

1.  You can send the person an email with a download link for the digital content right there in the email. For example:

2.  You can send the person an email with a weblink (hyperlink) to wherever the digital content is hosted online. This could be a blog post, a YouTube video, or an online article. Like this:

3. You can email the person a link to a hidden webpage on your site. You can also make this page password-protected. Then on the page you have the download link(s) for the digital content. Or if it’s a video, the video is embedded right into the page, so they can watch it there.

Here’s an example where I have done both; embedded a video AND provided download links for the digital content (PDF eBooks). And yes, this is the hidden, password-protected page that people are given access to after purchasing the product:

One important caution about embedding videos: If the video is not yours, you run the risk of the video suddenly being deleted and then you look unprofessional to your customer. To prevent this happening, you either need to check your videos regularly. OR you need to use a plugin like this:

http://en.savefrom.net/user.php?helper=ff

to download those videos and save them to your desktop. You would then upload each video to your private Vimeo account (for example) and the grab the code for your own Vimeo video and embed them in your webpage from there. This is what we’ve done for the LTYF program as we found public videos were continually deleted or moved.

Now, you could upload these videos to your free YouTube account, but then you run the risk of getting tagged for copyright violation – since it is publicly viewable that you swiped the vid.


Okay, now it’s your turn. Go through each of your products (or freebies) now and map out how you are going to sell and then deliver each of them to your customer after purchase. Points to include in your plan:

  • File format (mp3, pdf, etc.)?
  • YouTube (public) or Vimeo Pro (private) videos?
  • Webpage, hidden page, password-protected page?
  • Email with download link and photo of cover?
  • Download links for audio on webpage, with or without audio player?
  • eBook, report, manual, tutorial security, or non-secured?

Which method are you going to use to sell your products – PayPal “Buy Now” buttons on a webpage, or, a shopping cart? Check out this page if you’re not sure which to use.

Also write down the email sequence that will follow each purchase (Thank-you email, Feedback email, etc.):

Write down how you will deliver each product or freebie to the person that purchases, or signs-up or opts-in to your free offer. Remember the 3 ways to deliver digital content are:

  1. You can send the person an email with a download link for the digital content right there in the email.
  2. You can send the person an email with a weblink (hyperlink) to wherever the digital content is hosted online. This could be a blog post, a YouTube video, or an online article.
  3. You can email the person a link to a hidden webpage on your site. You can also make this page password-protected. Then on this hidden, password-protected page you have the download link(s) for the digital content. Or if it’s a video, the video is embedded right into the page, so they can watch it there.


How Do I Create An Audio Product – CD or MP3?

A CD or audio (MP3 file) can be a great item to have for your customers or site visitors since many people prefer to listen, rather than read. Many people even prefer it to video, since you can listen while you run, drive, walk the dog, lie down, or cook.

I’m going to show you how you can create a CD or audio in only ONE DAY and then you can use that CD in any of the following ways:

  • One of the best ways to start or build a relationship with your tribe (site visitors or customers) is to produce a CD or free audio (MP3 download file) that lets them get to know you and gives them some insight, inspiration, encouragement, or instruction. This could be just you talking, or you could interview a friend, colleague, family member, or a known expert in your field.
  • People often prefer audio to a book or eBook. So you could simply read and record your existing book aloud and then offer it as an AudioBook.
  • You can present your solution, or technique, or method in audio format. You could record your how-to manual. Whatever you would do as a book or video, simply record it as an audio instead. Diagrams can always be provided as a PDF (that they can download or view online) if needed.
  • You can also create a CD or audio that adds to and increases the value of an existing product. For example, think about how you feel about the value of an eBook. Now tell me how you feel about the value of an eBook and CD package?

This is called positioning. You may be offering exactly the same information, or same solution, but by adding a CD (which you can create in one day) you have positioned that solution as a “package” and thereby greatly increased the perceived value of that solution.

A Heal Your Insomnia Today eBook may sell on Kindle for $7.99

But a Heal Your Insomnia Kit (eBook + CD + pdf chart) may sell for $27 or $47 or $69 or higher.

So enough about why creating CDs (or MP3 audios) is a great idea, let’s move onto how you can create your CD, or audio product, or freebie, in just one day – AT NO COST. Keep in mind, that on this page, you’re learning how to create content. Here are the details on how to sell and deliver that content to your customer when you’re ready to.

*Note: And if you’re wondering about the sale prices I’m suggesting, that’s all covered here.

Step #1: If it’s just you talking, then record directly to your computer. If your computer has a good built-in microphone, you can just use that, or purchase this cheap, yet fantastic quality microphone from Audio Technica. Or record directly to your cell phone and then export the file to your computer. iPhone has an excellent quality recorder called Voice Memo.

If you would like to include other people on the audio then set up a paid or free teleconference line. This way you can record interviews, focus-group conversations, panel interviews and more. It also lets you conduct live calls with numerous listeners, record the conversation, and use that for your CD.

If you’re going to do this often, then get a paid service like Instant Teleseminar, which is what I use.

Or, go to one of the free providers below and sign up for their service. Keep in mind that the quality of the free lines is not a good and you can have more glitches and quality problems than with a paid service:

www.freeconferencecall.com

www.freeconferencecallHD.com

www.freeconferencecalling.com

www.freeconference.com

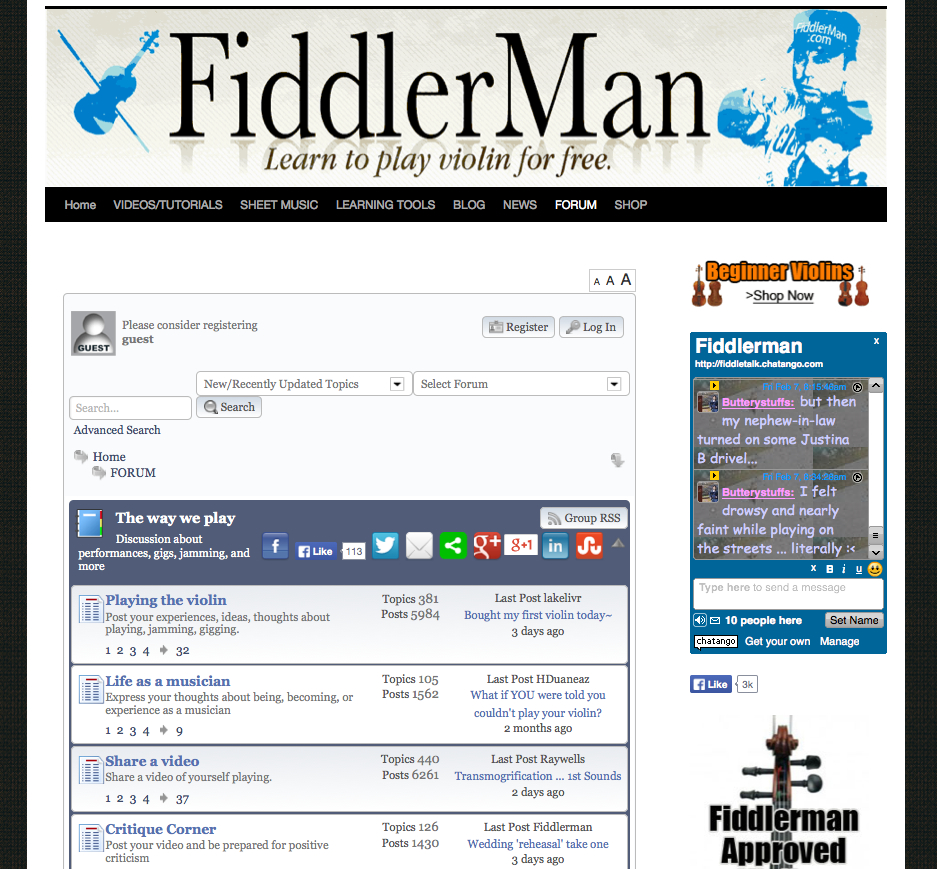
Note: you can also use Skype for this step, but only if you are planning on giving the audio away for free. This is because the quality of Skype is just not good enough (in my opinion). Here’s a sample of an interview recorded on Skype from Daniel Vitalis and you can see for yourself what I mean about quality. Click the PLAY button, or, you can download this audio from the link below:

http://listentofreedom.s3.amazonaws.com/daniel-vitalis.mp3

Of course, since this audio was given away for free and was fantastic content, I did not mind the fluctuating volume levels, or missed words, or occasional static – if I had paid for it, I would not be impressed.

Step #2: Learn How to Use the Service. Learn the basic steps for calling in, recording your call and then downloading the mp3 file. You can learn how easy it is to use Instant Teleseminar here, or each of the free services has their own instructions.

Step #3: Choose a Topic. Select a topic you can easily talk about for at least 30 minutes without having to refer to notes or think too hard. Or read (with energy and lots of expression!) from your book, or tutorial you have already created.

Step #4: Set Your Purpose. What is the one most important thing you want listeners to be able to DO by the time they’re done listening to your audio? What ONE problem do you want to help them solve? What ONE solution are you going to give them?

Step #5: Choose 3-5 Main Points. Your audio doesn’t need to be long. Choose three to five main points or subtopics you want to talk about.

Step #6: Make an Outline. For each of your 3-5 points, add another 3-5 bullet points to flesh out the subtopic. Be sure to include information that will help listeners achieve the objective you set in Step #4 above. Your information has to lead to action, or it has no value.

Step #7: Include a Call to Action. Once they listen to the audio, what do you want them to do next? Call you? Order a product? Make an appointment? Visit a webpage for more info? Share the audio with a friend? Decide what to have them do next and include that at the end of your presentation.

Step #8: Practice. Run through your presentation at least once to make sure it flows properly and that you are comfortable presenting it.

Step #9: Record Your Audio. Call into the conference line, or get your computer ready to record (use Audacity or Quick Time Player) start the recording, then deliver your presentation. If you make a few “flubs”, don’t worry. You can also use the free recording software called Audacity to edit out your mistakes. See my Audacity instructional video below. When you’re finished, save or download your MP3 file to your computer.

Step #10: Edit Your File if needed. Edit out any mistakes – use a free editing/recording software called Audacity. Add an intro or outro if you like. Then your audio is ready to go. See my video below for how to edit mp3 files using Audacity. If it is in another format, like m4a or wav, then convert to mp3 (see Tech 3 for instructions on how to convert audio file formats).

When you title your mp3 file, make sure there are no spaces between words (or people can have trouble downloading your file). You can use hyphens or underscore lines to separate words instead. For example: choose-your-best-idea.mp3

Step #11: Host Your File. Host your MP3 file on your website server, on Amazon AWS or even on DropBox.com. Copy the link to the hosting location and use it in emails, on your website, anywhere you’d like.*

Step #12: Also Create a Physical CD if you like. Transfer your file to a CD and you’re ready to go! If you don’t have many customers or site visitors, you can print labels yourself from an office supply store and mail them out personally. But if you have a larger list or customer base, then you can have a run of professionally replicated CDs made with covers and cases to match.

In that scenario, you would email the final MP3s to InfoDistributors.com (they manufacture CDs and DVDs) or some other replication company. They will send you the design template (instructions) for the artwork. You can create your CD cover art for free. CDs also make great direct mail items or giveaways at networking events. You may want to hand out a presentation on CD instead of just a business card.

That’s it! Follow these 12 steps and you’ll create your audio product, or a free giveaway for your sign-up list, in just one day!

As promised, here’s how to use Audacity to record your audio:

Record Audio On Audacity

Lastly, here’s a video I did, showing you how to import an audio, edit the audio, and then export the audio as an MP3 file you can then send to your people, or make available for quick and easy downloading:

Import and Edit Audio in Audacity


Now let’s brainstorm your ideas for a free audio or CD you could give to your people…


What great give-away, or freebie CD, or audio MP3 could you create that would make your website visitors and people on your email list LOVE you. What would be useful, helpful, fun, or entertaining? Would it be a solo audio, interview, teleseminar, lecture?:


How Do I Create An Audio Course?

We’ve talked often in Listen To Your Freedom about how people have different learning styles and preferences. So while some people prefer a book, or online course and workbook, others prefer learning via video or audio.

So when you’re deciding which format (audio, video, written) to present your solutions or information in, it helps to take into account all of these factors:

  1. What do YOU enjoy doing? Do you prefer writing, or video, or speaking (audio)?
  2. What does your customer prefer, and what do they need, based on their lifestyle?
  3. What are you able to do, and what can you afford to do at this time? It is better to just produce something simple, rather than waiting for your ideal scenario.

For me, audio is one of the easiest ways to develop and package content. Probably because I find it quite easy to speak, or read aloud, and I make very few mistakes when I’m speaking – so I don’t need to do much editing.

But let’s say you’ve already written a book or eBook. Well, creating an audio version of the book is an easy next step – and some customers will buy both.

Or perhaps you want to provide additional in-depth training in your audio course.

Or perhaps your book, or online course is really huge, so you want to chunk it down into stand-alone units and each unit consists of three one-hour audios.

All you need to create an audio course is a high-quality microphone that plugs into your computer, and Audacity, a free, easy-to-use recording software. Or, you can use a teleseminar recording service, and you dial into it with a corded, land-line telephone (ensures good quality).

Microphone Recording

If you want to use a microphone to record MP3 files directly onto your computer, you have a few different ways to go, Premium, Mid-Level, or Budget Bob. Let’s start at the top…

Premium Recording Set-Up

The Shure PG-42 USB mic is a really good microphone (about $249) that plugs right into the microphone jack on your computer. It will give you the clearest, best quality audio and can be used to record singing as well. Keep in mind though, that for a microphone of this quality, you also need to have a fairly quiet room to record in.

Unless you can completely avoid popping your “P” sounds (which causes a bit of a muffled boom in the recording), you also need to purchase a microphone pop filter. And by the way, the only way you can completely avoid popping your “P”s is to not pronounce them!

The Nady MPF-6 Clamp On Microphone Pop Filter is a good one, at a really good price (about $18).

You then can record onto Audacity (free for both Mac and PC), or GarageBand (Mac) or the very high-end Pro Tools for Mac or PC (really not needed unless you’re recording music).

However, please know that there is NO point in getting super high quality recording tools if you don’t have a soundproofed place to record in! Remember that the finer your equipment, the greater range and quality of sound it will record. So yes, it will pick up the crows outside, your washing machine, someone knocking on your front door, and your chair creaking.

Next, your recording room would also need to be set up to create a good quality or timbre of sound. For example, hardwood floors, bare walls and windows are all hard surfaces that the sound will bounce off of. So you need carpet on the floor, and rugs or thick fabrics covering the walls and windows (or egg cartons work well too).

Mid-Range Recording Set-Up

Now let’s look at the mid-range: A much cheaper mic, that has also gotten rave reviews from podcasters and Internet radio show hosts is the Audio-Technica ATR2100 USB/XLR Microphone. At only $53, it is far cheaper than the Shure mic listed above. But if all you’re doing is recording audio products (no singing) then this will likely be just the ticket. It plugs into your computer via a USB cord. It also comes with a mic stand for your desk, so you don’t have to hold it.

Then you would also purchase this Reduce Pop and Windscreen Mic Cover to place over your mic head and help get rid of those popping-P sounds – since it’s less than $3 you might as well get it, then do a test recording with it and without and see which works better for your voice.

Here’s my test recording, done in my office using the Audio-Technica microphone and the mic cover, recorded using Audacity:

Click the PLAY button [sc_embed_player fileurl=”http://listentofreedom.s3.amazonaws.com/audiotechnica-USB-test.mp3″]

Alternatively, you could wear a headset microphone that plugs directly into your computer. Again, it is best to get one that is corded for best quality and no interference during transmission. Just make sure it is compatible with your computer. Here are two good quality headsets that you could use:

Plantronics Audio 326 Stereo PC (plugs into the microphone jacks on your computer) – note this one is only for use with a PC, it will not work with a Mac, unless you buy an adapter (about $13).

Plantronics Audio 478 Stereo USB Headset Microphone (plugs into a USB port on your computer – so better sound quality) – about $29

Here’s my test recording, done in my office using the Plantronics USB headset microphone, recorded into Audacity:

Click the PLAY button [sc_embed_player fileurl=”http://listentofreedom.s3.amazonaws.com/plantronics-USB-test.mp3″]

Stereo Plug vs. USB Plug

If you get a microphone or headset with an audio/stereo plug (plugs into the microphone jack) it draws power from the computer, and converts your voice into an electrical signal only, and then sends it into the sound card where it can be processed as data.

But if you have a microphone or headset with a USB plug, it directly converts electrical signals into data, which is sent to the computer via USB. This usually results in better sound quality via the microphone.

The other benefit to the USB headset is that when you plug it in, the audio in/recording and audio out devices are automatically switched to the headphones. If you have a laptop, you may be frequently unplugging and plugging the headphones back in, so having the audio setting switch automatically would be a definite plus.

You’ll note with the three microphones above, the Stereo PC headset is less than half the price of the other two. Now you know why. But if your budget is really tight, know that you can still get a good quality audio recording with the Stereo PC headset.

Whichever type of microphone you use, you then can record using Audacity software (free for both Mac and PC), which is also very easy to use. Or Quick Time Player (Mac).

Budget Bob Recording Set-Up

Now let’s see what Budget Bob has to say: Believe it or not, you can also try recording using Voice Memo on your iPod or iPhone. I’ve heard recordings done using Voice Memo that were perfectly good and sellable audio recordings – you just have test repeatedly to get the perfect distance and then you have to maintain that position for the duration of the recording. So basically, you and your device cannot move for the duration of the recording. And of course, you have to record in a fairly soundproof room.

You can also use the microphone on a set of really good cell phone ear buds (in-ear headphones with microphone), plug them into your computer microphone jack – instead of your cell phone – and use the ear bud microphone to record directly onto Audacity software (free for both Mac and PC), which is also very easy to use.

However, for both these Budget Bob options, you must make sure your recording level is set as loud as you can make it, so that people will be able to play your audios in their iPod, or on a stereo system to their yoga class (for example). There’s nothing worse than buying an audio that you can’t turn up loud enough.

So again, set your input levels really high, record a 3 minute clip, then play it back on your computer and on your iPod or cell phone and see if you can turn it down low enough when listening through ear buds and high enough when playing on your computer or player to a room full of people. ALWAYS, always, TEST your stuff!

Basically, whichever recording device you choose – at whatever budget level, you then need to download it to your MP3 player and listen to it through headphones. Then also listen to it on your computer. Make sure it sounds good when it’s right in your ear, in your car, and on your office computer.

Now let’s get into the specific recording how-to’s…

How To Record & Export MP3 Files Using Audacity

Let me start by saying that Audacity is such a great free recording software that I and two of my friends began using it without any instructions whatsoever – it’s just that intuitive.

Of course, any learning curve can be shortened by having some instruction first, so here are a couple of videos that will no doubt save you some time in trial and error.

NOTE: Both these video demo’s are done on a PC.

Install Audacity

Now that you have installed Audacity, you can go ahead and use it to record and also to export .wav files. But, if you want to export the much smaller .mp3 files (which take much less space on your hard drive or iPod!), then you need to first install the LAME encoder.

I know this may seem like a hassle, but trust me, if you’re going to use audio at all, then this is just a one-time setup hassle for something you will use over and over again for years! You do NOT want to send WAV files to your customers or opt-ins as the file will take up a lot of space on their device and they may hesitate to buy any more from you. Always send out MP3 files.

Install Audacity LAME Encoder for MP3 Export

Next, here’s how to use Audacity to record your audio:

Record Audio On Audacity

And lastly, here’s a video I did, showing you how to import an audio, edit the audio, and then export the audio as an MP3 file you can then send to your people, or make available for quick and easy downloading:

Import and Edit Audio in Audacity

Telephone Recording

This is the method I personally use for recording audio courses. If I’m doing a meditation, then I use my friend’s professional studio – cause I’m just that picky. Also, I don’t have music in the background, it’s just my voice, so the recording has to be pretty pristine, with zero background noise.

But to create an audio book, or an audio teaching course, I just use my phone to dial into my teleconferencing account, hit Record, and away I go. Oh, did I mention I clear my house of children, unplug the phones, make sure the laundry is not running and put a sign on the front door first?

I prefer this method because I’m already paying the $47/month fee for my teleconferencing service (InstantTeleseminar.com) anyway. And the set-up and recording are super easy.

If you want to go this route, the key piece of equipment you need to have is a corded, landline phone. I’m talking about one of these:

That means you do NOT use a cordless phone, or a cell phone, as neither gives good audio quality. For example, on this call with Paul Zelizer on Connecting With Your Customers, he was using a cordless phone and halfway through our call it started picking up another person’s conversation, that then got recorded onto our call as well! So I had to do some editing and splicing on that one. In extreme cases, you would need to re-record the missing bits and splice them in – too much hassle! Just use the right equipment the first time.

And your corded phone also needs to be a good quality phone – that doesn’t mean it has to be expensive, but you need to search for one with good audio quality (read the reviews!) like this Panasonic Corded Phone (about $15).

If you’re going to be making a lot of recordings, then I would also get this Plantronics S12 Corded Telephone Headset System to plug into the phone and use the headset instead of the handset. Not only will this be more comfortable for you, but you will get MUCH better audio quality on your recording.

If you think you’re going to be hosting teleseminars or podcasts – anything where you’ll be interviewing someone or hosting live calls, then this is probably the most cost-effective route to go: Get your Instant Teleseminar account and a corded landline phone. I also insist my guest call in from a corded landline if at all possible.

Oh yes, one more thing – you actually need to have a landline in your house or office! This is what we all used to have, before cell phones came along. You can also use a cable-based landline (runs on your TV or Internet cable – not on WiFi), which should be fine, but it is not as good as a fiber optic telephone line.

You will have to examine your particular audio environment and your recording needs and then pick the best solution for you. I have provided you with all the components here, but you will have to mix ‘n match to customize the best solution for your unique needs. See the chart below for a quick overview comparison.

Regardless of the recording method you choose, you will need to ensure your office or house is really quiet, or record at night when everyone is asleep!

One last consideration: Many people are not aware that cordless phones and cell phones give off biologically unsafe levels of radiation. Dr. Charlie Teo – one of the most renowned neurosurgeons in the world – does not carry a cell phone on his body, nor put it to his head. He places it on a table, or a counter, and puts it on speakerphone.

Cordless phones emit even stronger radiation than cell phones – strange, but true. I have lots of information about WiFi and cellphone technology and how to make it safer on my Listen To Your Gut blog (type “wifi radiation” into the Search box). But for now, just know that we do not have any cordless phones in our house – they are all corded phones. And we all turn our cell phones off when we come into the house. Here’s one of the best videos on this topic:

So that is another factor to take into consideration if you’re balking at getting a landline hooked up. A landline can run on either fiber optic or cable. So if you already have a cable TV account, you can also run your corded phone on a cable phone line – just call your cable TV provider.

Oh and do not get a corded phone that also has a cordless handset with it – that defeats the purpose and you will still radiate yourself and the other people in your house.

So to summarize, here are your four options to obtain a good quality audio recording. Keep in mind that for each of these scenarios, your environment must be really quiet – no dogs barking, children playing, phones or doorbells ringing, doors opening or closing, no laundry or dishwasher noise, etc. Many parents find it easiest to record late at night!

Note: you can use Skype to interview someone and record your interview, but only if you are planning on giving the audio away for free. This is because the quality of Skype is just not good enough (in my opinion). Here’s a sample of an interview recorded on Skype and you can see for yourself what I mean about quality:

Click the PLAY button [sc_embed_player fileurl=”http://listentofreedom.s3.amazonaws.com/daniel-vitalis.mp3″]

Of course, since this audio was given away for free and was fantastic content, I did not mind the fluctuating volume levels, or missed words, or occasional static – if I had paid for it, I would not be impressed.

Skype has a section of its site where they provide links to both free and paid software you can use to record your calls.

Audio Recording Methods Comparison Chart

Solution Pros Cons
Shure mic with Nady Pop Filter – you record directly to your computer, using Audacity, as an MP3 file. Fantastic audio quality. Super easy to use – everything in one place. Most expensive (about $270). You cannot interview anyone else. Only you can speak and be recorded – unless you are recording from a Skype call. Need soundproofed and sound-optimized recording room.
Audio-Technica Microphone with Foam Ball Mic Cover – you record directly to your computer, using Audacity, as an MP3 file. Good audio quality. Super easy to use – everything in one place. Great price (about $39). You cannot interview anyone else. Only you can speak and be recorded – unless you are recording from a Skype call.
Plantronics Audio 478 Stereo USB Headset Microphone – you record directly to your computer, using Audacity, as an MP3 file. Good audio quality. Because you are wearing headphones, if you want to record a Skype call, your mic won’t pick up the other person’s voice coming through your computer speakers – so you won’t get any feedback noise and the audio levels from both of you should be good. Plugs in via USB port. Super easy to use – everything in one place. Great price (about $29). You cannot interview anyone else, only you can speak and be recorded – unless you are recording from a Skype call.
Plantronics Audio 326 Stereo PC – you record directly to your computer, using Audacity, as an MP3 file. The cheapest option and will still give you a good audio recording. (about $13) Plugs into the microphone jacks on your computer, which is not as good as a USB connection. Only for use with a PC, it will not work with a Mac, unless you buy an adapter. You cannot interview anyone else, only you can speak and be recorded – unless you are recording from a Skype call.
Good quality Corded landline phone and Instant Teleseminar account – you dial into a conference call platform and their system records your call as an MP3 file. You control the call, speakers (callers) and recording via a Control Panel on the Internet Good audio quality. Easy to use. Lots of other uses too: weekly podcast, or teleseminars, webinars, or interviews, or Internet radio show, or any other purpose where you need to interview someone, or have other people on the audio, or participating via the Internet. Reasonably priced (about $63, then $47/month). Not as good audio quality as a direct microphone. You also need to pay for a landline (cable or fiber optic) if you don’t currently have one operating. Bit more hassle than a mic to your computer as you first have to set up the call (takes about 3-5 minutes), then dial in.

REMEMBER: For ALL audio recordings, to save yourself hours of wasted time, be sure and record a 3-minute test clip first. Then play it back on your computer and on your iPod or cell phone and see if you can turn it down low enough when listening through ear buds and high enough when playing on your computer or player to a room full of people. ALWAYS, always, TEST your stuff!

Here are all my test recordings again, using the different audio recording methods, you can easily compare and then choose which suits your purpose best:

1. Audio-Technica microphone and the mic cover, recorded using Audacity:

Click the PLAY button [sc_embed_player fileurl=”http://listentofreedom.s3.amazonaws.com/audiotechnica-USB-test.mp3″]

2. Plantronics USB headset microphone, recorded into Audacity:

Click the PLAY button [sc_embed_player fileurl=”http://listentofreedom.s3.amazonaws.com/plantronics-USB-test.mp3″]

3. Instant Teleseminar with a corded, landline phone (no headset):

Click the PLAY button [sc_embed_player fileurl=”http://listentofreedom.s3.amazonaws.com/InstantTeleseminar-Test.mp3″]

After listening to each of these, I feel that the Audio-Technica gives the best voice quality, but it will pick up the most ambient (background) noise in the room or house. The Plantronics has the best balance of good voice quality and low ambient noise. The corded phone into Instant Telseminar has an edgy real-time sound to the voice, and like the Plantronics headset, there is low ambient noise. But I think if I used a corded headset plugged into the phone (with noise-cancelling mic) I would get a smoother audio quality.

This Plantronics S12 Corded Telephone Headset System would be my choice in this case, since there is a switch to set the microphone between high and low gain, and there is a dial to fine tune it within each of the settings. Here’s what a Freedomite said about this headset:

Out of the box, I sounded very loud in my own ear piece and if I were typing, you could hear it on the recording. So I set it to low gain, and moved the dial to a lower setting. My voice remained clear in the recording, but not too loud in my own earpiece, and sounds of me typing or moving around could not be heard on the recording. This is fantastic! With my previous headset, I could not turn down the gain this low, so I had to be very careful about background noise.”

When you have recorded your first “real” audio, download it to your MP3 player and listen to it through headphones. Then also listen to it on your computer. Make sure it sounds good when it’s right in your ear, in your car, and on your office computer. After you’ve got the first one sounding great, record the others using the same settings (write the settings down!).

Example: How I Created A $69 6-CD Audio Course

1. Used my Instant Teleseminar account to record my audios. ($47/month).

2. Dialed in from my corded, landline phone (excellent audio quality). Pressed record.

3. Talked for 60 minutes teaching people what I wanted them to learn for Audio 1. Downloaded MP3 recording to my computer.

4. Screwed up a little at the beginning, so used Audacity (free software) to edit my mistake. Exported as an MP3 file and made sure to set my fields for Artist Name, Track Name and Album Title – so that when someone imports my track into iTunes, or their iPod, it shows up properly.

5. Imported the MP3 file into iTunes, checked that my titling and name showed up correctly, and then converted it into a smaller file size MP3 (see instructions here), yet still with excellent quality. Tested it on my computer, my iPod with ear buds, and my car to ensure audio quality and volume levels were good. Made sure there were no spaces between the words of my filename (or people can have trouble downloading the file). Used hyphens or underscore lines to separate words. For example: choose-your-best-idea.mp3

6. Repeated steps 1 – 5 for all six audios

7. Emailed final MP3s to InfoDistributors.com (manufacture CDs and DVDs). They emailed me the design template (instructions) for the artwork for a 6-disc audio program.

8. Got my designer (found on Elance) to create a design from that template (cost $75). I emailed the finished design back to InfoDistributors.com

9. Created a video and a dedicated Page on my website to sell the program (my sales page). I shot the video with my Canon video camera (you could also use an iPhone, or Flip camera). If you want a really slick-looking landing page (sales page) you can either use your designer to create it as a Page on your blogsite, or use a WordPress Plugin called Optimize Press. If you are using Infusionsoft as your CRM platform, then you already have landing pages for your use.

10. Began emailing my list about my new Course, and carried out other marketing activities, like posting on Facebook, affiliate promotions, and a live webinar, or teleseminar to give some great free content, but also promote my course.

DONE!

All you have to do to create an excellent audio course is copy these 10 steps above. You can go ahead and create your content at any time and don’t worry, we will elaborate on Steps 9 and 10 in coming Modules. For now, all you need to focus on is creating your content or products.

NOTE: If I were creating an audio course that was delivered digitally via download links (no physical CDs), then I would skip steps #7 and #8 and replace them with:

7. Uploaded MP3 files to my server. Made sure there were no spaces between the words of my filename (or people can have trouble downloading the file). Used hyphens or underscore lines to separate words instead. For example: choose-your-best-idea.mp3

Emailed my designer to create CD cover art and package art to display in my shop and marketing materials.

You have to think of how YOU would like to receive your product. Personally, I understand that a boxed set of CDs has far more perceived value than a list of download links. However, I also find it super annoying to have to import each CD, one at a time, into iTunes and then transfer them to a playlist on my iPod – which takes about one hour total.

So personally, I may prefer to receive the boxed set of CDs along with all the files downloaded onto a memory stick (USB Flash Drive). That way I feel the specialness of the boxed set, but I can also insert the memory stick into my computer and transfer all the MP3 files to my iPod in about 20 seconds (Infodistributors.com also does custom USB flash drives).

However, I may also not care about the physical CDs and be happy with just the USB flash drive – because that alone is far more convenient than downloading a bunch of files! To communicate more value, you could have the flash drive imprinted with your name or program name and present it in a really nice box, or get a custom shape flash drive, like these, for example:

Or, you could always offer both the physical CDs and the USB flash drive and let your customer choose which format they want!

Lastly, just make sure you took note of #5 above and TEST your finished product to ensure:

  • File size is not too big and is in MP3 format for best compatibility across devices (see below for how to compress files).
  • Audio quality is good – test on both your iPod and computer.
  • Volume range is good (i.e. Can I turn it up loud enough if I’m playing it on my computer, or for a group, and can I turn it down low enough if playing through ear buds?)
  • File name does not contain any spaces – words must be linked with hyphens or underscore. Example: eat-green-foods.mp3
  • Track title shows up the way I want it to.
  • My name shows up as the Artist, and the Album shows up correctly as the name of my audio series

Throughout Listen To Your Freedom, you will hear me telling you to TEST everything before you release it to your customers, or as a freebie to your site visitors. Remember that you can sell a crappy product once, but that customer will not buy from you again. And whatever the quality of your free stuff, your site visitor will expect the same quality from anything they purchase – so make sure your free stuff is GREAT.

NOTE: Many Internet marketers would sell an Audio Course like this for at least $97 or $197. Set your price according to your market and when you’re ready, check out this page for details on how to price your stuff.

My Audio Track Doesn’t Show Up Properly in iTunes or Windows Media Player!

The data that you attach or embed into your audio file that allows other apps to read your info, or show your album cover, are called ID3 tags.

The easiest way to add ID3 tags to your audio is to add the required fields (Track Title, Album Name, Artist/Composer, etc.) when exporting your file from Audacity (see the videos above) as an MP3 file. Here’s what that looks like:

If you also want to show an album cover or have an image show up along with your audio track, then you need to use a special software to attach that image to your MP3, like Jaikoz or Mp3Tag.


Now that you’ve seen some more ideas for how to create an Audio Course (rather than just a single audio), brainstorm a larger project you would like to create in audio MP3 form; either a paid item, or a freebie. Something you could o er as a course, or a series of audios:


How would you like to record it? What equipment do you need to get?


How Do I Compress An MP3 File?

So let’s say you’ve recorded your audio course, or meditation, or audio book, or teleseminar series… and you download it onto your iPod or mp3 player to test it and you realize – oh my gosh, that just ate up a third of my memory! And you wonder, how big are those file sizes anyway?

As soon as you edit an MP3, or add some music to it, or perhaps your settings for your recording weren’t correct, you can end up with a monster file size. Not only is this hard for your customers to download, but if your audios eat up all the room on their iPod, they won’t be in a rush to buy more, because they’ll just remember the hassle. It’s really annoying to have to delete all your music playlists just so you can fit an audio book or course on your device (yes, I speak from experience!).

Okay, so now we know what the problem is, how can we fix it?

Google to the rescue! Just google: ‘how to compress mp3 file’ and it will pull up a variety of instructions depending on which computer and software you have.

If you have a PC, then LAME is an excellent free MP3 encoding software to use. You can use it to either make an MP3 file smaller, or to convert a WAV file to a smaller MP3 file. You can download it and get all the instruction for use here: http://lame.sourceforge.net/download.php

Then here is an instructional video, showing you how to use LAME and Audacity to compress and export MP3 files if you have a PC:

If you’re on a Mac, I am going to tell you how to compress your WAV or MP3 files into a smaller file size – without losing audio quality – using iTunes. I will also share what I found the best compression rate to be: The compression rate will apply to any computer or software (not just iTunes).

First of all, here is a good video that shows you how to use the MP3 encoder in iTunes to make your MP3 files smaller:

After watching this video, I did some testing with an audio recording that consisted of a spoken voice with music in the background. The file was created in Audacity using a voice recording on one track and instrumental music accompanying it on another track.

The original recording was done at 160 kbps (kilobits per second – the data transfer speed) and the finished file was 50.3 MB, which is a bit large.

I then tested compression rates for the file and here are my results:

80 kbps – file size dropped to 27 MB, no noticeable drop in audio quality.

64 kbps – file size dropped to 21 MB. The music sounds the same, the voice is slightly more muffled; has mildly lost the upper treble/sharpness range. MAY be preferable though as voice may feel a bit more soothing.

56 kbps – file size dropped to 16.9 MB. Voice is noticeably more muffled; not good quality for the voice – sounds like a cheap recording. And the music has lost its range and complexity of sound.

I also kept these setting as follows (rather than MONO as the video suggested) as I didn’t want the recording to play only out of one earphone, or only play out of one speaker in the car!:

Sample Rate: Auto

Channels: Auto

Stereo Mode: Joint Stereo

So my MP3 Encoder window looked like this:

ONE more thing: I noticed when playing the file on my computer, that I had to have the volume turned way up. Which may be okay for an iPod, but if someone was playing this recording in an MP3 player that is across the room, or in a yoga studio (for example), then I have not left enough volume for them to increase as needed.

So the way to fix that is in Audacity – I had to go back to the original recording and set the volume level higher before exporting. The current volume needed to be roughly doubled. You can increase the volume on an audio file by first Selecting the entire track (Edit->Select->All) then go to Effect->Normalize the track volume, then Effect->Amplify the track volume:

Then you export your file again. If you have LAME installed, then you can export it as an MP3 file. But if you don’t (or if it’s buggy) then you can export it as a WAV file, then use iTunes to convert the WAV file to an MP3 using the MP3 encoder as shown in the video above.

Of course, the way to avoid the low volume problem is simply to set the recording (audio input) levels higher in Audacity to start with! Or, if you are recording into your iPhone or iPod using Voice Memo, then move your device closer to your mouth.

By the way, for those of you who want a really thorough understanding of what all the options on the MP3 Encoder in iTunes are, here is the complete explanation from the Apple Help Library:

The MP3 Encoder pane contains the following settings.

Extension: This field displays the MP3 file extension (.mp3) automatically after the MP3 output format is selected from the File Format pop-up menu or the (+) pop-up menu in the Settings tab.

Allow Job Segmenting: This checkbox allows you to turn off job segmenting. It is relevant only if you are using Compressor with distributed processing and with multi-pass encoding. (The distributed processing feature is limited to computers that have Final Cut Studio installed.) For more information, see Job Segmenting and Two-Pass or Multi-Pass Encoding.

Stereo Bit Rate pop-up menu: The higher the Mono or Stereo kilobits per second (kbps), the higher the audio quality and the larger the file size. The most common bit rate for stereo MP3 files is between 128 kbps and 192 kbps. Lower bit rates are more appropriate for sound files containing voice recordings (as opposed to music).

Some example settings and uses include:

  • 32 kbps: AM radio quality, suitable for medium quality speech
  • 96 kbps: FM radio quality, suitable for high quality speech or medium quality music
  • 128 kbps: Suitable for good-quality music
  • 256 kbps and 320 kbps: Suitable for music that is near CD quality

Use Variable Bit Rate Encoding (VBR): This setting varies the number of bits used to store the music depending on the complexity of the music. This can help keep file size to a minimum.

Sample Rate pop-up menu: The number of times per second that the music waveforms are captured digitally. The higher the sample rate, the higher the quality and the larger the file size. Don’t choose a sample rate higher than the rate used originally to store the music or you’ll waste space. CD quality, for example, is 44.100 kHz, so choosing a higher rate when you’re encoding from a CD is unnecessary.

Channels pop-up menu: If you don’t have stereo speakers or if your audio files are monaural, choose Mono (mono files are about half the size of stereo files). If you’ll be listening to your MP3 files using your stereo system, choose Stereo.

Joint Stereo: When this checkbox is deselected, your MP3 files contain one track for the right stereo channel and one track for the left. In many cases, the two channels contain related information. When the Joint Stereo checkbox is selected, one channel carries the information that’s identical on both channels, and the other channel carries the unique information. At bit rates of 160 Kbps and below, this can improve the sound quality of your converted audio.

Smart Encoding Adjustments: Select this to have Compressor analyze your encoding settings and music source, and then adjust settings to maximize quality.

Filter Frequencies Below 10 Hz: Filtering inaudible frequencies results in smaller, more efficient files without perceptible loss of quality.

OKAY, did you learn enough about creating audio files? Whew. I know we had to get rather technical in some spots there, but that’s just the way it is sometimes!

How Do I Deliver Audio or Video With My Book?

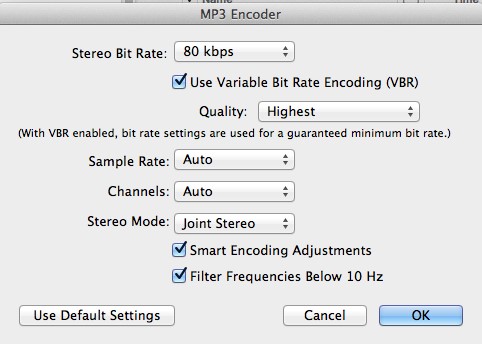
So let’s say you’ve published your softcover or hardcover book, and it’s available for sale on Amazoan, in Barnes & Noble bookstores, and on your site. Or you’ve published your e-reader book on Kindle, or Nook.

But you have an audio, or series of audios that are an integral part of the book. How can you make sure that Susie Smith, who buys your book from Chapter’s bookstore in Calgary, can receive those MP3 audios?

Remember, if this was an eBook purchase from your site, you would simply email the download links for the audios.

But you don’t have Susie Smith’s email and you don’t even know that she bought your book in her local bookstore. Or, how about Susie bought your Kindle book on Amazon – you still don’t have her email address.

I’m going to show you how to deal with this situation first (delivering audio), then I’m going to show you how to be able to provide video in the exact same situations.

Adding Audios To a Printed or Kindle Book

To be able to supply an unknown reader with your audios, you simply have instructions like this as part of the book text; which sends them to your site or hidden page where you give them the download links for your audios:


For the audio guide that accompanies this book, please go to:

www.mysite.com/guide-me


This webpage can be a hidden page, or it can be a password-protected page. If it’s password-protected, you would then have instructions like this in the book:


For the audio guide that accompanies this book, please go to:

www.mysite.com/guide-me

and enter the password: SWIMMING


Make sure these instructions appear on the page where you talk about the audio and also at the end of the book.

Or if you want, you can make the password a bit trickier by having something like this:


For the audio guide that accompanies this book, please go to:

www.mysite.com/guide-me

The password is the first word of the first sentence on page 26.


Here’s a real-life example of how someone has done this from a softcover book I bought on Amazon, called Full Body Presence by Suzanne Scurlock-Durana, where she gives you 5 audios that go along with the book. Here’s the sequence of events:

1. I bought the book

2. On page 11 and page 185 of the book, the website and password is given where I can download the audios:


To download the free audio tracks
for this book or order a CD
for a small fee plus shipping, visit

www.healingfromthecore.com

Click on the Full Body Presence download link,
and enter the password presence.

or write to us at

Healing From The Core
P.P. Box 2534
Reston, VA 20195

2. I go to the site and this is what I see:

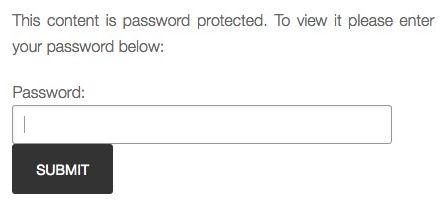
Although it looks like you have to enter all your personal information, you actually don’t, and it works with just the password and the Image Verification fields filled in. NOTE that I don’t recommend you set your webpage up like this! This is way too confusing and she must get a lot of customer service questions about this process. I’m going to show you a method you can use that is much simpler and clearer for your reader or customer.

After I SUBMIT the form, it goes here:
http://www.healingfromthecore.com/FBPAudio.html

HOWEVER, as I said, there is a much simpler way for you to set up exactly the same thing on your handy-dandy WordPress site in three easy steps, that is also less confusing for your customer:

How To Create A Password-Protected Page

1. Put something like this at the beginning and end of your book:

For the audio guide that accompanies this book, please go to:

www.mysite.com/guide-me

and enter the password: SWIMMING

2. Set up a hidden page (see instructions above) on your site called “Guide Me”, this will ensure the URL for that page is: www.mysite.com/guide-me and then list your audio titles along with their download link on that page.

You could either structure your downloads in the way shown above, with Click here to download… Or, you hyperlink the actual audio title, like this:

Welcome to the GUIDE ME audio downloads page.

For each of the files below, simply Right-click on the link,
then Save As… to save the mp3 file to your computer or device.

CHAPTER 1 AUDIO
Right-click here to download the audio: Choosing Your Best Idea

CHAPTER 4 AUDIO
Right-click here to download the audio: Multi-Purposing Your Content

etc.

In both cases, you would create the link to the MP3 audio file by using the Insert/Edit Link button – try this video if you don’t know how to add a hyperlink to text. Here’s an example of what it looks like when you add the link:

Finish setting up all your links. And of course, have an introduction or some explanatory text on the page before you list the download links.

3. When you go to publish that page, here’s what the PUBLISH box on the top right hand side looks like. See where the Visibility is set to Public?:

You can change this and set the Visibility to Password Protected. Simply click on the Edit link next to Public and enter your chosen password:

Then click Update. Or if you haven’t published it yet, then click Publish.

When someone enters the URL you gave: www.mysite.com/guide-me

Here’s what they’ll see:

Note: If you want to also offer the option to PLAY your audios online, you can install the free plugin Compact Audio Player. Here are instructions on how to install a plugin.

Adding Videos To a Printed or Kindle Book

The process for adding a video to a printed book is actually very simple.

You simply take a screenshot of the video and then place that in the book as a jpg photo. Underneath the video you give the YouTube URL where the video is located. So it may look like this:

If your book is being printed in black and white, make sure you test to make sure your color images will print nicely and not be too dark!

Alternatively, you could follow the same format as we used for providing audio with a book (see above) and have a dedicated page at the front and back of the book that says something like this:

Helpful Video Content!

I have a number of helpful instructional videos
that go along with this book. Please visit the
book’s video page to view them:

www.ListenToYourColon.com/videos

Again, you could choose to make this a hidden page, or a password-protected page. If it was password-protected, you would change your book notice to appear like this:

Helpful Video Content!

I have a number of helpful instructional videos
that go along with this book. Please visit the
book’s video page to view them:

www.ListenToYourColon.com/videos

And enter the password: intestine

Pretty simple eh? And your readers will love the multimedia content. Personally, I think the second method of sending them to a video page on your site is better than prompting them to type in YouTube URLs.

Alright, now that you are simply brimming with tools and ideas, let’s come up with YOUR plan to get your content out there