How Do I Set Up My Own Affiliate Program?

bigC-aff-adIf you’ve been digging through this site for a while, maybe you’ve notice I often talk about the different ways you can feature another company’s affiliate ads on your site – common examples of companies that make this easy are Amazon and Google AdSense.

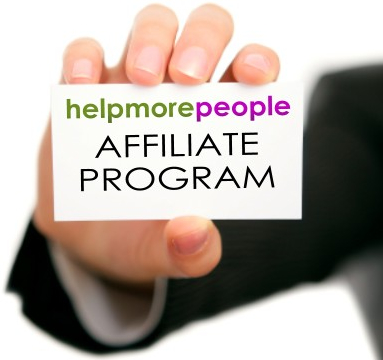
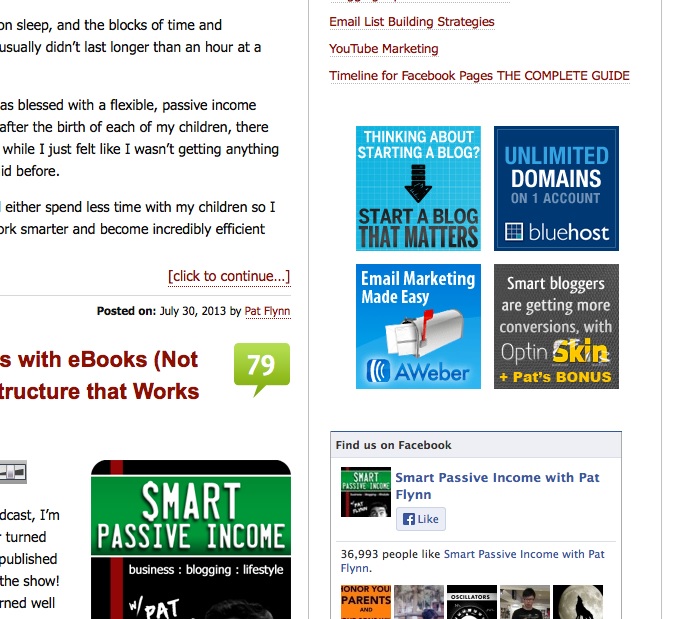
Now we’re going to talk about setting up your OWN affiliate program, so that other people can run YOUR banner ads on their sites! Or they can link to your site or products in their blog posts, or emails, or course materials (like I am doing throughout this LTYF program). The image on the left here is an example of an affiliate ad/banner – click on it and see where it goes! Or, just hover over it with your mouse and you can see that this banner is my affiliate link (commissions go to our charities at LTYF).

Having your own affiliate program is an excellent way to expand your sales network and your audience – without spending a dime on advertising. It’s a classic win-win: You win because other sites advertise your stuff and expose you to new people and they win because they receive a nice, juicy commission on every sale they refer to you.

An affiliate program can also be used to quickly drive new visitors to your site when you’re just starting out and your site is too new to get good search engine rankings.

For example, after I published my first book in 2000, my husband Ian emailed an online health site called HealingWell.com and asked the owner, Peter, if he could send him my book to look at, and then if he liked it, perhaps Peter would like to carry affiliate ads for the book and earn a commission on every sale?

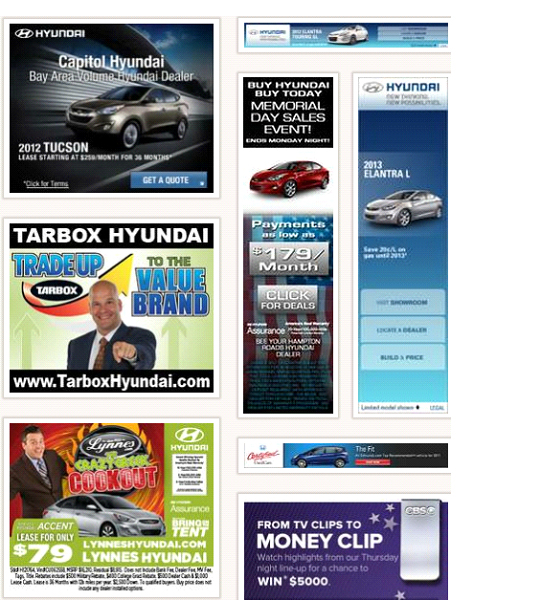
Peter loved the book and immediately registered for our affiliate program (which was with 1ShoppingCart at the time) and then he carried these banner ads on his site:

For many years, Peter’s site generated us more sales than our own site! HealingWell.com now has over 2 million unique visitors per month (continual source of new visitors/traffic) and continues to be one of our top-earning affiliates. And yes, Peter has remained an affiliate with us non-stop since 2000. All it took was a few emails and a phone call and that resulted in over a quarter million dollars in sales for us and a whacking great load of commission money for him!

Of course, we had numerous other affiliates that generated far less revenue for us and them, it goes to show that you just never know which sites will become your top sellers.

How Do I Find Sites To Affiliate With Me?

The secret to finding good affiliates for your stuff, is to approach sites that are already talking, writing, or videoing about your same topic. Approach site owners who are already selling to your niche.

For example, as I was creating this Listen To Your Freedom program for you, I was doing a ton of research. So whenever I came across a site in this same niche that I thought was really great, I added it to my ‘potential affiliates’ list. Then, when I had the LTYF program ready to go, I approached each of these sites and ask them via email and phone (you’ll always stand out if you follow up with a phone call) if they would like to affiliate with us.

The other way to find great affiliates (commission sales) for your stuff is to do a search on your topic or niche. Then visit each of the sites that come up in the first 10-20 pages of search results and contact the ones you think would be a good fit.

So, if you’re stuck in a scarcity-mindset (make a note to yourself to clear that block to abundance!) you might be thinking: But why would my competitor want to advertise my stuff?

However, if you’re coming from an abundance mindset (like grains of sand on a beach; there is more than enough for all of us) you will realize that successful sites are always open to other great stuff they can bring to their readers and blog visitors. Especially if your stuff expands, or enhances, or pairs nicely with their stuff.

A Match Made In Heaven

Let’s say I have a cooking site and I sell my own recipe books on the site. And you have an amazing new kitchen gadget that will cut food prep time in half. So you send me an email with a link to a demo video and then follow up with a phone call.

When I realize that my commission on each sale of your gadget will be $75 and I don’t have to worry about shipping, returns, customer service etc. am I going to affiliate with you and put a banner ad on my site for your product? You bet I am!

Now let’s say I am also hugely popular on the web and you know I have a large email list, or lots of new visitors every day. You might suggest an arrangement where you send me the gadget for free, so that I can use it and test it out. And then I agree to also blog about it (if I like it) and I place my affiliate link to the gadget in the blog post. In addition, I will send an email to my list promoting the gadget. Is that a win-win for everyone, or what?

Let’s take it one step further. Instead of linking directly to your gadget in my email, instead, you have me link to a landing page or sign-up offer you have set up, where my readers will receive a free gift from you. At the bottom of that page, or underneath the sign-up offer is my affiliate link to the gadget for the people who want to buy right away.

Sales vs. Sign-Ups

WHY would this be better than just a direct sale? Take a minute to think about why you would rather have a list of names and emails, rather than a bunch of sales?

Answer: Are you likely to get more sign-ups to receive a free gift than you are purchases for a product people have heard about once? Sure you are.

Remember that people rarely buy the first time they hear about something, or the first time they come to your site. You will always have much higher sales from building a relationship with them first; educating them about why your gadget is so great and the many ways it will make their life easier and better and save them money (benefits).

Also, what happens when you have your next product ready to sell? If I’ve joined your affiliate program and you have just garnered 1,500 names and emails from my list (the people who signed up for your free offer that I advertised to my list), you have now tripled your email list to use for marketing your next product! Do you understand how that happens? If my people sign up for your opt-in, or they purchase something from you, they are now part of YOUR list. So having an affiliate program can also help you grow your email list quickly.

Are you beginning to see why having your own affiliate program is so exciting and so necessary?

We routinely have people signing up for our affiliate program (or contacting us about it) that we have never heard of. But they have come across our site – because we are in the same niche – and they instantly want to sell my products along with their own. Yay! It’s a win-win.

How Much Commission Should I Offer?

If you are selling a digital product – an eBook, online course, website membership program, audio MP3s, or any other product that can be downloaded – the normal commission on your retail sale price is 50%. And I have seen some offering 60%.

If you are selling a physical product, that has to be manufactured or printed, warehoused, shipped, and you deal with customer returns and questions, then you can offer only a 40% commission and in some cases a 30% or even 25% commission will be accepted – depending on the costs involved in providing the product.

Selling To Retail Stores

If you are selling your physical products to a physical retail store or a wholesaler, they will want a 40% commission. Put another way, they will require a wholesale price no greater than 60% of what the product retails for.

If you are selling physical products (books, supplements, gadgets, bicycles, etc.) to a distributor, they usually want a 60% commission – or, a wholesale price no greater than 40% the retail price.

Choosing The Best Affiliate Program

So now that you understand the monetary value of an affiliate program and how you can use it to introduce new people to your stuff and drive lots of extra traffic to your site, how do you choose which affiliate program to use? If you’re already using an affiliate program, can you still make it work for you, or will you need to switch to something else for better function or compatibility?

Many shopping carts, or CRM systems come with an affiliate program built-in. But sometimes, your email marketing platform will not interface with your affiliate program, so you need to check for compatibility between all your systems before purchasing anything.

However, I have already done the 20 hours of researching and comparing for you (I’m not kidding!) and in the next unit I’m going to lay out all the options for you – based on your needs and your budget. For now, let’s move onto how you can create or overhaul an affiliate program that works really well to attract people to your product or service.

*Make a note in your notebook to come back to this page again after you have chosen your infrastructure components and are ready to set up your affiliate program.

While we’re on the topic, why don’t we learn how to make our own affiliate banners – what works, what doesn’t, and guidelines to whipping up your own great banners!


How Do I Create My Own Affiliate Banners?

How To Create Standout Affiliate Banners

As you may have noticed already from cruising websites, there are a lot of ads competing for your attention in the right or left column of people’s sites. Sometimes these banner ads (colorful graphics and text combined) run along the top or the bottom of the site. And in rare cases, they even appear in the middle of a page. Do you already have your own affiliate ads running? Are they delivering as much as they could?

How can you design or redesign your banners to get noticed, and even better, to entice people to actually click on the ad and come to your site?

Let’s start with some basic guidelines to help you design banners (or you can give these to your banner designer that you hire on Elance or Fiverr b) that get people’s attention and get them to take the action you want:

  1. One banner –> One Message

Your banner should only have one message and one call to action.  The message should be the TOP benefit the person will experience if they use your product or service. This should be easy for you since you have already done extensive work on mapping out your customer profile and the benefits they will receive from your stuff in previous modules.

Now, for EACH banner, just pick ONE benefit. Here’s an example of some banner ads from Advance America that have done a great job with this.

Let’s dissect these banner ads a bit so that you can see how they are very clear ads with one message that carries their top benefits to their customer:

One Message Benefit
We’re here for you between paydays Security, safety, care, help
Clear and simple way to get the money you need Easy, fast, no-hassle
That’s why we’re here with the money you need Relief from worry, safety net
For quick and easy financial solutions Help, easy, fast, solves your problems, don’t worry

So you can see how this company does not use their banner ads to talk about what they do (features). They do not advertise: cheque-cashing service, or loans available, but rather they press home – in a single message – the benefits the user will experience.

This next set of banner ads does a good job of presenting only one message, and the benefit is the free gift. Do these ads work as well as the ads above, which were offering a clear emotional benefit? The only way to know would be to test both formats and see which pulled more clicks and more sales:

This next set of ads for Target also do a good job of sticking to just one message. As you’ll see, some of their ads imply a benefit (save, less hassle from all top brands in one place) and some do not:

Now here’s an example of some ads that have no clear message – don’t ever do this!

  1. Create Simple Ads with High Contrast

In order for your ad to stand out and catch someone’s eye, it cannot be a jumble or crowd of colors and text. Your text color and background have to contrast – so your text stands out. Your images have to contrast with your text – so the text stands out.

Your call-to-action (click here for your free report) also has to contrast with the elements around it. So you see why your ads need to be simple, with one message only? If you try to cram too much stuff in there, or don’t have enough contrast, eyes will just flick over your ads.

The top three examples I gave you above, also happen to be great high contrast ads – for all three go back and see how the colors, text and images really contrast with each other and stand out easily to grab your attention – even though they each used a completely different color scheme and look/feel.

So now let’s look at some examples of bad banner ads, with low contrast, instead of high contrast.

These Sony banner ads are simple, with one message, BUT the contrast is so low, they’re actually hard to read!

This next set of banner ads are also a great example of low contrast ads, designed to catch no one’s attention!

In comparison, here is a set of ads that have good, high contrast (and a good call to action!):

  1. Clear Call To Action

Like your website, your banner ads should also make it very clear what you want the person to do. It may seem obvious that, “Hey, this is a banner ad, you click on it!” But again, you must not assume and instead you must have a clear call to action on your ad like:

  • Learn more
  • Click here
  • See your options
  • Get X here
  • More here

Look at these banner ads – can you tell at a glance (cause that’s all the time you get for a banner ad!) what they want you to do? Nope.

Compare those ads with this example and you’ll see how a clear call to action is much more effective:

  1. Create A Variety Of Ads

It’s important to create a variety of banners that display the key elements and benefits of your product, so that you can test them and see which ones work best to entice people to click through to your website.

The banner that you like the best, or that looks the best, may not work the best!

Also, you may get a banner that gets you lots of click-throughs to your site, but hardly any of those people buy anything. Whereas another ad could have a much lower click-through rate, but sell triple the amount, or get you double the number of opt-ins. Again, testing your ads is the only way to really know which ones work the best.

If you want ideas for banner ads and ad design, you can use Moat.com to pull up any company’s banner ads for you, all on one page (for free) – that’s how I got all the banner ads I’ve shown you thus far.

As I mentioned above, you can find a designer that specializes in banner ads on Elance.com – you should be able to get some basic sizes done for $50 – $75. And you can also try Fiverr.com which is likely cheaper, but may not be as professional.

You could also design them yourself, using a free online banner maker. The downside to these ‘free’ banner generators is that when you go to save your design, they often charge you. Also, you can only do really simple banners.

Your way around the fee, or just to do something really quick, is to create your banner, and then use Preview or SnapNdrag (Mac) or Jing (Windows PC) to take a screenshot photo of the banner before you click “save”. Here’s an example of one I did in about 10 minutes:

I then used Preview (Mac) or Photoshop (pc) to add a border around it, which would help it stand out on a webpage:

If you don’t know how to take a screenshot photo, here’s how:

HOWEVER, even better: Canva, is a super cheap design site that lets you design your own ads, banners, and more right in the browser. The images and designs are $1 and up (you pay when you download them), but many are totally free. Look what you can make (I did this one using only free images and fonts!) in 3 minutes:


Whatever your skill set, aesthetic or budget, making a banner doesn’t have to be hard! If you want to do it yourself, remember that it doesn’t necessarily need to be fancy or even particularly attractive to have the desired result.

Standard Banner Sizes

Whether you hire someone to do your affiliate banners (ads), or you do them yourself, you’ll need to know which size and shape of banners you want.

Here are the standard sizes used by most affiliate programs. Think about where – on a webpage or blog – the banners might appear. And make sure you offer a few different sizes and shapes so your affiliates will be able to place them wherever they wish.

Leaderboard (728 x 90 pixel):
leaderboard-banner-728-90-a84
Full Banner (468 x 60 pixel):
full-banner-468-60-a84
Half Banner (234 x 60 pixel):
half-banner-234-60-a84
Rectangle
(180 x 150 pixel):
rectangle-banner-180-150-a84
Square Button
(125 x 125 pixel):
square-button-banner-125-125-a84
Micro Bar
(88 x 31 pixel):
micro-bar-banner-88-31-a84
Skyscraper
(120 x 600 pixel):skyscraper-banner-120-600-a84
Wide Skyscraper
(160 x 600 pixel):
wide-skyscraper-banner-160-600-a84
Large Rectangle (336 x 280 pixel):
large-rectangle-banner-336-280-a84
Medium Rectangle (300 x 250 pixel):
medium-rectangle-banner-300-250-a84

Has seeing these banner ad examples and learning how to create your own affiliate (commissioned sales) program got your head buzzing with ideas? If you already have an affiliate program, have you had some “aha!” moments around how you could improve it? If your site is already up, or if you have products (or even just product ideas) you think could be sold by affiliates, or if you want to create some new ads with some new-found clarity, take a minute to sketch out your banner ideas in your notebook, while it’s all fresh in your mind…


The 4 guidelines for creating standout affiliate banner ads are:


  • Each banner must only have ONE message 

  • Create simple ads with high contrast colors/design
  • Ad must have a CLEAR call to action
  • Create a variety of ads


If some ideas for banner ads for your products or services popped into your head while reading this module, then jot them down here (write/draw). Or come back to this section when you are ready to launch your own affiliate program.


Banner Design Software

Another alternative, if you already have Adobe Photoshop, is you may want to purchase this easy and reasonably-priced banner design software from Gary Simon. His WiseBanner software enables you to create really nice banners, with images and text (he has many design templates ready to go) and would certainly save you money in the long run.

Gary has also provided us with his Five Golden Rules Of Affiliate Banner Design to take your affiliate ad banner education a little further. Don’t worry if you don’t understand some of the things he’s talking about, as I said earlier, all you really need to get some good affiliate banners going is to use the four guidelines I gave you above. This is for those of you who want to go a little bit deeper:

Golden Rule #1 – Split Test Like No Other

If you’re a successful affiliate marketer, you likely already know this rule. If you’re new to AM however, it’s probably the most important rule when it concerns your success. Split testing your display advertising (whether it be text based or image based) is absolutely crucial. Designers particularly have a hard time with this concept because of ego, “This banner is awesomely designed, let’s stick it up there and it shall convert.” This is rarely the case.

When we’re talking about banner design, your efforts to maximize ROI are dependent on your willingness and persistence to discover the absolutely best banner design. The only way to do this is to test, test and test. This includes testing the colors, copy, call to action, position of elements, etc.

Golden Rule #2 – You Don’t Need a Visual Masterpiece

This is another thing that a lot of designers have a hard time understanding. Sometimes ugly banners that look like they were designed in the 90’s outperform banners that are much more visually appealing. There are two reasons for this.

(1) Visitors do not care about your graphic talent. They’re usually preoccupied, and their decision to click on a banner has little to do with the use of the latest design trends and fancy effects.

(2) Banner blindness. If you design a really nice banner, there’s a chance it also might be conventional. Just because your banner(s) make effective use of white space, typography, position and colors, does not mean it’s not conventional. Ugly banners can perform well because they break design trends, thus becoming noticeable.

Ultimately, it’s a great idea to test varying styles of design.

Golden Rule #3 – Site-Target Design When Possible

If you’re running a campaign that’s targeting a specific site, always design your banners based on the website’s layout. I personally like to screenshot the website I’m about to advertise on, bring it into Photoshop, and design my banners in the exact location in which they’ll appear.

This allows you to do all sorts of things to maximize CTR (click-through rate) and avoid banner blindness. You can (if the site’s admin allows you), attempt to make the banner design a part of the actual website’s layout. You can choose your colors, copy, font and white space intelligently when you know your banners are going to be shown on a specific website.

Golden Rule #4 – Break Conventions

Don’t be afraid to do something completely off the wall, whether it concerns colors, position, copy, white space, etc. The worst that can happen is you discover it performs poorly against a baseline version. The reward, however, can be enormous. Sometimes it’s difficult to think outside of the box, but it’s at least worth a thought or two when you’re conceptualizing a banner design.

Golden Rule #5 – More or Less? Test

It’s the same as with landing page design: short copy vs. long copy? You don’t really know, so you need to test. Sometimes we have a willingness to include a lot of information, but that’s not always effective. More information means more clutter, a potential for less CTR (click-through rate), a potential for more banner blindness. But more information can also mean higher conversions as you’re sending more informed visitors. On the flipside, very simple banners can yield a higher CTR but with fewer successful goal completions. This is why testing both is a necessity if a highly optimized campaign is your goal.

In the end, effective banner design occurs when you’re willing to test and experiment. As a designer, it can be quite tedious designing a range of multiple banner sizes along with split test variations. That’s why I created WiseBanner (requires Adobe Photoshop). It cuts out nearly all of the tedious work involved in banner design. I hope you enjoyed this article!

If you don’t have the desire to split-test your affiliate banners to see which colors, designs, or text work the best, then simply use the four guidelines I gave you above on How To Create Stand-Out Affiliate Banners.

Alright, now that you know WHY you need to have your own affiliate program, and you know HOW to design and create your own coolio affiliate banners, let’s move on to helping you choose the best system that combines your affiliate program, shopping cart and email marketing platform together – to make your life easier and save you money!


How Do I Process Sales On My Site?

Okay, now let’s talk about where/how your shopping cart fits into your site infrastructure. Keep in mind that your shopping cart, your email marketing platform, and CRM (customer relationship management) are all different things.

Your shopping cart is simply the system whereby you:

  1. List your stuff for sale
  2. Process the payment for your stuff
  3. Deliver that stuff to your customer

In the beginning, when you don’t have much to sell, or if your business is fairly simple, then your shopping cart and email marketing functions can be combined. But as some of you know, as your business grows and you add more products and services you may need to differentiate these two systems.

Customer relationship management (CRM) is a more advanced feature and not usually something you have to consider until your business is large enough to hire a customer service person – but of course, it would be nice to have at any stage when talking to your customers, if you can afford it.

In an ideal world, you could mix-and-match shopping carts, email marketing platforms and affiliate programs to come up with the best solution to meet your needs. However, in reality, these different platforms often don’t interface with each other (or not very easily); so you will not end up with one automatically centralized database.

This means that if someone buys a product from you, you will not be able to use your email marketing platform to market to them, because their name and email will be sitting in your shopping cart database. Sure, you could import this customer’s information to your email marketing platform, but if that has to be done manually, it means extra time and hassle.

Always try to automate whenever possible because not only will this make your business run more smoothly, but it will make your business scalable; no matter whether you have 50 customers or 500, there will not be any more work for you, and no loss to the quality of care for your customers, if everything is automated.

Alternately, if you spend a lot of time researching (as I have for you!) you can find systems that can interface with each other, or be easily imported. But then you will still have to set up and manage three different systems, rather than just one, so there is a big extra time cost involved.

Of course, there are companies who have tried to combine all these aspects together and provide all-in-one solutions, but I have yet to see anyone who is offering an all-in-one product where ALL the components are equally excellent – especially if you have a substantial online store.

With Infusionsoft, for example, they have an excellent CRM, excellent email marketing program, excellent affiliate program, but their shopping cart is very basic. Their shopping cart is nowhere near as good as BigCommerce, or even Volusion.

BigCommerce has an excellent shopping cart and good affiliate program, but really basic CRM and no email marketing platform.

You see what I mean?

In the next unit you’re going to look at how you can get other sites to advertise you and link to your stuff, via your own affiliate program. After that, I will then guide you through picking and combining the best components (email marketing platform, shopping cart and affiliate program) for your particular needs and your current budget.

So take a deep breath, you’re doing great and we’re nearly there!

How Do I Combine My Shopping Cart, Affiliate & Email Systems?

Which is the best email marketing platform, affiliate program, and shopping cart for you to use, based on your type of business and your time and money constraints? If you don’t know what those are, follow the links to learn about each part of your site infrastructure.

Whichever platform you choose, there are detailed instructions (or instructional videos) on the provider’s site to teach you exactly how to create an opt-in form (using their platform) and how to put that form up on your site or blog. So, I will not provide those instructions here. I will just provide you with details about the different email marketing platforms, so you can choose the one best suited to your goals or business.

Therefore, I’m going to put myself in your shoes (easy to do because I’ve spent years there!) and tell you the best real-life solutions for your particular circumstances. Being that I have been both chronically ill and am still the mother of three kids, and currently own three businesses (and have two dogs and eleven horses!) I think it’s safe to say I know what I’m talking about.

NOTE: In the very next unit, I’m going to help you make your decision in the section What Would Jini Do? So if you feel yourself getting overwhelmed by the choices here, know that is coming right up next! OR if you prefer, you can just skip right over there and do what I say without looking at all the options here!

For those of you who do want to walk through this whole process and gain a better understanding of each component and how they fit together, first you will have to decide on your priorities, taking into account:

What type of business do you have? – do you have a lot of physical products, so it’s very important that they are displayed properly, with good descriptions, great photos, video, etc.? Or do you have just a few digital information products ( like eBooks, videos, teleseminars, home study courses), so your shopping cart is not so important?

How much time do you have? – do you prefer to spend your time on marketing, getting affiliates, setting up email campaigns and testing opt-in offers? Or do you dislike that kind of work and would rather market yourself by writing blog posts, making helpful videos, being a guest on or hosting teleseminars? Do you need a basic email marketing and CRM (customer relationship management) system, or do you need something robust and complex?

How much money do you have? – Do you have an operating budget and some start-up cash to invest in your new venture or business expansion? This would enable you to set up with a decent solution right from the start, thereby cutting down the hassle factor of having to upgrade, or change systems to eventually get where you want to be. Or are you hoping to spend as little as possible to start and willing to go with a less-robust option, knowing that you might have to go to the trouble of upgrading your systems once you’re fully operational?

I’m going to present you with 3 different solutions below for your email marketing platform, affiliate program and shopping cart – depending on where your priorities are. I’m going to break these solutions up according to how much time and money each of them require. I spent about 20 hours researching each system currently offered in both the email marketing and shopping cart arenas and so rather than go into each and every one, I’m just going to present you with my conclusions and the best solutions I found.

If you find yourself getting bogged down with all the details, remember that in the very next module I’m going to distill all this information down and make it super easy for you to decide, so don’t worry!

TIP: If you ever want a quick way to do a basic search to see how one product stacks up against another (as many people have done detailed online reviews), simply type into Google: _____ vs _____. But spend a good chunk of time scrolling through the different opinions and try to find people who are not just shamelessly plugging a system for the affiliate commissions.

You can assess each of these systems (where I’ve combined the necessary components for you) based on what you can afford and what your priorities are for your business. Keep in mind that I have left the affiliate program optional at this point.

Remember, an affiliate program is a way to promote your own products by giving referring bloggers or websites a commission when they refer customers to you. However, if you didn’t want to set up an affiliate program yet, then a way around this problem is to offer people who sign up to be your affiliates a Coupon Code instead to give to their people.

Using Coupon Codes Instead of An Automated Affiliate Program

In this case, you would have to do everything manually: You would use your email marketing platform to create a sign-up form for affiliates. When someone signed up, you would go to your shopping cart system and generate a Coupon Code specifically for that affiliate. You would then email the dedicated Coupon Code to the new affiliate.

So let’s say Alpha signs up to be an affiliate of yours. Alpha would then blog about why he thought you were so great and how your widget changed his life. He would offer his readers (or his list) a coupon for 10% off if they buy your widget. Alpha’s customer, Sandra, then goes to your site, purchases your widget and enters her coupon code to get 10% off.

The back-end system of a good shopping cart like BigCommerce or 1ShoppingCart will then show you a list of the coupon codes that have been entered. You know that Code XYZ comes from Alpha and you see that this month, 10 people have bought using Alpha’s coupon code. So you now write him a cheque for his commission on those products – or send him payment using PayPal.

The downside of doing it this way (coupon codes) versus a proper affiliate program is that this way you have to manually track commissions and manually make payments to your affiliates. With a proper affiliate program, all of this, from sign-up, to tracking, to consolidating payments, is automated – no work from you involved. Proper affiliate programs also have built-in 1st and 2nd tier commission structures.

This means that if Alpha refers his friend Genesis to sign up for your affiliate program, Alpha will also receive a commission on Genesis’ commissions. Of course, you are in charge of whether you even want to have 2nd tier affiliates and also of what percentage you will pay out in commissions.

If you won’t have anything to sell for about a year, or you are going to base your site around selling other people’s products, then you don’t need an affiliate program for your own stuff at this time. Otherwise, it’s best to choose a solution that has everything you need, so you only have to learn one system and you only have to set up everything once, and you don’t have the hassle of transferring all your data to a new system because you didn’t plan properly from the start!

I’m also going to list the current prices for each of these solutions and will do my best to keep these prices up-to-date (let me know if I’ve missed a price change!). Remember to think long-term when assessing what you need, and also remember that your time will soon be worth money!:

  1. BASIC Email Marketing & Shopping Cart Solution

GetResponse ($15/month) with PayPal (free) OR a 3rd Party eCommerce Site (cheap or free) – GetResponse is an easy, yet full-service email marketing platform that allows you to set up webforms for either your free offer opt-in, or your newsletter sign-up, or blog subscribers etc. and then allows you to email out to those people in an automated way – this means you don’t have to individually email people from your computer.

Automated emailing (also called autoresponders) means that you only write ONE email. You enter it into your platform, select the groups you want to receive the email and then press Send ONCE. This is how you can email two thousand people in about 5 minutes, with a couple clicks of your mouse. Mail Chimp is a completely free email platform, but the free version does not allow you to have any autoresponders – so you will still have to send every email manually, one by one. So if you have virtually no money, you can start with Mail Chimp, but know that you’ll need to switch to GetResponse as soon as you can.

GetResponse has instructional videos that show you how to set up your opt-in form and then also how to manage (email out to) the names on your list. You can email out your newsletter, or information emails, or emails with content attached. You can also do online surveys, video email marketing and put your opt-in (sign-up) forms on your Facebook fan page, provide social media ‘share’ buttons, etc. Here’s a quick overview (2 minutes) so you can see how simple it is:

I would only use GetResponse on its own if you are not planning on selling more than 2-3 products from your own site for at least one year. GetResponse also works great for people who make their money primarily from affiliate (commission) sales, or who only want to offer PayPal as a payment option, or who are using a 3rd party site to sell their products or services like eBay, Shopify, Etsy, or Bandcamp (more on these options in a moment). GetResponse basic level (up to 1000 subscribers) is only $15/month so it is a very cheap way to get started.

It is free to set up an account with PayPal and you only pay them a commission on each sale. PayPal is certainly easy and very cheap (free until you sell something!) if you want to keep cots low.

The good news is, GetResponse integrates easily with full-service shopping carts like Big Commerce, or 1ShoppingCart, along with the ability to take credit cards. So you can also start with just GetResponse and PayPal, or GetResponse and a 3rd party eCommerce site store, and then easily move your database across to one of these full-service shopping cart solutions when you can afford to.

There are other similar email marketing platforms like Mail Chimp (which is free to start), iContact, AWeber, etc. but none has the ease of use combined with the extensive functionality that GetResponse offers.

If you’re planning to go as minimal as possible, then start with either the free service from Mail Chimp or make your life easier by starting with GetResponse. Then sell straight from your site by either invoicing people directly using PayPal, or setting up automated BUY NOW links to PayPal. Or, choose a 3rd party eCommerce site and create your storefront (you’ll still need a PayPal account for this), and link to it or embed it on your site. So PayPal (or your eCommerce site via PayPal) is your shopping cart solution at this level and you do not have an affiliate program, nor can you use coupon codes, because you don’t have a full-service shopping cart.

eCommerce Site Benefit Breakdown

Using an external (3rd party) eCommerce site can be great for particular types of products, as many of them are set up for specific markets – for example, Etsy is for handmade, vintage, and craft items, while Bandcamp is for original music. Others, like Amazon, eBay and Shopify, are more general and sell just about anything.

Pros: What’s so handy about these sites is that they are already frequented by customers looking for what you’re selling (like selling your jewelry at a crafts store, or your music at a record shop), which could increase the likelihood of someone stumbling across your product in an otherwise immense online market. They also provide you with everything you need to start selling – you just have to customize your page (storefront), upload your products and descriptions, and link to the page on your site.

Cons: The downside of eCommerce sites is the commission they charge, combined with the PayPal processing fee; over time as you generate more revenue, you may find that the cost of a quality shopping cart system is actually cheaper than all these accumulated fees. Or, you might not find a site that caters specifically enough to your product or service. The main drawback of an eCommerce shop, is that your customers will be sent away from your site and may easily get distracted and end up buying someone else’s product instead. You also can’t customize beyond what their site infrastructure allows for, and you must sell within their parameters. These sites also require the buyer to have an account on that site – which will add one more annoying step in the process that might make or break that sale.

If you’re selling an eBook, or a solution-focused product or service (you’ve invented a great dog-door, or you do event catering), then PayPal is a better option until you can afford your own shopping cart. You have no real reason to send people through another site (although you might end up trying eBay or Amazon for your books or products in addition to your own site) just to buy your one product, especially if it falls outside the niche-range of well-known eCommerce sites.

Or try both: But if your product fits well within a niche on an established, high-traffic eCommerce site, by all means give it a try. Many people – such as craftspeople, musicians, artists, vintage or antique collectors, and more – find the exposure too good to pass up. And many products will sell well from both your site and an eCommerce site, which gives you the benefits of both. You have to weigh the pros and cons to figure out if your particular offering will benefit from the ease and exposure of an eCommerce site at this time, or whether it is not worth the time and money right now, if you’re short on both. Once your website is running smoothly and generating a good income, then you definitely should look to offer your products on eCommerce sites like Amazon and you may even find your customers requesting this!


  1. MID-LEVEL Email Marketing & Shopping Cart Solution

1ShoppingCart ($34/month) – This is your solution if you’re on a tight budget, yet you need to have a good shopping cart, and you also want a good email marketing platform. The only drawback to this entry-level package with 1ShoppingCart is it does not include an affiliate program. Now, having said that, you can also purchase an affiliate program separately called Omnistar for $27/month. So then you will have a shopping cart, affiliate program and email marketing platform for a combined total of $61/month. So still a very reasonable cost.

The downside is that you now have to manage 2 different systems; 1ShoppingCart and Omnistar, so that will take you a bit more time than having everything in one system. Another important distinction with 1ShoppingCart at this level, is that you cannot embed your shopping cart on your own website. At this level, people will leave your site and your store will be hosted on 1ShoppingCart’s server. You will be able to custom-brand your store though, with your own logo and colors, so your customers will not feel like they have left your site. There will also be menu buttons on your store that link back to your own site – so it’s a pretty good solution at this price point.

If you can afford to step up to the next level of 1ShoppingCart ($119/month), you can then get the shopping cart, email marketing system and affiliate program all together. You will also be able to embed your store on your own site. This is definitely, 100% the best way to go if you can afford it.

I know if you’re launching a new venture, it’s very tempting to go with the cheapest option – because everything is so unknown and unproven. But I really encourage you to take a leap of faith in yourself, to invest in yourself and your vision. Let me give you an example from a fellow Freedomite of why this is important.

Lori Clarke started out using GetResponse for her email marketing and PayPal for her product sales ($15/month). She went to all the work of learning the GetResponse system, setting up her opt-in and email autoresponder series and then setting up the PayPal BUY NOW buttons on her product pages… and then 2 months later, started all over again with 1ShoppingCart ($119/month). What happened? I’m going to let Lori herself tell you her reasons for the switch:

“I switched because I found 1ShoppingCart was more intuitive and user friendly. GetResponse also wasn’t robust enough on the customer management side, and their customer service (to me as the customer) wasn’t as good as 1ShoppingCart. The other part of it was that I wanted to add an affiliate program and a shopping cart – by the time I would have paid for all three of these separately, it didn’t make sense; because by the time my business was generating decent money, I would have to switch anyway!

I needed to believe that my business was going to thrive and go to the next level. I needed to choose something that was reflective of what I wanted and believed my business could be. So although I didn’t have the funds, I let my belief drive me, not my pocketbook.”

Read that last paragraph over again… So definitely think about the long-term when you are choosing your email marketing platform. And yes, if you don’t yet have a vision, or believe that your business is going to generate enough money, then you may choose the cheapest (or free) option. That’s totally okay, but just know that it’s going to cause you more work down the road when you have to switch everything over to the more robust, efficient system.

  1. TOP-LEVEL Email Marketing & Shopping Cart Solution

Infusionsoft ($299/month) – When my business outgrew 1ShoppingCart (when we were generating $10,000 in sales per month), we researched the market for CRM (customer relationship management) and email marketing solutions and we chose Infusionsoft as the best platform to be able to do everything we wanted, plus everything we might need to do in the future! Please note that Infusionsoft sometimes has an additional sign-up fee and sometimes not – so check for current pricing.

Infusionsoft goes way beyond the capability of GetResponse, 1ShoppingCart, or any others; but of course, since Infusionsoft can do so much more, it is also much more complicated to use and manage. So it requires a lot of time to both set up and manage ongoing. You either need someone in your business who loves techie marketing stuff, or you need to be able to hire someone to handle Infusionsoft for you.

We are still with Infusionsoft and while it is a complicated system and fairly pricey – it is well worth it. If you currently have a business that is already doing more than $60,000/year in revenues (or you plan to get there fairly quickly), you should definitely take a good look at Infusionsoft.

What’s The Difference?

The main difference between 1ShoppingCart’s customer relationship management (CRM) system and Infusionsoft’s advanced CRM system lies in the way their systems track and categorize opt-ins and/or customers. Here’s my General Manager, Justin Wade, on why he loves Infusionsoft so much! And remember, I don’t receive affiliate commissions from Infusionsoft, they are all donated to our fabulous charities – we recommend Infusionsoft so highly simply because they’ve made that much of a difference in operations for my health business, as Justin will now explain:

Data and Behavior-Based Marketing

The biggest difference between Infusionsoft and cheaper alternatives out there, like Aweber and Constant Contact, is the ability to collect more data about your customers which you can then use to automatically provide a personalized experience.

For example, let’s say you have a potential customer (also known as a prospect or lead) who has expressed interest in your products. This person then clicks on a link about PRODUCT A in an email you sent. Infusionsoft enables you to keep track of the fact that the person is interested in PRODUCT A and could then trigger other email, or email sequence, based on that click. Conversely, let’s say that the same customer also did not click on the link in that same email about PRODUCT B, within 30/60/90/X days. Infusionsoft can also check for this and communicate with the person accordingly.

This behavior-based approach is much more likely to make your prospects and customers feel connected with you and your business, because your have programmed Infusionsoft to figure out what your customers are interested in and engage them accordingly.

Keep in mind that you have to input the email sequences you want Infusionsoft to send out, based on which links are clicked. Infusionsoft doesn’t create anything out of thin air, it merely actions what you have mapped out and programmed it to do.

My autoresponder is just fine, though…

If you aren’t using Infusionsoft then you are robbing yourself of vital customer data, bottom line. Most of the autoresponders out there use a linear progression (i.e. Email #1 is sent today, #2 goes out in a week, #3 in 30 days, etc) and, as a user, you might say “yay, it’s automated!”. However, once you see the campaign builder in Infusionsoft it really becomes clear how antiquated and behind the curve the other guys are.

The campaign builder could be regarded as an autoresponder but that would be sort of like calling an iPhone “just a phone” or a space shuttle “just an aircraft”. Each campaign contains a variety of different elements which can include a limitless amount of interconnected autoresponders, webforms, etc. Where traditional autoresponders operate in a straight line, Infusionsoft operates as a fully interconnected logic web. The key is being able to inject automatic decision-making processes into this web based on what your customers do.

For example, let’s say John buys a book from your store. Most autoresponders would just send John some emails about similar books and maybe a coupon code at some point. Fairly standard stuff. With Infusionsoft, you can set it up to check for (and act on) things like:

  • Has John purchased from us before?
  • If so, how many times? How recently? For how long?
  • If not, how did he find out about us?
  • What has John clicked in the emails we’ve sent? How long ago did he click?
  • Does John own any books from the same author? Which genre(s)? Are they eBooks or physical copies?
  • Has John received any coupon codes? If so, has he used them?
  • Has John filled out any surveys at our site? What did we learn about him?

And the best part is, you can use any or all of the above pieces of information together or separately to customize John’s experience as your customer. How? The answer is Tags.

Tags are Infusionsoft’s way of labeling a customer based on anything and everything he or she does. This includes, but is not limited to, clicks, filling out forms/surveys, and purchases (or lack thereof). Tags can be applied for any behavior. As an example, if your company carries the ACME brand and Wile E. Coyote is your customer, he might have the following tags:

ACME Purchases

Signed up for “7 Ways to Catch a Roadrunner” e-mail series

Clicked blog post link – What You Need To Know About Jet-Propelled Unicycle Operation

Filled out “Look out below! Crucial info about safety from falling pianos”

Purchased Explosive Tennis Balls (under an ACME brand category)

Purchased Anvil (under an ACME brand category)

Purchased Jet-Propelled Unicycle (under an ACME brand category)

89th Order

Purchased within the last 30 days

So let’s say you are now carrying a new ACME product and want to target the specific customers on your list who might be interested. You can use Infusionsoft to sort by people who have purchased ACME products in the past and you can set up an autoresponder to send out some emails. Here’s where the personalization comes in… Let’s assume you sent the original email to 100 people. In order to separate people who are REALLY interested from people who are potentially interested, you can set Infusionsoft to check whether any of the 100 recipients clicked your product link in the 7 days that will pass between the first and second emails. For people who purchased your new product, the system can be set to stop the campaign entirely (or send the customer over to a cross-promotion autoresponder… or send the customer an email in 30 days asking for product feedback…). For the people who clicked, you can send another email immediately with additional information if you’d like to capitalize on their interest. For the others, you can automatically send them into a separate autoresponder which will contact them in X amount of days as a last ditch attempt to connect. With each subsequent email, you can further segment this group of people based on clicks, purchases, etc. and use additional autoresponders to upsell, cross-sell, and/or side-sell to your heart’s content. The possibilities are endless.

Another great thing about tags is that you can use them to trigger autoresponders. As an example, you could set up an autoresponder which sends some emails about you and the services you have to offer over the course of X amount of days. If you’re at a tradeshow and meet a new business contact, you can add the person to your Infusionsoft contact list directly from your laptop, tablet, or smartphone and then just apply the “New Tradeshow Lead” tag that you set up to trigger the aforementioned autoresponder. Infusionsoft would then execute the autoresponder for that person and send out the emails about you.

Who are my customers and where did they come from?

If you are using any type of advertising then you’ll definitely want to know if people are finding you as a result of your advertising efforts and Infusionsoft makes this really easy. It uses a function called “lead source” which basically labels any and all of your customers based on where they came from. Whether you are running campaigns on Google or sending out paper flyers, Infusionsoft tracks this and makes it easy to get the information you need.

Another customer metric that is thrown around a lot is called Lifetime Customer Value. This is simply the grand total amount of money that you expect a customer to spend with you. For example, let’s say you sell some sort of product that assists with vasectomy recovery. Your Lifetime Customer Value in that case is probably going to be really easy to calculate because you aren’t likely to have many repeat customers. It gets a lot more difficult if you are selling something like spices or clothing where people might make frequent purchases spanning years. Not to worry, Infusionsoft makes this information readily available so you can look at who is spending how much and on which products in order to assist your strategic decision-making.

API and Technical Stuff

Infusionsoft has a fantastic API. What is an API? In computer programming, an application programming interface (API) is a set of routines, protocols, and tools for building software applications. An API expresses a software component in terms of its operations, inputs, outputs, and underlying types. In layman’s terms, an API allows a piece of software to talk to another piece of software and exchange information. For example, if you have ever used FedEx or UPS to get real time shipping quotes while shopping (or for your own business) then you witnessed that system speaking to the FedEx or UPS system via the API. If you use a shopping cart like Big Commerce, Shopify, Volusion, etc. and want to use Infusionsoft as your back end marketing juggernaut, all info will pass from your cart system to Infusionsoft via the API. Using a proprietary 3PL system? No problem, that will communicate with Infusionsoft via the API as well.”

Can you see the value of a robust CRM system? The more tailored you can make your marketing, the more you can provide your people with what they want, and the less you bug them with things they’re not really interested in. Hence, your sales increase and your ‘unsubscribes’ from your list decrease.

Infusionsoft is the only automated CRM system I know of that can do automated tagging, multiple tagging and then automatic removal from groups and adding to new groups based on the person’s actions.

You can also search your database to segment it up according to multiple parameters. Let’s say I want to see how many people in my list (database) live in California, New York, Michigan and Oregon AND have purchased only blue pens AND have bought in the last 3 months. Infusionsoft can search my database and pull that list for me in seconds.

These are just two of the advanced CRM elements that Infusionsoft enables you to do and there are many more. I just wanted to give you enough of an idea so you understand WHY it’s worth paying extra for this system and worth spending the extra time on set-up. Sometimes Infusionsoft charges a set-up fee (in addition to the monthly fee) and sometimes they don’t, you will just have to check.

Now, here comes the only downside to Infusionsoft – their shopping cart is not great.

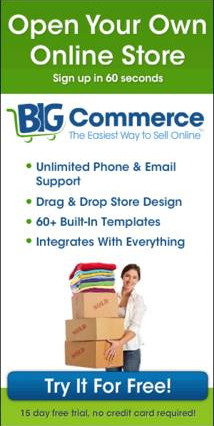
Infusionsoft and BigCommerce ($339/month) – So you can either use Infusionsoft’s shopping cart (which is decent, but not great), or you can go with a really awesome shopping cart system called BigCommerce. Again, we did a thorough review of shopping cart systems when we upgraded our LYTG Holistic Health Shoppe – which sells over 350 products – and we chose BigCommerce, rather than using Infusionsoft’s.

We especially like BigCommerce because it allows your customers to do all kinds of cool things like compare similar products, create a wish list, view special offers or featured products, watch videos (without leaving the product page), leave product reviews, and so on. It also has an “abandoned cart” function that tells you when people added stuff to their cart, but then didn’t follow through with that purchase. You can then have an autoresponder sent to them offering them a discount or free shipping if they want to complete their order.

BUT, when you are first starting out, or you only sell digital products, you absolutely can use Infusionsoft’s shopping cart. And after you’ve been running for about a year, you can look into upgrading your shopping cart to BigCommerce if you need it.

At that point, you will need to also purchase an API (application programming interface) to get all your ongoing purchasing and order info to transfer automatically from BigCommerce to Infusionsoft. When you need that, contact Ian (my husband) and he’ll tell you exactly what you need to do: ian@listentoyourfreedom.com

Now, before you get completely confused, know that I am going to boil all these options down for you and make it super easy to make your choice! Keep reading for help deciding how to make it all work for you.


Note: Remember that all the affiliate commissions from links throughout Listen To Your Freedom go to our amazing charities – so please click through to these sites, rather than typing in the the URL. Join us in paying it forward!


How Do I Choose My Site/Customer Infrastructure?

Alright, I think I have given you enough information and ideas to make a good decision about the infrastructure set-up that balances your needs and your budget, or, to reconsider your current system and weigh in with your needs, cash-flow, and plans for growth. So again, take a look at your priorities, before making your decision from the options I gave you in the last unit. Remember, you need to take into account:

  1. What type of business do you have? – do you have a lot of physical products, so it’s very important that they are displayed properly, with good descriptions, great photos, video, etc.? Or do you have just a few digital information products (ebooks, teleseminars, home study courses), so your shopping cart is not so important? Or are you planning to, or do you already use, an eCommerce site like Bandcamp, Etsy, or Amazon?
  2. How much time do you have? – do you prefer to spend your time on marketing, getting affiliates, setting up email campaigns and testing opt-in offers? Or do you dislike that kind of work and would rather market yourself by writing blog posts, making helpful videos, being a guest on or hosting teleseminars? Do you need a basic email marketing system, or do you need something robust and complex with added CRM (customer relationship management) capability?
  3. How much money do you have? – Do you have a decent operating budget or some start-up cash to invest in your business? This would enable you to set up with a decent solution right from the start, thereby cutting down the hassle factor of having to upgrade, or change systems to eventually get where you want to be. Or are you hoping to spend as little as possible to start and willing to go with a cheaper, less-robust option, knowing that you might have to go to the trouble of upgrading your systems once you’re fully operational?

The Bottom BOTTOM Line

If you’re still not sure, after reading the What Would Jini Do? section below, or you just want the no-think option, then go ahead and sign up for 1ShoppingCart (Premium Package $119/month). Look, you’re obviously serious about turning your passion into a business, or taking your passionate business to the next (and next-next!) level, or you wouldn’t be here on LTYF! This package will safely take you up to revenues of $100,000/year before you’ll need to switch to Infusionsoft. Just go do it. And then you can click over to the next unit.

For those of you who still want more of the WHY, keep reading…

What Would Jini Do?

In case your head is whirling by this point and you’re a step away from screaming, “Just tell me what to do, for god’s sake!” I will now break it down for you as if your business were my business. SO, knowing what I know now, if I were just starting or revamping an online business, here’s the platform and shopping cart I would choose, depending on my circumstances:

Scenario 1: I have lots of time (or am able to hire someone to manage my CRM and email marketing system). I have a decent amount of money, and plan to have less than 30 products. I want to be able to do everything from an affiliate program to targeted marketing campaigns. A decent shopping cart is all I need and having everything in one system is my top priority: Purchase InfusionSoft ($299/month + possible signup fee)

Scenario 2: I don’t have many products to sell, or my products are all information (digital), or affiliate products (i.e. I’ll be selling other people’s products), so I don’t need a fantastic shopping cart, but I’m totally into marketing. I want to get into complex marketing campaigns, Google Adwords campaigns, SEO-driven campaigns, etc. I need to be able to split-test, test headlines, test opt-in offers, test markets. I intend to make more money off of 5 products than most people make off of 100, because I’m a marketing maven! And I’m willing to spend the substantial amount of time it takes to set this up and manage it: Purchase InfusionSoft ($299/month + possible sign-up fee)

Scenario 3: I have lots of time (or am able to hire someone to manage my CRM and email marketing system), a decent amount of money, and more than 25 products. I want to be able to do everything from an affiliate program to targeted marketing campaigns. I can’t afford an automated API yet, but I can afford to hire someone each month to import my customers from my shopping cart to my email marketing platform. My shopping cart is very important to me and must be the best: Purchase InfusionSoft and BigCommerce ($339/month + possible Infusionsoft sign-up fee)

Scenario 4: I have some money, but not much time and I have more than 10 products. I want to have an affiliate program along with my email marketing platform and a decent shopping cart: Purchase 1ShoppingCart (Premium package $119/month)

Scenario 5: I want to keep my costs really low and I can do without an affiliate program for now, but I definitely need a decent shopping cart and a decent email marketing platform: Purchase 1ShoppingCart (Plus Package $34/month)
Bonus: I will be able to upgrade to 1ShoppingCart Premium package as soon as I decide I need it (and have an affiliate program) without having to move my database or do any additional set-up!

Scenario 6: I want to spend virtually nothing to start, I don’t need an affiliate program, and I only have a few things to sell: Purchase GetResponse and PayPal and/or an eCommerce shop ($15+/month)
Bonus: I will be able to add 1ShoppingCart as soon as I feel I need it (and have an affiliate program and/or CRM) and I can import my database easily and automatically (all at once) from GetResponse to 1ShoppingCart.

Scenario 7: This is going to be a zero-cost operation at first, but I realize I need to start building my list (database) immediately and then have an easy way to sell my eBook when it is ready: Mail Chimp and PayPal (Free)
Bonus: I will be able to add 1ShoppingCart eventually (and have an affiliate program and/or CRM) and I can then import my database from Mail Chimp to 1ShoppingCart. Or I can upgrade to GetResponse first, so that I can host autoresponder emails, and then upgrade to 1ShoppingCart.

Choose and Implement Your Platform!

You can visit each of these 4 options (click on the name to go to their site) and take a look at their pricing, watch their summary video for a quick overview of how each platform works and what it can do for you, and then make your choice!

GetResponse:

1ShoppingCart:

InfusionSoft:

BigCommerce:

*Notice that most of these weblinks are affiliate links. ALL of the affiliate commissions from Listen To Your Freedom go to our amazing charities. Remember to put your affiliate links everywhere in your stuff – in documents, your blog, pdfs, sidebar links, emails, etc.


How Do I Use My Blog to Generate Business?

Publish At Least One Blog Post Per Week!

As soon as your new site, or your new, or re-vamped blog is up, I want you to go ahead and publish your first blog immediately! If you’ve never done this before or need a refresher, we have super clear and easy videos showing you step-by-step how to write and publish a blog post, how to add photos, or link to other sites from your blog post, etc. And then be sure and celebrate this landmark event – the start of something truly beautiful!

Some Internet marketers will tell you that you must blog every single day. However, I’ve found a much better strategy is to blog as often as you have something valuable, interesting, profound, funny, entertaining, or helpful to say.

A site full of garbage, recycled, or boring content isn’t going to do anything for your brand, your reputation, or your site visitors – and it’s not going to make people opt-in to your list so they can receive more boring garbage! So only blog good, or funny, or touching, or helpful, or scandalous, or intriguing, or useful, unique-to-you-and-your-site posts.

This is the main reason I don’t like hiring someone in India or Russia to write my blog posts for me (as many do) – are they really going to post great content that makes visitors say, “Wow! Where can I get more?” Not likely.

On the flip side of that, if you rarely post anything to your blog, then you won’t be generating any content for search engines to catalogue, and no one will come to your site! So if you tend to be lazy about things like this, then set yourself a minimum of one blog post per week.

The only exception to this blogging schedule is if you have a business that does NOT rely on traffic generated by search engines. For example, let’s say you have a high-end consulting business where you only have room for 5 clients and all your clients come to you through word of mouth. In that case, you may not even need a blog at all! Because your site may function solely as an extended business card, or brochure. Your site may also be the internationally-accessible place for magazines, or events looking for speakers to download your press kit.

In scenarios like that, you do not need to blog regularly. But, if you need to have a steady flow of visitors to your site in order to get yourself and your stuff out there, then you absolutely need to publish at least one blog post per week, or you won’t show up on search engines and no one will know you exist!

Now let’s say that you would like to blog more often, you just don’t have any ideas, or you’re unsure of what your readers would actually be interested in.

What Should I Blog About?

Firstly, your readers are interested in pretty much ANYTHING that you are interested in. You are creating and then feeding your tribe, so be the leader! They will follow you. Here’s a quick list of ideas for what to blog about when you’re stumped. See which of these gets you excited, then run with that – and you may come back here repeatedly, or print out this list and stick it above your computer.

Personal Stories – Some of you may not feel comfortable sharing personal things on your blog, but if you’re serious about building a relationship with your readers, you have to find some level of vulnerability you feel good about. People buy from people they trust. If you won’t show people who you really are, how are you going to build that trust with them? So find areas of your personal life, your personal thoughts, or experiences that you do feel able to share. Maybe you want to keep your kids private, but you feel good about sharing your hiking adventures; the challenges you faced, how you overcame your difficulties on the trail, your thoughts as you felt like giving up, etc. That’s great! That gives your readers a glimpse into the real you and helps them feel more connected to you.

Book Review – These work really well as blog posts for several reasons. Firstly, they allow your reader to get inside your head and get to know you better. You’ve heard the saying, ‘you can tell who a person is by the books they read’, so this is an intimate way to build relationship with your readers. It is also helpful, because most people are looking for a good book to read, or suggest to their bookclub. And lastly, you can include the Amazon link (from your Amazon Associates/affiliate account, so you receive a commission) to the book – makes it easy for people to pick up the book and you earn a bit of money!

Movie or Album Review – See Book Review above, all the same stuff applies, but you can give your opinion on your favorite musician or movie.

Give Your Thoughts On Other Blog Posts – Giving your opinion on other key blog posts can be really helpful for your audience. Show your readers you have their best interest at heart, by connecting them to other people in your niche. Link to posts you’ve read that you think would be great to pass on to your readers. As a bonus, the blogs you link to may take notice, which may spark a helpful or profitable relationship in the future.

Also, keep in mind that you don’t have to always post written text or articles! If you don’t like to write much, you do not have to write your blog posts – you can simply post your videos, or other people’s videos instead, with a paragraph or even just a line of commentary. And if you don’t know how to do a blog post – check out these how-to videos!

That should be enough to get you started, but know that I also have LOTS more ideas for you on how and what to blog.

How Do I Make Money Off Other People’s Products?

In addition to your own products or services you will sell on your site, there are a number of simple ways to generate additional easy, automated cash from your site – by offering affiliate or commissioned sales products.

Or, you can use these methods to start generating revenue right away, before your own products or services are ready. Some of you may choose to generate all or most of your income from advertising and affiliate sales – also known as referral or commission sales.

For example, perhaps you only want to offer personal coaching and you want to have affiliate links (commission links) to other companies for all your product sales. An affiliate, or commission sale is where you are NOT the one who warehouses, sells, or ships the product. You are NOT the author or publisher of the book, or CD or DVD. And that product or service is NOT for sale on your own website.

You are simply the one who recommends that product to your people. And if your people click on the web link that goes to a product (or service) you’ve recommended, and they purchase that product, you will receive a commission on the sale price of that product.

How does that work? Well, there is computer software code embedded into the weblink. So that when someone clicks on that weblink, the affiliate program software automatically knows that person came from you – so you will get the sales commission on anything they buy.

Maybe you love ballet dancing. So you want your site to consist of tutorial videos, interviews, photos and other content you share on your blog. Then at some point in most of your blog posts, you will have an affiliate link to the particular pair of pointe shoes you recommend as the absolute best, or, your favorite tutu supplier. Or you run affiliate links down the right hand side of your site for top ballet DVDs, or ballet schools, or intensive workshops.

My kids Oscar and Zara have an educational site about WiFi Radiation called RadiationEducation.com, and it earns almost all of its money from affiliate links. In fact, the kids have a number of affiliate links right on their webpages, but most of their $200/month comes from a blog post on my site that they link to (they don’t have a blog on their site, that’s why we used mine). In that blog post, we provide instructions on how to measure WiFi radiation and then carry affiliate links for about eight different radiation meters with a description and review of each. Every time someone clicks the link to a meter and then purchases it, the kids receive a commission. Some months, they can earn $500-600 commission – from only 2 weeks of work back in 2010!

That’s why I want to tell you about these automated ways to generate money before you nail down your site design – since you may find you want to really run with one or two of these and that may significantly change your site design. A few weeks after he implemented affiliate links, I received this email from a Freedomite:

This is so much fun (even if it only covers dinner – at the best spot in Ubud).

Now I get a few emails like this per month from my affiliate vendors (8 and counting) – and the amounts are increasing.

Thx for all your help!

Six months after he sent this email, his affiliate commissions were generating $1,000/month and his requests for personal consults had increased significantly. What did he do during that 6 months? He simply kept blogging great quality content – written and video – twice a week, wrote a couple of articles for community-based publications, and gave 3 presentations at community events.

Isn’t that great? Remember, automated means that the work is all in the set-up. But once set up, ongoing revenue is generated (often daily) completely automatically. You can be asleep, or sitting on the beach and your site is generating you money. All you have to do on an ongoing basis is to blog interesting, helpful, entertaining, or useful stuff a few times a week.

The great thing about these four methods I’m going to teach you is that they are all completely free to register, set up, and participate in:

Each of the links above go through each of the four affiliate monetization methods in detail, so choose whatever you’re most curious about and get started!

How Do I Use Google’s AdSense Program?

For those of you who are considering hosting advertisements on your site to generate income, this unit will explain all the ins and outs. Even if you’re not sure you want to go with this option for automating income, knowing about how Google AdSense works will give you the tools to decide what’s right for your site.

Google AdSense is a free program that you can sign up for using your Google account (also free). Once you have it set up, you can choose to display ads on your blog and/or your YouTube channel and videos.

Here’s an example of what Google AdSense TEXT ads on a blog or webpage may look like:

Text ads like this can go either at the end of your blog posts or site pages, or they can be placed about mid-way or three-quarters of the way through your page.

And here’s what Google AdSense DISPLAY ads may look like:

AdSense display ads are usually placed in the sidebar of a site. Or sometimes they are placed at the top of a site – which I don’t like as I think it really takes away from your site branding and look & feel.

So when you’re asked to select the Ad Type can select whether you want Text or Display ads. And then you also get to select the size of ad you want, whether it’s horizontal or vertical, what shape it is, and where you want it to show on your page or post.

Target Ads To Your Audience

The important thing about Google AdSense is that you can select which ads are allowed to appear on your blog or videos. You can also completely block certain ad categories.

So if you wanted your ads to be super specific to your topic, for example, cooking, then you would block all ad categories other than Food & Groceries – you could even sub-category your ads down into (for example) Baking Goods or Baking Ingredients.

But you may realize that even though your site is about cooking, people who like to cook are also likely to enjoy gardening, or perhaps use health supplements. So in that case, you may want to run a wider variety of ads on your site.

You can set up your AdSense ads to be tracked, so when you login to your account, you can see which ads are getting the most clicks and generating you the most revenue – and then you may want to cancel some of your other ad categories and just stick with the one(s) your stats are showing you work best for your site visitor.

AdSense has detailed tutorial videos showing you exactly how to do all of the things I talk about here. Or, if you have the budget, you could go on Elance.com and hire someone to set up your AdSense account for you – this would likely cost you under $100 CAD if you know how to outsource tasks to Elance.

Where Should You Place Your Ads?

You don’t want to junk up your site just to make money. Or maybe you do! Seriously, an ad-heavy strategy may work for period of time, but if you are setting up a long-term business, people won’t come back to your site for the ads – they will come back and refer their friends because of your excellent content. So be discriminating about where ads are displayed and which ads you allow.

My advice would be to always select them to appear somewhere that doesn’t distract from your content, or become annoying, or make your site look cheap and cluttered. Here’s a good video from an experienced AdSense user, Darren Rowse, where he shares some of his testing and experience:

WARNING!!

However, I strongly advise you to NOT put any advertising on your site until you have ALREADY generated decent search engine rankings and you have a good number of visitors coming to your site every day because of your interesting, informative, or entertaining content (contained in your blog posts).

Again, I speak from experience, since I tested this with a new site I set up, ListenToYourHorse.com.
Here’s what happened: I launched listentoyourhorse.com and a few days after it went live, I registered with Google AdWords and ran 1 of their ads down the sidebar of my blog and another along the bottom. I also registered with an equine-specific advertising network and ran 3 of their ads down the blog sidebar. A friend of mine blogged at least once per week, for 3 months on the site. And I blogged whenever I could.

When I checked Google Analytics after 3 months of regular blogging, I had a grand total of 4 visitors to my site!! Seriously, I’m not joking, and I have NEVER in my entire existence on the web seen such truly crappy stats for one of my sites. The ONLY thing I did differently with this site was to have the ads on it.

So then I pulled all the ads off the site, waited one month – only published 1 new blog post during that month! – and when I checked Google Analytics again, I’d had 104 visitors.

4 visitors in 3 months with ads vs. 104 visitors in 1 month without ads. Hmmm… that’s a pretty clear lesson I’d say!

So if your site has already been up for a while, you can go ahead and put some ads on there – but make sure you’re tracking your site visitors in the first few months. Otherwise, if your site is new, or not up yet, then be sure and hold off until you’re generating good traffic to your site FIRST, then you can add some advertisements and see what happens. Just bookmark this unit and come back to it later.

You can get started at: www.google.com/adsense

And get detailed instructions for how to set up and run your account here:

https://support.google.com/adsense/checklist/3044373?rd=1

If you learn better visually, then check out the AdSense tutorial video channel:

https://www.youtube.com/user/InsideAdSense/videos?view=0&flow=grid&sort=p

Speaking of videos, if you’re interested I can show you how you can monetize your YouTube videos and how and when to use each kind of video ad. More automated revenue, coming right up…!

How Do I Make Money Off My YouTube Videos?

Once you have set up your YouTube channel and uploaded a few videos, you can choose to have advertisements added to your videos – for which you get paid based on the number of views or clicks. When you add advertisements to your videos, you get to share in the ad revenues generated.

You can choose whether the ads are full-screen and play before your video starts (don’t do this unless you have very strong content to hold people so they don’t get annoyed with the ad and click away), or just appear as a banner along the bottom of your videos. You can also choose to have ads appear on your channel page.

These ads are controlled by the Google AdSense program, so you have some control over which types of ads can appear on your videos and channel, which is nice.

Every time a viewer clicks on these ads, you receive a few pennies. Bit by bit, it can add up and it is worth doing. I add new videos very infrequently, but I still make anywhere from $170 to $200/month in revenues. Not bad for free money. Keep in mind though that some of my videos are quite popular with over a quarter million views. When you are just starting out, you will earn much less – but many people have figured out how to make a living entirely off YouTube monetization, so it’s definitely possible!

It is super easy to participate in YouTube’s ad revenue program – you simply go to your Video Manager, click EDIT, click Monetize my video and then select the kind of ads you want to display with your videos:

Keep in mind that YouTube changes its systems very frequently, so right now, this is what the monetization process looks like, but that may change 5 times in the next year! It doesn’t matter though, as YouTube is great at providing very clear instructions for everything.

You can see in these next two screenshots the different types of ad formats you can select. I used to run Overlay ads on my videos, since these were the least obtrusive. The Overlay ads appear in a small rectangle at the bottom of the video and you can click the X anytime to close them. Here’s what an Overlay ad on your video looks like:

However, YouTube then decided to really push the TrueView In-Stream ad format and so drastically reduced the commission for the Overlay ads. TrueView In-Stream ads are those that appear the very start of the video, in full screen and you have to wait about 4 seconds before you can click “Skip Ad” and get to the video itself. When my ad revenues plummeted to less than 50% of what I was previously earning, I decided to switch all my videos with 10,000+ Views to the TrueView ads. Here’s what a TrueView In-Stream ad placed before your video looks like (note the “Skip Ad” option):

The reason I am not running TrueView ads on my less-watched videos is that I don’t want to give people a reason to click away. If your video shows even a few thousand views, it provides social proof that your video is worth sticking around for. But when you’re trying to build Views on your videos, if you only have 42 views on your video, is someone really going to sit through 4 seconds of advertising to see if your video is any good?

On my other two channels (for my horse stuff and my art stuff) I am letting my videos get to 1,000 views before I will monetize them. But you can and should test this for yourself. Maybe monetize one of your new videos, but not the other and see if it makes a difference to your video Views.

Don’t worry, I provide plenty of instruction on how to create excellent videos for YouTube right over here.

Here is the type of content you can have in your videos that will enable you to monetize them – most of this is just common sense, but I thought I’d grab the info for you from YouTube anyway:

You must meet these minimum requirements in order to monetize your videos on YouTube:

  • Your content is advertiser-friendly.
  • You created the content or have permission to use it commercially.
  • You are able to provide documentation proving you own commercial rights to all audio and video content.
  • Your content complies with YouTube’s Terms of Service and Community Guidelines. YouTube reserves the right to disable monetization for accounts that do not follow our guidelines.

Examples of content that may be eligible for monetization

  • You filmed your cat and there is no background music.
  • Your video contains royalty-free music, and you can prove commercial use rights by using a direct link to the terms.
  • Your friend created content for your video and states in writing that you may use and make money from it.
  • You created original music yourself and are not signed to a label.

Examples of content that would NOT be eligible for monetization

  • Your video has music you purchased on iTunes or content you taped off of television (i.e. you don’t have a license for this copyrighted music or content).
  • You sing a cover of your favorite song without express permission from the artist.
  • You edit together a compilation of content created by others. Content with violence and/or nudity meant to shock and disgust.

So whether or not you’re ready to produce videos right now, it’s definitely worth knowing about these options, as they may have a bearing on how you plan your site, business, or products.

So let’s move onto one more monetization tool that you can utilize right now, or the second your site or your new blog goes live – in fact, you can use these tools in your very first blog post! Click here to find out more about affiliate programs.

How Do I Make Money As an Affiliate?

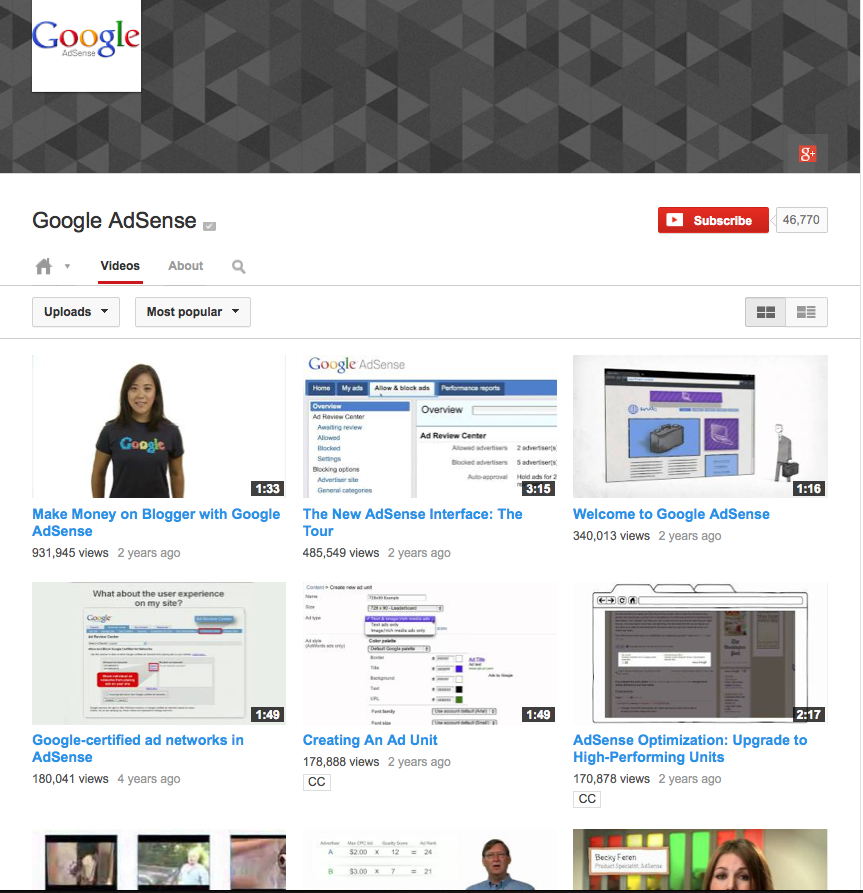
Aside from selling your own products, programs, or services, you can also sell other people’s items that fit your niche and are high quality. Be sure that you do not sell anything that does not reflect your standards of quality, or it will downgrade your reputation and garner you negative press.

Most sites that have successful products or services for sale will have an affiliate program. An affiliate program is simply a system whereby you receive a commission for helping generate sales of someone else’s products. Here’s how it works:

If you wanted to be an affiliate for Listen To Your Freedom, for example, you would promote Listen To Your Freedom on your site. This could be done a number of ways:

  • You write a blog post about the program and place a banner ad or text affiliate link to the program in your blog post
  • Have a banner ad (graphic/photo) on your website for the program
  • Have a text ad on your website for the program, or at the end of all your blog post(s)
  • Post to your Facebook page or wall about Listen To Your Freedom and use the banner ad or text affiliate link
  • Have a text ad on your YouTube video (in the ABOUT video description section of your video) for the program

Then, when anyone clicks on any of these banners or text affiliate links (from wherever you’ve put them), they will go to Listen To Your Freedom.com and they will be tracked as they navigate through my site.

If they purchase (at any time) the commission on the sale will go to you. Tracking of affiliate links is done by using cookies, so as long as the person has not cleared their cookies, you will receive the commission if they buy, even if they buy a year later.

Note: Which reminds me, either go sign up for the LTYF affiliate program now, or make a note to do so once your site is up!

Text Affiliate Link

Here’s an example of what a text affiliate link can look like, from my Bluehost affiliate account:

CLICK HERE TO SIGNUP FOR BLUEHOST.COM

You see how the text is blue and underlined? Hover over it with your mouse and you’ll see that it is a live link (hyperlink), if you click on it, you will go to Bluehost’s site.

Here’s what the code looks like that creates this hyperlink:

<a href=”http://www.bluehost.com/track/ infomedia1962″>CLICK HERE TO SIGNUP FOR BLUEHOST.COM</a>

If you would like to change the text that displays for this link, simply replace the text portion CLICK HERE TO SIGNUP FOR BLUEHOST.COM with whatever you would rather say.

Affiliate Banner Ad

A banner ad is simply a graphic (image) that links to the recommended site with your affiliate ID embedded in the link code.

Here’s what a banner ad can look like and again, I’m going to use my Bluehost affiliate account as an example – and I’m going to choose the same ad that Pat Flynn has on his site (we’re going to talk about Pat in just a minute), because I know that one has worked well for him:

So, the image shows you what will appear on your webpage or blog post, when you copy/paste the code onto your page.

Easy-peasy, so when I go to add this banner ad to my blog post or the sidebar on my site, the only thing I paste is this:

And then the only thing that appears on my site or in my blog post is this:

And when people click on that banner ad, they go to Bluehost’s site. And if they purchase anything I will receive the commission for it. You see how this is automated revenue? All you do is set it up and it keeps earning you money whether you’re sleeping, or on vacation, or driving your kids to school.

Begin At Any Time!

Unlike Google AdSense, or other scrolling/rotating sidebar advertising programs that could have a negative impact on your search engine rankings IF you add them too soon – affiliate ads can be added to your site at any time.

Affiliate ads or affiliate links (in a blog post, for example) are simple hyperlinks – the same as if you linked to a charity website you liked, or a dog training tips site, or YouTube. So search engines are not going to ‘mark’ your website as having a lot of ads compared to content – which obviously, is not a nice site to send people to!

So you can go ahead and use affiliate text links, or affiliate banner ads as soon as your new site is up, or your new blog is added, or your existing site re-designed.

Choose Products That Fit Your Niche

When choosing which programs and products to affiliate with, you just want to be sure they compliment what you are offering and won’t be taking sales away from your own products and programs. Affiliate commissions usually range from 40 – 70 percent. If that sounds like easy money, don’t forget that you have to work just as hard to market someone else’s products as you would to market your own.

Why do product creators give away such high affiliate commissions? Firstly, you are making the sale to customers they might not have otherwise reached, which is more money for them as well as you. Secondly, keep in mind how much commission a physical shop owner would earn off goods they sold through retail sales (usually 40 – 50 percent). The biggest difference with affiliate sales is that you don’t have the hassle or cost of warehousing, shipping, or handling the products.

Of course, some people never create their own programs or products, they simply affiliate and receive commissions on selling other people’s products. This model is similar to a retail grocery store – which doesn’t manufacture its own packaged foods, but merely sells other vendor’s foods.

Pat Flynn is an online entrepreneur who does just that. He has two sites where he sells his own programs and services, but he has another site (SmartPassiveIncome.com) where he just shares all his Internet business tips and tricks and all the sales on that site are generated from affiliate commissions.

Pat has a large variety of affiliate links (commission sales links) on his SmartPassiveIncome.com blog. These links are to various training programs, marketing tools and other people’s products or services. But amazingly enough, his top affiliate earnings are from a simple banner ad he carries for Bluehost – which provides website domains and hosting. His own products on his other sites generate him roughly $6,000 per month, but just his Bluehost affiliate commissions generate him $30,000 per month. Note how his Bluehost affiliate banner is the same one I used in my example above:

Now granted, Pat’s blog has a ton of traffic (visitors to his site) as he provides stellar content and has been doing it for many years, and he also links to Bluehost in some of his blog posts. But it just goes to show that you never know what will generate you the most income until you try it and see. So don’t be afraid to test out products and services that you think might fit with your site visitor’s needs or interests.

You can either find good products to affiliate with by doing keyword searches on your niche, or search for companion products you think your niche might like. When you find a good website, test their product and if you like it then sign up for their affiliate program. Or you can use an affiliate program warehouse, like Clickbank.com and search there for products or programs your site visitors might be interested in.

If you want to carry ads for a variety of online merchants, then ShareASale is a good place to start. ShareASale requires you to only register once and you can then host ads for companies like Adidas, Craftsy, Mens Trunk Club, Gymboree, etc. Here’s how simple it is:

Affiliate Link To Stuff You Use

Another great way to choose which products or programs to affiliate with is by simply recommending the items that you use yourself!

Let’s say you do a blog post on your great new blender – then show a picture of the blender, which is linked (via your affiliate link) to the shop where your reader can purchase the blender.

There are many stores that cater specifically to very targeted niche markets; like art stores, saddle shops, knitting stores, fishing gear, bike racing, longboarding, the list is endless. Since this is your area of passionate interest, you likely already know the best online shops to purchase from. So simply sign up for an affiliate account. Don’t be afraid to email the site admin and ask if they have an affiliate program – as many do not make it obvious.

Here’s a great example of an artist, Nowlenn Petitbois, who has an affiliate account with a huge art shop (DickBlick.com) and here you can see she has done an excellent tutorial video and then has all the products listed that she used in the video – and each product is an affiliate link:

Another way to feature products is to have a ‘favorites’ or ‘stuff I love’ page. Again, this is where you feature all the items that you use often, or that have made a big impact on you – things that are worth sharing.

Again, these things will be niche-specific, but they can also be your favorite books or favorite music, your favorite custom boot manufacturer – anything that is really personal or specific to you. This is your tribe, remember? They want to know personal stuff about you, and they also want to emulate you.

Kelly Rae Roberts is an artist who has sold over $10 million worth of retail products (via licensing deals) in the last 3 years and here’s how she presents her mix of favorites – the affiliate links are split between Amazon.com and DickBlick.com. Note how she has written a little blurb next to each one, explaining how she uses it, or why she loves it – this makes her list useful and valuable, not just salesy:

When you’re ready to actually create a list of favorite or recommended items like this on your blog, be sure and check out these detailed how-to instructions: How Do I Feature a List or Recommended Items on My Blog?

Your Turn to Brainstorm!

Even though you may not have your site up yet, let’s take a few minutes now to brainstorm some ideas and ways you might want to incorporate affiliate links (free money!) into your site and blog.


Here are some questions to start your brainstorming process…

Are you going to write blog posts about your favorite stuff, or equipment you use – and then make each of the products you recommend an affliate link? What kinds of things do you want to write about?


List here the sites you can link to that have products you like – mark which of these have an affiliate program, and which you have to check whether they do. Tip: The link to a website’s affiliate program is usually in the site footer (at the bottom), or sometimes you need to email them to inquire.


Okay, now that you’ve put your own ideas down on paper, here are the other important things you need to know in order to make money from affiliate commissions.

Don’t Overcrowd Your Site Pages!

The top mistake that nearly everyone makes with affiliate links is to cram as many as possible onto the sidebar or homepage of their site.

I guess they’re hoping that if they have a ton of ads on there, eventually their site visitor will click something. But it is completely the wrong strategy. Why?

  • It looks like you are desperate – please, buy something, anything!
  • It reduces trust in you – if your primary message is “buy, buy, buy,” then your site visitors get the message loud and clear that you don’t care about them. You are just trying to sell to them.
  • It’s confusing and takes away from the message and solutions of your site. Remember the golden rule; always GIVE value first. Give help, give solutions, give hope. People buy from people they trust or feel a connection to.

Too many affiliate links also means there are a dozen ways people can leave your site and go engage with someone else’s site – who may have a better customer funnel than you. If that’s confusing to you, think of it this way – you do want to make sales with your ads and affiliate links, but it’s just as important to keep your site visitors engaged with YOU and your site. If you put too many ads on your site, you run the risk of them getting distracted on other sites, and spending their money there instead of with you.

Take the example of Pat Flynn I gave you above – this is a guy who has a huge amount of daily traffic, yet he has only 4 affiliate links (banners) on his blog. For myself, I don’t have any affiliate links in the sidebar of my Listen To Your Gut site: all my affiliate links are inside my blog posts – so I am always giving information and value, and then the referral to purchase or learn more.

This is because I already sell 300+ products of my own on that site! I don’t need or want to send people away to other sites to buy, unless it’s for specific things that I have no intention of providing myself. But even on a site like that – you still have to keep the same principle in mind, of not overcrowding and looking too selly.

Let me give you an example from a test we ran on our Shoppe. Even though this is my site shop – which is obviously meant to sell product – the helpful information still needs to take precedence over anything else. And I’m going to tell you exactly how we tested and discovered this fact!

Previously, a product page in our Shoppe looked like this – note how the product information is right there, along with a “Jini Says” tab for my personal notes on the product:

Then we were approached by a company who guaranteed an 8-12% increase in sales for a 30-day trial period – or our money back. This company said they increased store sales by adding recommendation sidebars and scrollbars, like “customers also bought…” or “our customers also viewed…” So we said, sure, let’s test it.

So after installing their ‘recommendation’ sidebars and scrollbars, here’s what that same product page looked like:

What do you think?

And do you think sales went up or down?

First let me tell you what I thought when I viewed the changes:

“It just looks to me like one giant advertisement. I FEEL: sell, sell, sell! It is confusing. There is way too much stuff competing for my attention on this page.

I know what I want, that’s why I clicked on the MucosaHeal, but WHERE is all the info about MucosaHeal??

Ads for other products is NOT what sells our products. Information/education is why people buy from us – and that is now not the focus AND requires effort to find.

HOWEVER, I do like the “Our customers also viewed…” sidebar. I think that is interesting, does not distract from the product and actually adds to the page.

So, my recommendation would be to:

– Move the “Our customers also bought…” scrolling window to the end of the product description – way down at the bottom of the page.

– Keep the sidebars on the right and left as is.”

Well, those were my thoughts, but it’s always good to test your views and assumptions, so we let the shop run for 2 weeks like this first.

Then we looked at our sales for the two weeks before we made the changes, versus the two week period with the ‘recommendation’ elements as you see above. Let me tell you what we analyzed in order to determine whether this new format worked, or not.

Sales Metrics

Now, in order to determine if sales go up or down, you don’t just look at the dollar amount sold. Because your site traffic (people coming to your site) may be higher one week than the next, or higher in one month than the other. Instead, you look at your customer conversion rate. This means, that out of all the people who viewed your shop, what percentage purchased something?

Well, after we switched to this ‘recommendation’ format, sales decreased. Our conversion rate dropped from 11.23% to 6.73%. This means that with our original product pages, 11.23% of people who came to our site purchased something. With the new product pages – which featured all of the recommendation elements – only 6.73% of the people who came to our site purchased anything! In addition, overall sales figures (the dollar value of goods sold) dropped slightly from previous levels.

So remember, that when you are assessing the effectiveness of a sales or marketing strategy, you need to look at both metrics to get an accurate picture of what the effect actually is: You need to look at overall sales figures and sales conversion rates.

But we didn’t just can the service, we first deleted the big scrolling window of products from the middle of the page, but kept the sidebar recommendations, to see what effect that would have. Our conversion rate went back up again and even increased a few points. This showed us that it was worthwhile having the recommendations in the sidebars, but NOT where they detracted from the main information people were looking for.

That’s why I advise you to not overuse affiliate banners and ads, but keep them relevant to the information you are giving and don’t cram too many on your page. Or, place the ads at the bottom of the page or blog post – like Nowlenn Petitbois did in the example above. And speaking of Nowlenn, did you notice how she didn’t just give the name of the product and hyperlink? But rather, she gave the name and showed a picture of the product. Remember that visuals are always more appealing than just text – Kelly Rae Roberts did the same thing, and so did I in the screenshot of one of my blog posts I showed you at the very beginning of this unit.

Always select your ads or product promotions to appear somewhere that doesn’t distract from your content, or become annoying, or make your site look cheap and cluttered. Here’s a video from experienced AdSense user, Darren Rowse, where he shares some of his testing and experience. His same advice also holds true for any kind of affiliate ads:

Never be afraid to test things! Just make sure you keep accurate records before, during and after. Do you think Pat Flynn tested a lot of different ways to present his affiliate banners on his site? You bet he did!

Sure you can often shortcut your testing by looking at sites that are similar to yours and very successful and then just copy them – swipe away! But there will come a time when you start to wonder if something else might work better, and it’s always a good idea to test when you feel a nudge in a certain direction.

Okay, now let’s move into our next possibility; aside from affiliating with sites you love and buy from yourself, an easy way to get started with affiliate programs is to sign up for Amazon’s affiliate program.


How Do I Access Amazon’s Affiliate Program?

I strongly recommend you become an Amazon.com affiliate because their program is just so easy to use – Amazon calls this their “Amazon Associates” program. This means, that whenever you link to a product on Amazon (a book, DVD, etc. ANYTHING that is sold on Amazon), and someone visiting your site clicks on that link, you receive a commission from Amazon if they purchase it.

But here’s the great thing I discovered, if the person clicked on my affiliate link to a book (for example) but before they checked out, they also added a blender to their cart and then purchased both, I would get a commission on both!

Amazon’s affiliate program only takes about 10 minutes to sign up for and it’s completely free. You can sign up here:

https://affiliate-program.amazon.com/

Once you’ve joined the Amazon affiliate program, there are two ways that you can use your site to generate commissions on sales of Amazon products:

1/ You can easily add relevant Amazon products to your existing blog posts or Pages.

This is the super-quick and easy way to generate some extra, automated income by mentioning or recommending Amazon products. This means that if you’re already blogging about the new blender you bought for your green smoothies, or the educational toy you gifted your nephew, you can add the product – and perhaps 2 or three more good products in the same category – right into your blog post.

Once you have your Amazon Associates account set up, you simply go to the product you want to show in your blog post and click on Link to this Page, then you can choose whether to just grab the plain link code, or the code that will have a picture of the product show as well:

Is that super easy, or what?!

For example, here’s a list of my recommended business books and you can see that they are all affiliate linked to Amazon.

Here’s a video where I show you exactly how easy it is to add Amazon affiliate links to your regular blog posts, or site pages:

Having shown you how simple it is to get started this way with Amazon affiliate links, I also want to point out that unless you are linking to high priced products, you have to sell a LOT of product to make any money this way. Also, your affiliate link is only active for 24 hours, or until the person clicks on someone else’s Amazon affiliate link!

So the more people who use Amazon affiliate links (and it is growing daily), the more important it becomes to catch people at the place where they are finished researching and are actually ready to buy. Darren Rowse sums this up beautifully in his Amazon Associates Tips article:

Another big factor in the equation of Amazon conversions is the intent that your readers have when they visit your blog. Why are they there and at what stage in the ‘buying cycle’ are they at?

I began to think about this just over a year ago as I looked at the growing traffic on my photography site but realized that my Amazon earnings didn’t seem to be keeping up with the traffic growth that I was experiencing. What I realized is that DPS was a blog that was largely writing about ‘tips on how to use a camera’ and that as a result it wasn’t really drawing readers to it who were in a ‘buying mood’. In fact a survey that I did found that many of my readers had recently purchased a camera and were on my site specifically because they wanted to learn how to use it.

As a result I added to the mix of new content on the site more articles relevant to people buying a digital camera. I wrote tips with advice on buying cameras, reviews of digital cameras and equipment etc. This culminated in a whole new section on the blog devoted to ‘gear’.

Slowly this has attracted new readers to the blog – readers who are researching their next camera purchase – readers who are more likely to click a link to Amazon and who once there are more likely to make a purchase.

This is where search traffic can convert with affiliate programs – ie when you’re writing content that people in a ‘buying mood’ are searching for.”

I use Amazon affiliate links in my blog posts, but I make very little revenue from them. I don’t mind though, as I consider it a service to my reader to show them exactly what product I’m talking about.

If you do want to derive the bulk of your income from Amazon referrals, then understand you will have to experiment and test quite a bit to find out what works. Read through the different options below and then also check out Darren Rowse’s article series on the topic – before you decide whether to base your site on this method.

In earlier days, it was more common to make more than $1,000/month from an Amazon affiliate site. But now, you have to work pretty diligently to make more than $100/month, so you may choose to focus on individual product affiliate programs (where the link is valid for 30 days or longer). This is how my kids average $200/month from affiliate sales (with no ongoing promotion or blogging) on their RadiationEducation.com site – by linking to two independent stores.

2/ You can also base your entire site monetization around Amazon products

Featuring Amazon products and getting your site visitors to purchase from Amazon (and then you receive a commission) might also be the ONLY way you make money from your site. You might choose this option if your site topic aligns nicely with one or two Amazon product categories.

In that case, you might just want to focus on blogging and videos to provide value, build relationship and trust, and get your search engine rankings (where Google or Yahoo will list your site in search results) and then generate your income from Amazon sales.

I can see this model working nicely for websites based around topics like cooking, baking, crafts, gymnastics, hockey, health, dental health, sports performance and nutrition, etc. Basically, any topic or niche where Amazon carries a good number of products related to, or useful to that niche. But remember, you must link to high priced products, or it will be very difficult to generate enough money from your Amazon links.

But always keep in mind the golden rule: GIVE away help, solutions, hope, entertainment etc. And then your shop is just one section of your site – not your entire site! Firstly, because you will never be successful competing directly with Amazon, or Zappos, or any other big retailer. But also, because your shop is composed of affiliate products, even Google requires that you give value to people or they will give you a low search engine ranking, or ban you entirely. This short (less than 2 minutes) but sweet video explains exactly how Google views your shop site and what you need to do to keep Google happy:

So let’s say you like the idea of deriving much or all of your income from Amazon affiliate sales – and don’t forget, you can always start with this model and then change it as you develop your own products and programs – how exactly do you set up your site to provide this?

Depending on your budget, you could use a free WordPress theme like this one, called Magazine Basic, whose layout functions nicely as a shop:
http://wordpress.org/extend/themes/magazine-basic

Here’s what the Magazine Basic WordPress theme looks like when it’s used as a store for Amazon products:

You would then either manually add the products one by one, or a faster way is to use a paid plugin like WP Zon Builder.

A good WordPress Amazon integration plugin will allow you to build a stand-alone store in minutes, like Alex does in this video where he shows you how he built a site in about 10 minutes using WP Zon Builder and his own design. This video is also valuable because it shows you how to set up an Amazon affiliate site in a way that gives value to visitors, and doesn’t just hawk product:

Or, you can purchase a WordPress theme for your blog site that is specifically geared to selling Amazon products and has nice graphics and design already included. Do a keyword search for “wordpress themes for amazon affiliates”. Some popular ones are Azon Profit Store, WP Zoner, Candyzon and ProReview.

Keep in mind there are two elements here needed to have an Amazon storefront site:

  • The WordPress Theme used to display the products
  • The WordPress plugin used to integrate with Amazon to automatically grab and display the products with your affiliate link

You can use a free theme and a free plugin. Or you can use a paid theme and a paid plugin. Or any combination of each.

As an example, a great step-by-step free tutorial showing you how to set up a store using the free theme Magazine Basic is here:

http://winkpress.com/amazon/build-amazon-store-with-wordpress-for-free/

Amazon Storefront Types

Here are some ideas for different ways to set up your site if you want to make the bulk of your revenue from Amazon affiliate sales. Or perhaps there is another large store that you want to carry affiliate products for as well.

Of course, on each of these examples you can also carry Google Adsense ads on the site to generate ad revenue, and/or have links to other sites of yours where you sell things, or other affiliate linked ads. Remember, for all of these, your blog posts would create the traffic to your site and also position you as an expert:

  1. A Stand-Alone Review Site – There are several different types of reviews you can put on your site:  your personal reviews, other people’s reviews, or YouTube or video reviews. Even though you don’t have Buy links on the site, each product you review (or related products listed under the review) links to Amazon (using your affiliate link so you get commissions), like this one:
  2. A Niche Store – Amazon sells just about everything, so there are thousands of products and niches to choose from. Go shopping on Amazon and you will find many great ideas. Choose a niche (very specific, narrowly defined category) based on your top interests or passion. The Comfortable Office Chairs site is an example of a niche store site:
  3. A Content or Review site AND A Separate Store Site – this would actually be two sites, with different URLs. The reason you would do this is to position your content or review site as an unbiased source of information. Many people trust information more if they think the person isn’t selling anything.

So one site focuses on content and the other on products; both work together and they point to or link to each other.

Health guru Daniel Vitalis has set up his sites in this way (although he mostly sells his own products). See the two screenshots below. By the way, note how difficult it is to read the light colored font on a black background! Remember this when you choose your site colours.

Here’s Daniel Vitalis’ main site www.DanielVitalis.com which contains his blog (content), but note the Shop Now link in the right hand column:

This main site then links to his Shop site www.surthrival.com:

Interestingly, I went back to look at Daniel’s site a few months later and he has done a complete re-design – his shop is now black text on a light tan background – much better!

  1. A Content or Review site with a Store as a Separate Category – With this format, you would have a normal content site (blog, pages, posts) about your niche, and then have one Page called Store, Products, Shop, or something specific; as in this case where it’s called T-Shirts & Great Things.  Put all of your products in that section and link to them from the content areas:

Brene later changed her site from this format (above), to a format that enables her to list even more Amazon products – by creating a page called Brene’s Favorites. And on that page, she has 4 photos, each representing a category of product that she’s enthusiastic about – see the large photos on the left hand side:

If you click on any of those categories, like PHOTOGRAPHY, instead of a list of products with an Amazon affiliate link, she now sends you off her site and straight to her Amazon Storefront:

So she kind-of has a stand-alone store, but it’s not on her site. This option would work well if you had a strong following like Brene does. Brene’s site visitors are not likely to leave her site, stay on Amazon, and then wander off and forget about her. They know her, love her and will be back to her site many times.

BUT, this kind of store (which still works using affiliate links) can also be embedded in your site pages. I’m wondering if Brene knows this is possible… In my opinion it is always better to keep people on your site for as long as possible, that’s what I’ve done on my Art site, where the store is embedded on my site page called PRINTS. Note that this is not an Amazon store, but Amazon does have a storefront you can embed on your site in the same way:

If setting up your own Amazon store appeals to you, all you need is to register for your Amazon Associates account and then it’s also free to set up and get started! All the details are here: Amazon aStore.

For those of you who are artists or photographers, the store and plugin I use on my site above is FineArtAmerica.com.

We’ve also used this same plugin for another site Ian (my hubby) runs called LegendaryFootballGrounds.com:

Note: There are many ways you can feature or sell products from 3rd-party sites right on your own site’s SHOP page and I give you lots of good options right over here.

  1. Niche Checklist Sites – Very similar to a Niche Site, but even more specific in that you use an effective copywriting trick. Examples: Top 5 items needed for a camping trip, Top 10 products needed for survival, Top 8 things children need for school, etc.

A site like this would also do very well with a Pinterest or Facebook page where you could share great pictures or videos – that hopefully would go viral and increase traffic to your site.

Here’s an example of a site whose niche is Top 10 everything! Note how the site is further monetized with ads at the top and right side. Personally, I think the ads are way too big in relation to the content, and I’ll bet they would increase their revenues if they put the focus more on their content:

  1. A Stand-Alone Store – A site mainly dedicated to products of your choosing that you think would interest your readers. You would do blog posts about various products and why you like them so much, or why they’re the best (which would also drive traffic to your site). For example, if you were a raw foodist you may feature juicers, blenders, books, dehydrators, yoga equipment, natural cosmetics, etc. In addition to your store, every blog post would also feature one or more affiliate products.
  2. Build a Hub store – Where many of your content sites point to one store site. Like spokes on a wheel pointing to the Hub. With this kind of set up, you can have a Shop link on each site, but you can also simply link individual text (for example an author, or name of a product category, eg. Chest Freezers).

OKAY! Are you buzzing with ideas for how to link to Amazon products from your own site?

Now that you know all the different ways you can sell Amazon products on your site or blog, you’ll start noticing how everyone is doing this!

Again, it doesn’t matter whether you have your site up yet or not, you can still think about the different ways you might want to feature Amazon product affiliate links…


When you read through the different types of Amazon Storefronts in this unit, did any idea in particular stand out or appeal to you? Here they are again:

Stand-Alone Review Site – Tablet example

Niche Store – Office Chairs example

Content or Review site, with Store as separate Website – Daniel Vitalis example.

Content or Review site, with Store as separate Category or Page – Brene Brown example, Jini’s art site example

Niche Checklist Site – Top Tenz.net example

A Stand-Alone Store – Garlic Health Store example

A Hub Store – different content or blog sites all pointing to one store

Brainstorm now the different ways you would like to set up Amazon store products on your site – this is an important step in figuring out the design of your site. You can brainstorm in writing, or even make a sketch(es) of the way(s) you think you would like to feature Amazon products (hint: Think about what YOU like or enjoy and then do that!):


The Required Legal Stuff

One last important point: if you are going to have any kind of affiliate link on your site, or make any kind of recommendation that may lead to some form of compensation, you are legally required to clearly state that on your site. And I’m going to make it super easy for you to do that! You can simply copy/paste these legal disclaimers onto your own site, after changing the site name to your own.

If you haven’t built your site or added affiliate links yet, you won’t need this until you are ready to get your site up – but just make a mental note of it and download the file to a folder on your computer called: NEW WEBSITE.

  1. Affiliate Disclosure on Site or Blog

Here’s the short disclosure statement that needs to go on every page of your site – you can put it in smaller font at the very bottom, or in a box in your sidebar on the right or left hand side, as long as it’s legible – go ahead and swipe it (copy/paste) to use on your site.

If you are going to have your blog sidebar appear on every page of your site (other than the homepage) then you can just have this Affiliate Disclosure statement as a Text Widget in your blog sidebar:

*******************************

Some of the services recommended on this website provide compensation to [my-site]. All recommendations are based foremost upon an honest belief that the product, service, or site will benefit my site visitors in some way. Read the full Compensation Disclosure for more details.

*******************************

  1. Affiliate Compensation Disclosure Page – Full Legal Text

The underlined text in blue above (Compensation Disclosure) then links to a separate page, post, or pop-up that lists your full Affiliate Compensation Disclosure.

NOTE: Wherever you see [my-site] or [my-site].com in the text below, that means you need to delete the highlighted text and replace it with your website URL.

So if your website address is ListenToYourGut.com

then [my-site] becomes: ListenToYourGut

and [my-site].com becomes: ListenToYourGut.com

Use the Edit –> Replace function on Microsoft Word to make all these customizations in a few seconds.

Click here to DOWNLOAD the .doc version of this Disclosure, making it easy for you to customize it.

Affiliate Compensation Disclosure

Some of the web sites, products, and services I recommend provide compensation to [my-site].com in the form of referral fees or commissions. [my-site].com also gets compensation for display advertisements served from Google’s Adsense network. This allows me to provide all information to the end-user for free. It is my belief that the site will grow so long as I provide the most useful advice available. My promise to you is that all recommendations I make are chosen foremost for their ability to save you money, time, or hassle.

The Legal Stuff…

GOOD FAITH RECOMMENDATIONS

I recommend web sites, products, and services on [my-site].com based in part on a good faith belief that the purchase or use of such products or services will help my users. I have this good faith belief because (a) I have tried the product or service mentioned prior to recommending it or (b) I have researched the reputation of the Provider and have made the decision to recommend the Provider’s products or services based on their history and reviews. The representations made by me about products and services reflect my honest opinion based upon the facts known to me at the time a product or service is mentioned on [my-site].com.

YOU SHOULD ALWAYS CONDUCT YOUR OWN INVESTIGATION (PERFORM DUE DILIGENCE) BEFORE USING OR BUYING PRODUCTS OR SERVICES FROM ANYONE VIA THE INTERNET. THIS INCLUDES PRODUCTS AND SERVICES SOLD ON THIS WEBSITE AND ALL OTHER WEBSITES.

MATERIAL CONNECTION

Unless otherwise expressly stated, you should assume that all references to products and services on [my-site].com are made because material connections exist between the website’s owner (“Owner”) and the providers of the mentioned products and services (“Provider”).

POTENTIAL BIAS AND DUE DILIGENCE

The Owner’s opinion about a product or service may be partially formed (consciously or subconsciously) in part based on the fact that the Owner has been compensated or will be compensated because of the Owner’s business relationships with the Providers.

In some instances, the Owner and a Provider will have a business or personal relationship that does not involve the Owner receiving compensation related to products and services mentioned on [my-site].com. However, the nature of the relationship is sufficient to establish a material connection between the Owner and the Provider.

Because there may be a material connection between the Owner and Providers of products or services mentioned on [my-site].com, you should always assume that the Owner may be biased because of the Owner’s relationship with a Provider and/or because the Owner has received or will receive something of value from a Provider.

Perform your own due diligence before purchasing a product or service mentioned on [my-site].com (or any other website).

COMPENSATION

The type of compensation received by the Owner may vary. In some instances, the Owner may receive complimentary products, services, or money from a Provider prior to mentioning the Provider’s products or services on [my-site].com.

In other instances, the Owner may receive a monetary commission or non-monetary compensation when you take action based on the content of [my-site].com. This includes, but is not limited to, when you purchase a product or submit personal information to a Provider after clicking on an affiliate link on [my-site].com.

THIS POLICY

The Owner’s goal is to make your experience using this website a pleasant one. If you have any questions about products or services mentioned on this website, please contact the Owner and have those questions answered prior to making a purchase of such products or services.

Website Owner Contact Information:

[my mailing address]

Please note that the content of this page can change without prior notice.

*******************************

Click here to DOWNLOAD the .doc version of this Affiliate Compensation Disclosure, making it easy for you to customize it.