How Do I Use Google’s AdSense Program?

For those of you who are considering hosting advertisements on your site to generate income, this unit will explain all the ins and outs. Even if you’re not sure you want to go with this option for automating income, knowing about how Google AdSense works will give you the tools to decide what’s right for your site.

Google AdSense is a free program that you can sign up for using your Google account (also free). Once you have it set up, you can choose to display ads on your blog and/or your YouTube channel and videos.

Here’s an example of what Google AdSense TEXT ads on a blog or webpage may look like:

Text ads like this can go either at the end of your blog posts or site pages, or they can be placed about mid-way or three-quarters of the way through your page.

And here’s what Google AdSense DISPLAY ads may look like:

AdSense display ads are usually placed in the sidebar of a site. Or sometimes they are placed at the top of a site – which I don’t like as I think it really takes away from your site branding and look & feel.

So when you’re asked to select the Ad Type can select whether you want Text or Display ads. And then you also get to select the size of ad you want, whether it’s horizontal or vertical, what shape it is, and where you want it to show on your page or post.

Target Ads To Your Audience

The important thing about Google AdSense is that you can select which ads are allowed to appear on your blog or videos. You can also completely block certain ad categories.

So if you wanted your ads to be super specific to your topic, for example, cooking, then you would block all ad categories other than Food & Groceries – you could even sub-category your ads down into (for example) Baking Goods or Baking Ingredients.

But you may realize that even though your site is about cooking, people who like to cook are also likely to enjoy gardening, or perhaps use health supplements. So in that case, you may want to run a wider variety of ads on your site.

You can set up your AdSense ads to be tracked, so when you login to your account, you can see which ads are getting the most clicks and generating you the most revenue – and then you may want to cancel some of your other ad categories and just stick with the one(s) your stats are showing you work best for your site visitor.

AdSense has detailed tutorial videos showing you exactly how to do all of the things I talk about here. Or, if you have the budget, you could go on Elance.com and hire someone to set up your AdSense account for you – this would likely cost you under $100 CAD if you know how to outsource tasks to Elance.

Where Should You Place Your Ads?

You don’t want to junk up your site just to make money. Or maybe you do! Seriously, an ad-heavy strategy may work for period of time, but if you are setting up a long-term business, people won’t come back to your site for the ads – they will come back and refer their friends because of your excellent content. So be discriminating about where ads are displayed and which ads you allow.

My advice would be to always select them to appear somewhere that doesn’t distract from your content, or become annoying, or make your site look cheap and cluttered. Here’s a good video from an experienced AdSense user, Darren Rowse, where he shares some of his testing and experience:

WARNING!!

However, I strongly advise you to NOT put any advertising on your site until you have ALREADY generated decent search engine rankings and you have a good number of visitors coming to your site every day because of your interesting, informative, or entertaining content (contained in your blog posts).

Again, I speak from experience, since I tested this with a new site I set up, ListenToYourHorse.com.
Here’s what happened: I launched listentoyourhorse.com and a few days after it went live, I registered with Google AdWords and ran 1 of their ads down the sidebar of my blog and another along the bottom. I also registered with an equine-specific advertising network and ran 3 of their ads down the blog sidebar. A friend of mine blogged at least once per week, for 3 months on the site. And I blogged whenever I could.

When I checked Google Analytics after 3 months of regular blogging, I had a grand total of 4 visitors to my site!! Seriously, I’m not joking, and I have NEVER in my entire existence on the web seen such truly crappy stats for one of my sites. The ONLY thing I did differently with this site was to have the ads on it.

So then I pulled all the ads off the site, waited one month – only published 1 new blog post during that month! – and when I checked Google Analytics again, I’d had 104 visitors.

4 visitors in 3 months with ads vs. 104 visitors in 1 month without ads. Hmmm… that’s a pretty clear lesson I’d say!

So if your site has already been up for a while, you can go ahead and put some ads on there – but make sure you’re tracking your site visitors in the first few months. Otherwise, if your site is new, or not up yet, then be sure and hold off until you’re generating good traffic to your site FIRST, then you can add some advertisements and see what happens. Just bookmark this unit and come back to it later.

You can get started at: www.google.com/adsense

And get detailed instructions for how to set up and run your account here:

https://support.google.com/adsense/checklist/3044373?rd=1

If you learn better visually, then check out the AdSense tutorial video channel:

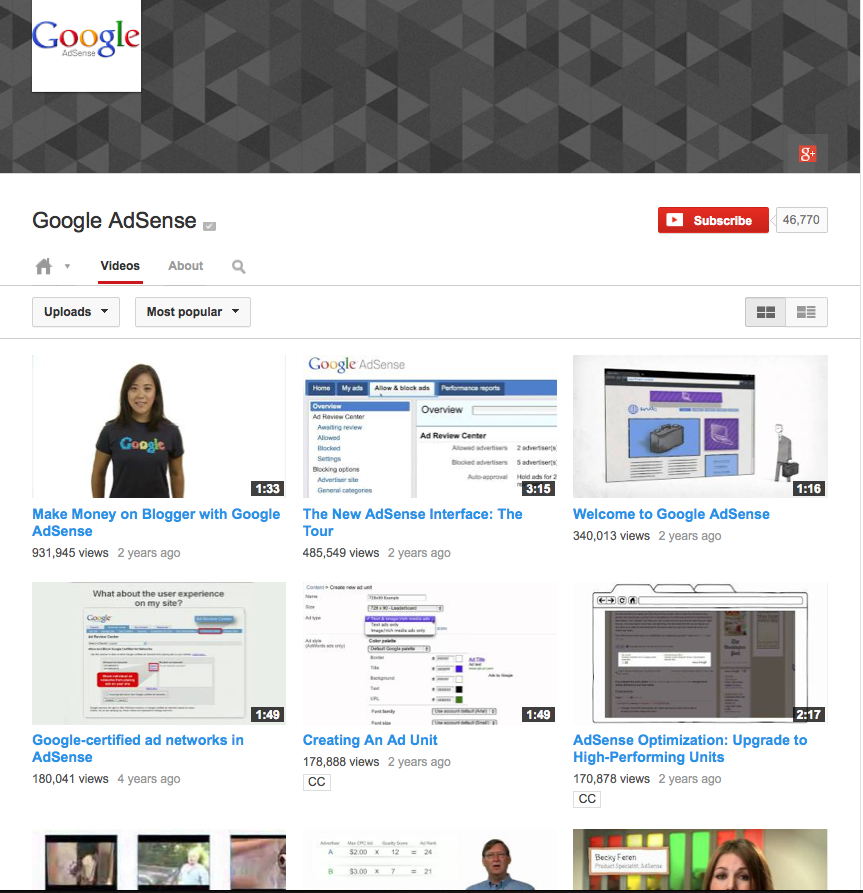
https://www.youtube.com/user/InsideAdSense/videos?view=0&flow=grid&sort=p

Speaking of videos, if you’re interested I can show you how you can monetize your YouTube videos and how and when to use each kind of video ad. More automated revenue, coming right up…!

How Do I Make Money Off Other People’s Products?

In addition to your own products or services you will sell on your site, there are a number of simple ways to generate additional easy, automated cash from your site – by offering affiliate or commissioned sales products.

Or, you can use these methods to start generating revenue right away, before your own products or services are ready. Some of you may choose to generate all or most of your income from advertising and affiliate sales – also known as referral or commission sales.

For example, perhaps you only want to offer personal coaching and you want to have affiliate links (commission links) to other companies for all your product sales. An affiliate, or commission sale is where you are NOT the one who warehouses, sells, or ships the product. You are NOT the author or publisher of the book, or CD or DVD. And that product or service is NOT for sale on your own website.

You are simply the one who recommends that product to your people. And if your people click on the web link that goes to a product (or service) you’ve recommended, and they purchase that product, you will receive a commission on the sale price of that product.

How does that work? Well, there is computer software code embedded into the weblink. So that when someone clicks on that weblink, the affiliate program software automatically knows that person came from you – so you will get the sales commission on anything they buy.

Maybe you love ballet dancing. So you want your site to consist of tutorial videos, interviews, photos and other content you share on your blog. Then at some point in most of your blog posts, you will have an affiliate link to the particular pair of pointe shoes you recommend as the absolute best, or, your favorite tutu supplier. Or you run affiliate links down the right hand side of your site for top ballet DVDs, or ballet schools, or intensive workshops.

My kids Oscar and Zara have an educational site about WiFi Radiation called RadiationEducation.com, and it earns almost all of its money from affiliate links. In fact, the kids have a number of affiliate links right on their webpages, but most of their $200/month comes from a blog post on my site that they link to (they don’t have a blog on their site, that’s why we used mine). In that blog post, we provide instructions on how to measure WiFi radiation and then carry affiliate links for about eight different radiation meters with a description and review of each. Every time someone clicks the link to a meter and then purchases it, the kids receive a commission. Some months, they can earn $500-600 commission – from only 2 weeks of work back in 2010!

That’s why I want to tell you about these automated ways to generate money before you nail down your site design – since you may find you want to really run with one or two of these and that may significantly change your site design. A few weeks after he implemented affiliate links, I received this email from a Freedomite:

This is so much fun (even if it only covers dinner – at the best spot in Ubud).

Now I get a few emails like this per month from my affiliate vendors (8 and counting) – and the amounts are increasing.

Thx for all your help!

Six months after he sent this email, his affiliate commissions were generating $1,000/month and his requests for personal consults had increased significantly. What did he do during that 6 months? He simply kept blogging great quality content – written and video – twice a week, wrote a couple of articles for community-based publications, and gave 3 presentations at community events.

Isn’t that great? Remember, automated means that the work is all in the set-up. But once set up, ongoing revenue is generated (often daily) completely automatically. You can be asleep, or sitting on the beach and your site is generating you money. All you have to do on an ongoing basis is to blog interesting, helpful, entertaining, or useful stuff a few times a week.

The great thing about these four methods I’m going to teach you is that they are all completely free to register, set up, and participate in:

Each of the links above go through each of the four affiliate monetization methods in detail, so choose whatever you’re most curious about and get started!

How Do I Register My Domain & Get Hosting?

Before we get started, I want to make it clear that you need to read the ENTIRE contents of this page about domains and hosting, and this page about email set up, BEFORE actioning (i.e. signing up for or purchasing) anything!

This is because it’s better to purchase your domain, hosting and emails all together at the same time, and to know what you’re looking for before you buy it. When you purchase all three together, you will be able to get a better discount – since many of the discount coupons require a minimum order total. When your order total is higher, you can then use a 20% discount coupon, rather than a 10% one.

In this unit, you’re going to accomplish the following:

  • Register your domain with a top-tier, ICANN-registered seller
  • Make sure the company you choose has 24/7 live customer service (via chat or phone)
  • Choose a basic hosting package

Step 1: Choose Your Domain Name

If you don’t already have your domain name – this is your URL, or the web address of your website – then now is the time to see if the name you want is available and to register it. For those of you who care, URL stands for Uniform Resource Locator.

Note: If you already have a website, but it’s not a WordPress site, or it doesn’t have a WordPress blog, then you should consider switching your content over, or even starting over with WordPress and a new domain name. Click here to find out why you absolutely need to have a WordPress blog to maximize your success.

Examples of domain names are: www.Amazon.com or www.JiniPatelThompson.com or www.MadWire.com  So as you see, your domain name can be your own name, or the name of your product, or the name of your company, or something catchy that relates to the problem you solve.

Whether you choose to go with a descriptive domain (e.g. www.FreshFloorz.com) or a catchy name (e.g. www.swerve.com) make sure you ALSO get the domain for your own name. YOU are your most important brand. So firstly, make sure no one else can use your personal brand and secondly, at some point (mark my words) you will want to use your own name for a website.

Down the road, you may just want use your own name as a portal site, that then has hot links to all the other different sites you run. That’s what I ended up doing with JiniPatelThompson.com:

Or, in 10 years time, you may want to set up a site that’s all about you sharing what you’ve learned. Maybe you’ll be traveling around speaking to groups of people about your methods, or inspiring them. You just never know, and domains are so cheap, you’d be crazy not to grab it.

We have also grabbed the domains for all three of our children – it is never too early! If your name is already taken, see if you can play around with the spelling of your name, or include your middle name, or perhaps your nickname, etc.

BIG TIP: Do NOT search for the domain(s) you want until you are ready to buy them! Domain selling has become a lucrative business and so as soon as you search for a domain, buyers are alerted to that fact and will snap it up – then when you’ve thought about it for a day or two and go back to purchase it, guess what? It’s already gone, but it’s for sale for $2,000 if you still want it!

So best to sit down with a sheet of paper and get planning!


Brainstorm every possible domain name (or variation on the spelling of the name) that you would like. For example: www.MyName.com


Put them in order from your top favorite to your least favorite:


Once you’ve read through the rest of this page, you can get your credit card ready and go see if the domain you want is available. It’s best to get a .com name if you can, so be prepared to have to pick from lower down on your list. And remember, you’ll want to register your domain name and get your website hosting at the same time, so make sure you know what you want!

You can use GoDaddy.com to search for the domain name you want and see whether it’s available or not. Don’t use your Internet browser (like Google) for this, as it will not be accurate enough. GoDaddy is an ICANN registered domain company with direct access to the domain registrar.

This can also be useful because if your domain name is taken, it may also be getting close to expiring with the current registrant and then you can be put on the waitlist, so you can grab it if the domain holder does not renew their registration. But let’s say the .com version of your domain is gone, GoDaddy will also let you know immediately whether .net or .biz or .tv etc are available. If possible, get the .com version of your domain first. BUT if you can afford it, get ALL the versions of your domain together – you will get a bulk discount and you will also protect your brand for future development.

It’s easiest if you buy your domain and host your website with the same ISP (Internet Service Provider). So probably best to go through all this info first (which will also help you choose your hosting company) then come back to this step and search for your domain with the ISP of your choice.

Step 2: Register Your Domain Name

Maybe you already have an active website – either a blog, or a site for your business. Depending on your plans, you can either stick with the domain you have and modify from there, or move your content to a new domain and hosting based on my recommendations, or scrap what you have and start fresh – it’s up to you (just remember that for your LTYF Guarantee to stand, you have to be using WordPress!). Find out why you absolutely need to have a WordPress blog to maximize your success.

If you are hosted on a free server, or template website service, then you may not even own your domain name – if you didn’t have to pay for it, you don’t own it, they do! In those instances, it’s a good idea to get a new domain name to use. Then you can choose to either move your existing content over to your new domain/site, or keep both sites running.

I use GoDaddy.com to register all my domains and for all my site hosting – they are the cheapest and they have stellar customer service. You can always find discount coupons for them as well (just search “godaddy coupons”) so you can get a really cheap deal for your domain and basic hosting package.

I tested using HostGator.com for about a year, but had two major glitches with them, where my site went down. The first time it took forever to even get through to them and the second time I could not even contact them since their help center was down too. Go ahead and research other companies if you like; just know that GoDaddy has worked great for me since 1999, so that’s who I’ll be referring to throughout the program.

Whichever hosting company you choose, just make sure they provide LIVE help, 24/7 – do NOT compromise on this. It doesn’t matter whether the help is via phone or chat, just make sure it’s live and available 24 hours a day, 7 days a week. Seriously, this will change your life and make a huge difference in running your business.

You also want to make sure your domain registrar is a Top Tier domain seller and that they are registered directly with ICANN (Internet Corporation for Assigned Names and Numbers). Whoever you choose, make sure to research where their data centers are, and whether or not they’re reliable – do whatever you can to safeguard against your site or server going down, which will cost you time and money once your business is running!

Next, make sure you register your domain name for at least 2 years. This is very important to be able to get your search engine rankings, as this is one of the metrics Google uses when they spider your site to decide how to rank you. Obviously, they want to give higher ranking for sites that plan to be around for a while.

While it’s best to get the .com version of your domain name, if you have the funds, then also get .net, .org, .info, .tv, .biz etc. If your business is regional or you plan to promote it locally, then also get the country-specific version of your domain e.g. .ca or .uk or .au

You can then set up all these different versions of your domain to URL-Forward into your main site. So getting different versions of your domain does not mean you have to do a website for each one! You can have them all forward into your main site. But it does prevent someone else from getting them, or a customer from typing in the wrong URL and going to your competitor.

What is the domain name system?

The domain name system, or DNS, is a system designed to make the Internet accessible to human beings. The main way computers that make up the Internet find one another is through a series of numbers, with each number (called an “IP address”) correlating to a different device. However it is difficult for the human mind to remember long lists of numbers so the DNS uses letters rather than numbers, and then links a precise series of letters with a precise series of numbers.

The end result is that ICANN’s website can be found at “icann.org” rather than “192.0.34.163” – which is how computers on the network know it. One advantage to this system – apart from making the network much easier to use for people – is that a particular domain name does not have to be tied to one particular computer because the link between a particular domain and a particular IP address can be changed quickly and easily. This change will then be recognised by the entire Internet within 48 hours thanks to the constantly updating DNS infrastructure. The result is an extremely flexible system.

Source: www.icann.org


Step 3: Choose A Basic Hosting Package

Once you have your domain, you need hosting in order to be able to have a website at that web address. Your domain is like a piece of land or property; hosting is the permits, tools and materials you’ll use to build your house, or your site. Your hosting package will determine some of the options you’ll have for your site, including space for your content and the complexity of your operations. For now, though, a basic hosting package will be more than enough to get your business going, and you can always upgrade later as needed.

A re-seller company like the domain onseller we talked about above may also be selling you second-hand hosting. They may be renting space on another company’s servers and they don’t actually own the physical server boxes in their own climate-controlled warehouse. Again, this will not be apparent unless something goes wrong. If your site goes down, or gets hacked into, it can take days or even up to a week to get things fixed and running smoothly again with second-hand hosting. That’s just unacceptable downtime and every day you lose, you’ll be losing money.

With a company like GoDaddy – who own everything themselves  – your downtime is not usually more than a couple of hours. When our site got hacked, GoDaddy immediately assigned their own security team to our site, backed up our site files, fixed the problem and restored everything – without charging us a dime. They own their own servers and they take their server security very seriously.

So whichever hosting company you choose, check with them first and make sure they own their own servers (the actual physical server boxes, not just the ‘space’) and have their own server boxes on-site, on their own premises. Many people recommend BlueHost, however, both BlueHost and HostGator were bought up by EIG and so when EIG goes down, they ALL go down.

Be aware when comparing pricing that many companies will list a monthly charge on their comparison page – but other companies, like GoDaddy, charge by the year. So $3.95/month for your domain and hosting looks very cheap. Until you see that GoDaddy charges $19.98 per year, which works out to only $1.66/month.

Your server is the machine (looks similar to a cable TV box) your website is hosted on – this machine handles all of the hundreds and thousands of site visitors you will get, without crashing, and provides a fast page load time for your visitors, as they come to your site for the first time and then click around your site. You can always upgrade your hosting as you go, with no hassle or time required, so start with the cheapest hosting package (smallest amount of storage space) and then increase as needed.

For example, on GoDaddy, the cheapest hosting package is called Economy Hosting. Unless you are immediately going to have an online store with 100 products, this hosting package will be fine for you. There’s no need to buy a larger package (more file storage space – larger bandwidth) until you need it. Also important to note, is whether your hosting package comes with an email package, or not. For example, GoDaddy’s Economy Hosting automatically comes with 100 email addresses. That means you can have personalized emails like me@mysite.com.

If you plan on having more than one site, you might consider an option that allows for hosting multiple domains at very little extra cost – On GoDaddy this is called Deluxe Hosting. It costs a little more but is worth it – if you think you’ll end up with more domains or websites soon, and trust me, you probably will! Of course, you could always start with Economy and upgrade when needed.

Each company’s hosting and email set-up process is different. So get in touch with whichever hosting company you chose and let them guide you through it. Any good domain/hosting company will also email you some how-to guides when you complete your order, so all the instructions you need should be in there. But if you’re confused, or need additional help, just contact your hosting company’s 24 hour service center.

Many hosting accounts automatically come with WordPress software installed – but you often have to request it or install it yourself. So be sure and check whether this is included (if not, ask them to throw it in anyway at no charge) as it will save you paying a programmer to do it later – or having to learn how to do it yourself.

A good hosting company will also often give you at least one free email with your hosting package – so be sure and read this page about email set-up before you select your hosting provider.

What About Free Template Sites?

In a later module, I suggest that people who are primarily visual, may want to first design their site on a free template web design platform, like iWeb. Then you’ll be able to communicate really clearly with your programmer as to what you want – or you can send him screenshots (photos) of what you’ve designed.

But why wouldn’t you just go ahead and publish your site on one of these templates, like iWeb, Weebly, Wix, or Website Tonight? Why pay for separate hosting and install a WordPress blog-based site? Well, for these two simple reasons:

  1. You will not get the search engine rankings with template sites that you will get with a WordPress blog-based site. For some reason, Google just loves WordPress blogs. And when you install the special plug-in I will tell you about, Google (and other search engines) will love you even more! Believe me, I have tested this with numerous sites. With my current set-up (which I will teach you) I get page one ranking on Google for dozens of specific search terms – and many times I’m on page one twice!
  1. Template-design sites are just not scalable, expandable, or transferable. So while they may be fine for you when you’re just starting out, they don’t provide for the future and you will just have to re-do everything as you grow (which will be a huge hassle and cost you a lot of money). With a WordPress blog site, as you grow, your blog stays exactly the same and simply becomes one of the sections on your site. The rest of your site is then programmed from scratch in PHP if needed – which is infinitely scalable and expandable. Again, I have tried all kinds of site programming languages (html, asp, template) and PHP is definitely the way to go and allows you to do all kinds of cool things as you grow. You don’t want to start with PHP though, unless you have lots of money. So you start with a WordPress blog-based site and then once your business is rolling and you’re making good money, then, if you need to, you can expand your site using PHP. In that case, like I said, your blog doesn’t need to be changed at all, it just becomes one of the sections of your new, expanded site – and your blog continues to drive your search engine rankings.

Time is one of your most precious commodities. This is one of the biggest benefits of using the Listen To Your Freedom system. You get to learn from our decades of mistakes, trial-testing and learning.

The advice I give you here is always the fastest, cheapest way we have discovered for accomplishing something, but ALWAYS with the long-term in mind. The procedure and solutions presented in this Listen To Your Freedom are designed to be able to take you seamlessly from revenues of $1/month to $100,000/month.

SSL Certificates or Other Add-Ons?

There’s no need to buy anything else at this stage. Most hosting companies will try to upsell you into all kinds of options before you checkout. But nothing else is really crucial, or will make a difference to your site’s success (except for dedicated emails). So instead of getting stressed, or feeling pressured, take a deep breath, and a good look at what they’re offering. In most cases, you’re safe to go for the most basic option that includes an email system, and don’t worry about any of the upsell options unless you’re convinced it’ll be really helpful for your business. If you need to call the company to understand what each option gets you, then call away! Just remember that their sales associates are trained to encourage you to buy more, so don’t let them sell you on anything you don’t understand.

If you’re going to start selling products right away, it’s a good idea to get an SSL Certificate – this encrypts your site transactions (customer credit cards) so that they are secure and more protected against hackers. Seeing an SSL Certificate (Secure Socket Layer Certificate) on your site is also reassuring to your customers so they’ll feel safer giving you their credit card AND will lead Google to give you a higher search engine ranking. Yes, this is a relatively new development (2014), but search engines are now giving higher priority to commerce sites that have an SSL certificate.

However, if you’re only going to be using PayPal, then you don’t need an SSL Certificate, since the transaction will actually be processed by PayPal, which has its own security system. Also, some shopping carts have a built-in SSL Certificate. So it’s best to hold off until you have the other components of your infrastructure set up.

You can also get your SSL Certificate later, after your site is set up and ready to go – usually if you are adding products, your set-up is going to take longer, so why pay for the extra month or two that you’re going to be setting up? You can get everything ready to go first and then get the SSL Certificate and install it on your site, just before you go live with your store.

Okay, now before you run out and buy your domain, let’s make sure you know what you want to do with your email package!


How Do I Build A Website?

This is a real quick run-down of the steps involved in building your own website. Each step links you to a more in depth explanation, complete with definitions, tutorials, and even some audios or videos to help you through, so don’t let this list intimidate you! It’s all very do-able stuff when you break it down. But wait – this is just an overview, so don’t do any of it until you’ve read this whole page and all the links corresponding to each step! It’s really important to have the whole picture in mind before you dive in.


Step 1: Get your Domain & Hosting

You will first need to purchase a domain name for your new website – this is your website address (e.g. www.Amazon.com). At the same time, you will need to sign up for a web hosting service. This will provide you with space on a server that will host all the programming and traffic (visitors) to your website.

Note: If you already have a website, but it’s not a WordPress site, or it doesn’t have a WordPress blog, then you’re still going to need to go through this process. Click here to find out why you absolutely need to have a WordPress blog to maximize your success. Don’t worry, you do not need to lose the traffic you’ve built up already to your existing site (or your content) – here’s how to import all that stuff from one platform to another.

Step 2: Set Up Your Emails

This may be a step you take at the same time as buying your hosting package – they will offer you a chance to register your business emails. Now that you have your own site, hosted on your own server, you can also get your own, private email addresses (kim@kimsite.com rather than kim@gmail.com for example).

Note: Again, if you already have your site hosted on a free server, or on WordPress.com, that is NOT a good idea and it will negatively affect your search engine rankings. So make sure you work through this entire module to ensure your site is hosted properly.

Step 3: Install WordPress

After you’ve purchased your hosting package, you will then install the free WordPress software on your hosting account. You could either pay a programmer to do this for you, or do it yourself by following the instructions from your hosting company. There are also a lot of good YouTube tutorials that will walk you through the installation process, and I also have a video that will show you how. In some cases, your hosting account automatically comes with WordPress software, you just have to request it.

Step 4: Design your Website

Once the main WordPress software installation is finished, you would either create your whole website, or, add your WordPress blog to your existing website. After installing WordPress through your web hosting account, you will be sent a link that allows you to log in to your site. You would then log in and choose a layout design – this is called your WordPress Theme. There are many good free Themes available (which I will show you), or you can purchase one. Once you have chosen a theme for your website, you can customize it by changing the text or background colors and arranging the layout to your desire.

Step 5: Add Pages and Links

Depending on the type of website you’re creating; you will then decide how many fixed, permanent Pages you need. Along with the fixed Pages of your site, I will show you how to create a blog with a variety of different blog posts for your visitors to read – that will also drive search engine traffic to your site. You can link to your Pages, your blog categories, other sites you like, and more in the top menu and the sidebars of your site.

Step 6: Add an Opt-In or Sign-Up Form

A form where you can capture names and email addresses is the foundation of your business. How can you build a relationship with people if you can’t communicate with them? An automated sign-up form also allows you to easily email your list as a group – rather than having to email people one-by-one.


How Do I Use Keywords on My Site (and Why Should I)?

What Are Keywords?

Keywords is the short way of saying: The words people type into search engines (like Google or Yahoo) when they are looking for information or answers.

So keywords consist of both single words and short phrases. For example, What is twerking? is the keyword phrase and twerking is the keyword.

Or, the best contact form plugin for WordPress is the keyword phrase
and the keywords are: contact form, plugin, WordPress.
In addition, contact form plugin or WordPress contact form could also be keyword phrases.

Wherever you need to use keywords (webpage, blog post, vidoes, etc.), it is best to use 1 to 3 words for each keyword (or keyword phrase) and then use a maximum of 5 keywords (or phrases) total.

If you use dozens of keywords, just to make sure you don’t miss any, then this will have the reverse effect – because you’re sending search engines the message that you are trying to manipulate them and don’t actually have anything of value to offer! Internet marketers who tried to trick Google this way quickly got slapped for ‘keyword seeding’ and their sites were either dropped down in rank, or blacklisted.

Remember, general information is not considered very valuable by search engines. Specific, targeted information, help, answers or solutions provide great value to the viewer and therefore to Google, or other search engines. If the search engines think you are providing valuable content, they will rank you higher in search results, thereby sending more people to your site.

So how can you find out which of these keywords and keyword phrases people are typing into search engines? Because once you know which keywords people are using, you can include those keywords or keyword phrases that apply to your content in your site copy, your blog post copy, etc.

Conveniently, Google provides us with a keyword search tool that is completely free to use and enables you to find out how many people are using a certain keyword, or keyword phrase to search for things, it’s called the Google Keyword Planner.

Have you signed up for a Google AdSense account? It can be useful even if you don’t want advertisements on your site. Once you’re registered and signed in you can use the Google Keyword Planner to identify good keywords to use in your site copy, your blog post titles, blog post descriptions, video titles and descriptions, book titles and descriptions and so on. Here’s a short little video (about 2 minutes) that shows you how easy it is:

How To Use The Google Keyword Planner

The other way you can determine which keywords people will use to search for your stuff is simply to pretend you are them! If you offer organic cotton, handmade, tie-dyed yoga pants on your site, then pretend that’s what you’re searching for. And what would you type into Google to find those? Keywords that immediately come to my mind are:

  • Organic cotton yoga pants
  • Colorful yoga pants
  • Tie-dye pants
  • Cotton yoga pants
  • Best yoga pants
  • Cool yoga pants
  • Organic yoga clothes

Now, you could either just use those, or you could take it one step further and test your assumptions. Use the Google Keyword Planner to see if people actually are using those keywords to search for your product – or if there are any better keywords Google can suggest you use. You could also ask four friends or family members what they would type into Google.

How To Use Hashtags

Hashtags look like this: #. And they are simply placed in front of keywords so that things like photos, graphics, on short posts (one or two sentences) can also be optimized for search engines.

Currently, most people are using hashtags incorrectly and just placing them in from of everything! You’ll see Facebook posts or Twitter tweets tagged like this:

#amazing #my boyfriend #you’ll love #wow #go here.

So, do you think anyone is typing “amazing” into Google? Or how about “go here”?

Also, like keywords, if you use a pile of hashtags, your post will just be dropped as spam, so stick to two or three hashtags that are the same keywords someone would be searching under to find the topic of that post, pin, or tweet.

Ask Friends and Fellow Enthusiasts

Here’s another reason it’s good to check in with what other people would type in when they search for your stuff: It’s really important to make sure that what you call your stuff is the same as what the majority of people searching for your stuff would call it.

A friend of mine, Lisa-Marie Cabrelli – who also happens to be one of the Top 25 Sellers on Amazon at Christmastime – once told me a story about her Dad. Her Dad had a website that sold fishing bait specifically for carp fishing.

Because he was English, her Dad called this bait, “boilies.” So his whole site talked about boilies, all his metatags, keywords and site copy listed boilies. But when Lisa-Marie took a deeper look, she discovered that 90% of his site visitors were coming from the USA. And in America, they called this bait, “carp bait.” No one in America even knew what a boilie was!

So Lisa-Marie had her Dad change all his site copy, keywords, titles, etc. to carp bait and his site traffic skyrocketed 10x – because he was now showing up for the keywords his market was actually searching for! And his sales also increased accordingly.

You can make keywords as complex and scientific as you like and if this area turns your crank, there are entire blogs, reports and online courses dedicated just to understanding and utilizing keywords to maximum effectiveness.

However, many of my blog posts are on page 1 of Google – sometimes twice! – using only the techniques I’m teaching you here. The most important thing to remember about keywords is that at the end of the day, if your content is excellent, highly targeted and directly solving people’s problems, pain, desire etc. (using the words they would use!) then your pages and your site will automatically get good search engine rankings over time.


Ask Google

You know how when you start typing something into a search engine bar, you’ll get an automatic drop-down list of search suggestions? These are predictive phrases that Google (or whatever search engine you’re using) thinks you might be looking for based on the words you’ve already written. Sometimes they’re totally absurd, and sometimes they are so on-point that you end up picking one of those instead of what you meant to write. Those suggestions are built out of data from the gajillions of searches typed in every day, and guess what – they can be used as a secret weapon when you’re trying to come up with keywords and keyword phrases. Here’s how:

1. Pretend you’re someone looking for your solution or product. Start typing in the main key words that you would use to find what you’re looking for.

2. Screen shot the suggestions for each of those terms

3. Add any of these suggested keywords that make sense for your product, solution, answer, etc. to your post.


So let’s take some time to figure out what your people are typing into Google – so that they can find you! Grab your notebook…


Now that you know who your customer is and which problems you solve, which solutions you are offering, which desires you fulfill… take some time to brainstorm what you think your customer is typing into Google (keywords or keyword phrases) when they are looking for the answers that you have:


Now call 2 people and ask them what they would type into Google if they were searching for your stuff:


This will give you a ready-to-go list of keywords to use when you are writing your site copy and your blog posts! Remember, you need to use the same words on your website and blog posts that people are typing into Search Engines (like Google, or Yahoo) so that they can find you. But you’re not done yet…

Bonus Points!

Now take 3 of the keywords from the lists you just created in your notebook, choose the ones that you think are the best of the bunch, log into your Google AdWords account and plug those into the Google Keyword Planner to see what Google thinks of your choices:

https://adwords.google.com

Write down any keyword suggestions Google has for you that look good, and compile your complete keyword list:


If you want to, you can photocopy or type up this final keyword list onto a sheet and slap it on your computer or bulletin board for easy reference when you’re writing your blog posts and web copy.


The Quick and Easy Method

Type each of your chosen keywords or keyword phrases into a search engine, like Google, Yahoo, or Bing, and see if any of them turn up useful content similar to what you would offer. Write down the good ones here:


Tracking Your Site Visitors – Google Analytics

Okay, we have one more element that is crucial to get set up before we can close out this module. Google Analytics is a free service that you can install on your site and it will give you feedback on things like:

  • How many visitors (hits) your site gets each day.
  • Where your visitors (site traffic) are coming from – search engines, Facebook, advertising, etc.
  • Which page most of your visitors are landing on when they first come to your site – don’t expect this to be your homepage, it might be a really great blog post.
  • How long visitors spend on your site and which pages hold them the longest
  • Which page are your visitors on when they decide to leave your site – are you consistently losing site visitors at a certain place?

When you have this data, you can then start to test out different things to see if they result in people staying longer on your site. Maybe you realize you need to re-locate your opt-in, because it’s only on your homepage and not many people are landing there.

You can also try different techniques to see if you can bring in more daily visitors – maybe your Facebook promotion drove 20% new traffic to your site and resulted in 20 sign-ups per day, whereas Pinterest only generated 1% new traffic. Well, now you know where to focus your efforts.

As you might imagine, like keywords, playing around with your site metrics can be a full-time job in itself, if you want it to be! For now, the only important thing is to install Google Analytics on your site, so the data will be there when you’re ready for it. If you want a concise guide with details on how to use Google Analytics when you first get your site up and want to track the basics, check out this quick tutorial.

Personally, I don’t pay a whole lot of attention to Google Analytics anymore because I’ve realized that as long as I continually provide excellent content and help, all the site metrics just take care of themselves. In addition, I use a very advanced back-end CRM (Customer Relationship Management) system that provides me with most of the data I need.

I consistently appear on page one of Google search results (and sometimes even twice on page one) for my targeted topics – so I know the people who are looking for that specific information can easily find me.

Of course, the fact that I have been occupying real estate on the web for 13 years also greatly contributes to my search engine ranking – I have proved myself reputable and the search engines know they can rely on me for excellent content that engages people and gives them the answers they’re looking for.

Go ahead and set up your free Google Analytics account now – we will enter the Tracking ID code on your site later, when you’re ready to launch.

http://www.google.com/analytics/index.html

Note: When I give you blog setup instructions for your programmer, Google Analytics will already be included in your blog setup instructions. So just make sure you register for your account at this stage and write down your Google Analytics Tracking ID somewhere you’ll be able to find it again. And of course, also file your login information for your Google Analytics account somewhere safe.

TIP: As you accrue more and more accounts and login information (usernames and passwords) it helps to store them all in one document for easy access on your desktop, in alphabetical order. Then every 3 months or so, PRINT that list out. This is the simple technique I use to organize all my Internet accounts and logins. Do not just store them in digital form and don’t store them on your phone or other mobile device that you could lose! Also, don’t use the same password for all your accounts and avoid using your name, birth date or other easily recognizable info for your passwords.


How Do I Shoot a Site Intro Video?

As you’re thinking about your website design and flow, you may want to consider using a video or slideshow presentation – usually at the top of your homepage.

Many people prefer to have a short video on the homepage of their site, that tells people in 1 – 2 minutes who they are, why they are here and what SOLUTIONS they have to share that will benefit viewers, or solve their problem, or meet their need.

This is what I did for Listen To Your Gut:


Others prefer to use a slideshow; which is a series of slides, usually infographics (pictures and text), that flow from one to the next in a viewer window – this is called a Slider:

[get embed code for LTYG slider]

Or, if your message is simple or you have only one or a few products, a still header image or banner is cool too:

If you have a product-based website, then a quick video showing exactly the same things about your product – how it will benefit me and solve my problem, what it is, why it’s great – is also a great option. Both Squatty Potty (product) and charity:water (service) use videos to quickly educate visitors and they are very successful.

Remember, that people have different learning styles and preferences, so it’s always good to have methods other than written text to communicate with your visitors, like video or audio. If you don’t want or need a video on your homepage, then consider putting one on your About Me page – or somewhere else applicable.

Kelly Rae Roberts has one of the best About pages I’ve seen – and she uses both video and written text to communicate exactly who she is and what she’s about in the most fabulously authentic way – go to her site and study it!

Now, obviously Kelly ($10 million in licensing deals) has the resources to shoot and produce a pretty cool video. But when you’re just starting out, this does not have to be a complicated endeavour – people are more concerned with your authenticity than your production budget.

You can use a simple Flip camera, or your iPhone – just make sure the lighting is nice and bright and you speak loudly and clearly. It’s best if you can match your outfit or background to something that matches or complements your site colors.

If the thought of making a video about yourself stymies or scares you, then simply answer these questions in front of a camera (in this order), and you’ll have your video:

  1. How I can help you….
  2. What I have learned that I can now share with you…
  3. Who I am. Where I have come from, the journey that’s led me to this place…
  4. Why I am here today…

Notice the order I gave you… most people start off their videos talking about themselves – because logically that makes sense. But that’s not going to make your viewer keep watching your video!

You have to start out talking about THEM. This point is of utmost importance – you must have a clear benefit for people, or why should they waste their time on your site? Nobody is going to spend time on a site just to admire your brilliance, there has to be something in it for them, there has to be a clear benefit to them.

You might think, well that’s not true, what about the site for an artist, dancer, singer, or performer? Like the video on Kelly Rae Roberts site? I’d spend time watching their videos, looking at their paintings, listening to their songs… Ah yes, because you have enjoyed their art, been entertained by their videos, moved to tears by their songs – you see, you have already received a direct, clear benefit!

Remember that the number one reason people buy something is because it solves a problem they have. The biggest benefit you can give your site visitor is to tell them that you understand what their problem is, tell them why you have the solution to their problem, and tell them how you are going to solve their problem.

Feeling Shy?

Now let’s say you are completely uncomfortable in front of a camera (you’d rather eat worms) or you don’t have any kind of device that can shoot a video. No problem! You just make a screenshot video of a powerpoint slide presentation, with your voice narrating. Here’s a very clear simple video by Greg Habstritt that shows you exactly how to do that in only 7 minutes! Greg actually shows you how to use PowerPoint and other detailed steps:

http://www.simplewealth.com/2011/01/19/how-to-create-a-high-quality-video/

Note: If you have an iMac, you can use the Quick Time Player software to record your screenshot video and don’t need to download Jing. Quick Time also allows you to save the video in whatever format you want – for web, mobile, etc.

Here’s the quick version (quicker than Greg’s) of how I create my videos using PowerPoint (or Keynote) and iMovie. If you don’t know how to use PowerPoint, then watch Greg’s tutorial above – this one just shows you how to turn the PowerPoint slides into a video:

Animated Video

Animated videos used to cost a LOT to have done, but Fiverr.com changed all that. Check out this video I had done for only $25 – you may have seen it before you joined LTYF:


For a video like this, you just need to provide the text (words) and they can either add stock music, or you can have them add your own music. Be sure and take a look at the different kinds of animation videos you can have done for $25 or less!

Alternatively, instead of having a video at the top of your site, you may want to have a series of photos. Perhaps you would like to have words on top of your photos? And then have the photos fade from one to the next…

Add A Slideshow To Your Header

This is called a slider. It is basically a slideshow comprised of a series of images, but you can also get sliders that allow you to combine video with photos. Or, perhaps you want a slider that rotates through three or four of your top videos.

After much searching I found a plugin called MetaSlider that also has a number of slideshow formats – some of which you can combine images with videos, or just have video, or add text to your photos, etc.

If you just want to have photos or still images in your slider, the plugin is free. If you want to have video, or have your photos alternate with video, then you have to pay for an upgrade.

You can download this plugin for free from the webpage.

OR the easier way (also free) is to go to your Blog Dashboard:

Click on Plugins –> Add New –> Search: Metaslider –> select it and click INSTALL NOW –> click ACTIVATE Plugin

Here I walk you through how easy it is to install MetaSlider and exactly how to set up your slideshow on your site. NOTE: To have your images show up full width across your site, make sure your images are sized to 1280×350 pixels:


Adding Custom Music

The music that plays at the beginning of all the Listen To Your Freedom videos is a ‘video logo’ that I purchased from AudioJungle. Video logos are very short (around 20 seconds) so sell for under $20. The longer tracks of 2 – 3 minutes are more expensive ($30 – $80). The cost of the music varies depending on whether you want to use it only for free content, or whether you’ll be charging for the end product. Or whether you want to use it for one purpose only, or multiple purposes.

If you’re ready to brand your videos by creating a Video Intro that appears at the beginning of every video, then you can either buy music, create your own music, or use free music.

The music tracks on these sites are either completely free or very low priced (as low as $1.99): SoundCloud, Vimeo Music Store, Free Music Archive, FreePlay Music, and StockMusic.

Don’t forget Garage Band on iMac– that is a very easy way to start creating your own music and I’m sure there are other apps and free software for easy music creation – just Google it!

If you can afford it, I feel it is worth buying a music track from somewhere like AudioJungle.net which will give you some high quality music, but also help to maintain exclusivity (i.e. less people will use paid music vs. free music). For example, this composer on Audio Jungle will give you a good idea of the variety available and how it all works: MojoMusic

In my LTYF videos, I use the same music for each clip. This is because I’m using the unique music as part of my brand identity – what you feel when you think of LTYF. Licensing music from AudioJungle or Vimeo Music Store is much cheaper than paying someone to compose a piece of music for you. I paid about $30 for the clip I use.

Publishing or uploading your videos to YouTube or Vimeo is also very easy as most video editing software (and some video cameras) have one-click uploads to YouTube and often Vimeo.

If you’re excited to start making videos right away, I have more resources and tips for you on creating YouTube and Vimeo videos.

In case you’re feeling a bit overwhelmed at this point, remind yourself that things are ONLY scary and overwhelming the first time you do them. Then they magically become easier and the process feels more exciting than scary. Watch the delightful Jody Jelas show you the super-fast way to put together a site intro video in only 7 minutes!

NOTICE how Jody gives you the really helpful, free content first, then she makes her sales pitch. You are far more likely to trust her and check out her offer after she has shown you who she is and given you something for free – tuck this away in your brain closet for later.

One last point: In the case of Kelly Rae Roberts’s video below, a lot of her video is actually just photographs, with words added on top of the photos. She may also have added some of her text letter-by-letter as a slideshow in PowerPoint, then imported it to her movie editor – as I showed you in my video above. I can also show you exactly how easy it is to add words on top of photos or artwork. So you could also do an entire video this way, if you prefer:

How About You?

Is your mind swimming yet? Do you feel overwhelmed with ideas and choices and you don’t know what to create for your site? No problem. Let’s grab your notebook and I’ll help you figure out what kind of video, or slideshow you’d like to have on your site…


So which of the following methods of presenting your key message appeal to you? Which media gives you that tingly, excited feeling? And which delivery method do you think would work best for your stu , or your audience? Feel free to check o more than one – remember there are a number of places you can put this “grab your site visitor” video or slideshow; your Homepage, About page, Contact page, Product pages, etc.

  • PowerPoint or Screenshot Video
Live Video – featuring you and/or your product
  • Photo Series Video – featuring words on top of photos or artwork, maybe a voiceover by you, and/or some music
  • Slider (photos, or video, or combination slideshow) in the header section of your homepage
  • Animated Video – perhaps done by someone on Fiverr.com

Choose one for now and then start planning it out. Either write down or sketch out your plan now. What words do you want to say or write? Remember the guide I gave you in this unit:

  1. How I can help you….
  2. What I have learned that I can now share with you…
  3. Who I am. Where I have come from, the journey that’s led me to this place…
  4. Why I am here today…

Just speak to these sentences one after the other (in this same order) and you will have the text for your video or slideshow! Yes, it’s that easy. Do it here:

  1. _______________________________________________________
  2. _______________________________________________________
  3. _______________________________________________________
  4. _______________________________________________________


Where do you want to shoot your video? Inside, outside, against a background, do you have enough light? Feel free to sketch it out here… Or are you going to hire someone on Fiverr.com to do an animated version of your video for around $25?


What photos or look/feel of images do you want to use? If shooting your video live, then what colors do you want to wear and show in the background – do these colors look good with your site? Write or sketch your ideas:


Are you going to have music – at the intro and outro (end), or during the video? Are you going to find a free clip, or pay for a more unique clip and use it as part of your branding (your specific look/feel):


Now remember, when you’re ready to work on your site video, expect it to be frustrating, scary and take a bit of trial and error. All these things are NORMAL when doing anything for the first time. So prepare yourself for some hassle and treat yourself with compassion!


How Do I Set Up My Business Emails?

In order to get your business emails set up, you’ll also need to be ready to buy your domain and hosting – ideally, you will buy them all at the same time through the same service provider. I suggest you read both this page and the page on registering your domain and choosing a hosting package before actually purchasing anything. Getting the right systems for you in place at the same time is going to save a lot of hassle in the future.

So let’s talk about how you’re going to finish the process of setting up your site infrastructure by getting your email boxes organized and set up. You’re going to:

  • Get personalized email addresses with your domain name and get them set up for easy access
  • Appoint a fictitious VA (virtual assistant) who will handle all customer service issues.
  • Set up your email accounts on your computer for easy access.

If you’re currently in business but using a different email system than what I’m suggesting, read through the material to compare – maybe you’ll want to swipe some tips that will make your life and business easier! Like this Freedomite who’d already been in business for 6 years, managing a full client load, when she implemented LTYF tips and switched her emails to this system:

“Implementing this email system was phenomenal! I can’t believe I put it off for so long because it changed everything for me! I spend WAY less time dealing with emails now, emails are not falling through the gaps, my friends and family are not complaining anymore. It’s actually had the most impact of anything I’ve done on my business this year – it really is phenomenal!!!”- A.S., Cornwall, UK

Step 1: Get your emails set up

You will need to sign up for email addresses with your hosting package. This means that your email addresses will contain the name of your site, rather than gmail or yahoo, or some other free email service. This makes you look like a proper business and builds customer confidence that you are legitimate and in it for the long-term.

I like to set up separate emails for the basic customer service categories and then these can also stay the same no matter who is answering that email box. For example:

service@listentoyourgut.com

orders@listentoyourgut.com

info@listentoyourgut.com

and then you can also set up your own email that’s more personalized:

lucy@listentoyourgut.com

NOTE: I strongly recommend you keep your personal and business emails separate. This may not make a lot of sense to you now, but trust me, as your business grows and expands, it will lay a strong foundation for both time management and customer service.

So if you already have a personal email, like Ralph@gmail.com, keep that email and continue using it for all of your friends and family. Do not even give friends or family your business email! This way, when you go to check your emails, you’ll only look at your business email inbox and deal with business concerns promptly. Later on in the day, or after you’ve finished working for the day, you can check your personal email.

This system also safeguards against the biggest drain on your time and energy: Emails! You can waste half or a whole day answering emails that do NOTHING for your bottom line. They don’t expand your business, obtain or service existing customers, set up joint-ventures, etc. But because they’re sitting in your Inbox with an urgent-feeling sign next to them, you feel they are important.

Then you get caught up in the interesting email from your brother who’s trekking through Nepal. And the urgent request from cousin Sally, whose mother is going into hospital… you get what I’m saying?

If your business and personal emails are completely separate, there is no temptation or even chance of you getting distracted and moved to action by anything other than business concerns.

Likewise, if your family members need to reach you, they know they have a private and dedicated way of communicating with you. There’s nothing worse than having to send personal emails to someone’s business email where their virtual assistant or other people might see them.

For my email system, I take it even further. Here’s an example of how I’ve set up my email inboxes. Let’s use Ralph again as the example:

BigRalph@bigboxes.com – since Ralph didn’t already have a personal email account with gmail or yahoo, this is his personal email address.

RalphG@bigboxes.com – this is a business email, but only for select business clients, colleagues, joint-ventures, etc. who are very important to Ralph that he wants to respond to within 24 hours. Ralph NEVER uses this email to sign up for anything online, or to shop, etc. That way he keeps this mailbox clean for only the most important stuff and never gets flooded with spam or junk.

ContactRalph@bigboxes.com – this is a business email that Ralph uses for two purposes. First, he gives it out to 2nd tier business contacts, or certain customers he’s chosen to enter into personal correspondence with. He also uses it to sign up for any newsletters or online business offers. If he makes any online business purchases, he use this email for his Amazon or Fotalia photography accounts, etc. This email box is not as important as RalphG above, so when he is pressed for time, Ralph knows as long as he checks RalphG, he can let this one slide for a bit.

service@bigboxes.com – this is the contact email that’s given out on Ralph’s site, his newsletter, advertising, and any other communication from his company. He also uses this email when setting up social media accounts with YouTube, Twitter, Facebook etc. that he is going to want his customer service manager to handle the admin for. His customer service manager, or virtual assistant (VA), takes care of this email box on her own and only forwards Ralph things she feels need his personal input.

When his customer service manager forwards him stuff, she sends it to his RalphG@bigboxes.com email, that way Ralph knows it’s important. When he replies, he writes his response, then sends it back to his VA (service@bigboxes.com) and she then forwards it to the customer. Ralph and his VA do not give the customer, or any other person, his top tier business email. And Ralph wants them to keep communicating with his customer service manager, who he has trained and trusts to only tag him when needed.

orders@bigboxes.com – this is the email connected to Ralph’s online store and any purchases made, follow-up, shipping etc. Ralph’s VA checks this email box before she checks the service@bigboxes.com box. Because once someone has paid Ralph money, or is trying to pay Ralph money, they become his number one priority and any problems or questions about their order need to be dealt with first. After the product or service has been purchased, the stellar customer service must continue because how you take care of them will determine whether they ever buy from you again – and whether they ever refer anyone to you, or warn them off!

Step 2: Use Your Email Boxes as your Filing System

As you read through the email set-up above, it may appear to be complicated. But when you realize that setting it up this way also acts as an automatic filing system for your business, you realize that it’s actually a really efficient system. If you find yourself wanting to brush off this section, or put it off until later, then read this email again from a fellow Freedomite:

“Implementing this email system was phenomenal! I can’t believe I put it off for so long because it changed everything for me! I spend WAY less time dealing with emails now, emails are not falling through the gaps, my friends and family are not complaining anymore. It’s actually had the most impact of anything I’ve done on my business this year – it really is phenomenal!!!”- A.S., Cornwall, UK

Watch this video where I walk SuZen Maureen through this exact same process and see how easy it is to set up and use this system:

Feel free to copy this system, or alter it to fit your individual needs. Even if you don’t need all these email boxes right away, you might as well get it set up as you will indeed be needing them soon! Here’s the shortlist:

Nickname@mysite.com – Personal email, family and friends

Firstname@mysite.com – Top priority biz email

ContactFirstname@mysite.com – Normal biz email, also used for opt-ins, affiliates, shopping carts, etc.

service@mysite.com – customer service questions

orders@mysite.com – order management and questions

You may want to print this shortlist out and tack it to your computer to make sure you use them correctly until you get to know them – remember, this system will only work if you keep them separated according to task.

So also make sure you configure your computer email software so that it automatically SENDS from whichever mailbox you’re working in. So if you’re reading emails in your service inbox, you want your replies to be sent from service – not BigRalph, for example.

Some people prefer to use a web-based mail. But for filing, sharing and organization I’ve always preferred Apple Mail on my computer. So use whichever system you prefer, but make sure you use the email tutorials (provided by whichever hosting company you choose) to get your email boxes set up correctly and start using them right away.

Step 3: Assign Yourself a Free VA Immediately!

When I first started my business, I used this exact same structure, even though I was the only one working! I called my customer service person by a pseudonym (I combined my middle name with my mother’s maiden name).

This is also a good idea because if you are selling a book, or a personalized service, if a customer or caller knows they are talking to the author or ‘big cheese’, they can tie you up for an hour with their personal story and it is very difficult to cut it short without offending them. But if they think you are just the customer service person, they won’t get into such detail and they won’t try to ask you all kinds of questions they should be paying you to answer!

Remember the importance of setting things up properly from the start? That way you manage your time and you also train your customer’s expectations. Trust me, your business does not need to be very big before you are going to need to hire a virtual assistant. A virtual assistant (VA) is like a personal assistant, but she/he can live anywhere in the world, as long as she/he has access to a phone and Internet connection.

You can hire an excellent VA without breaking the bank, especially if you can leverage the differences between worldwide currencies. We are based in Canada and have several VAs in the Philippines who work for $4/hr (in Canadian dollars), and they are managed (and trained) by our VA in California, who we pay $22/hr.  It’s win-win, because $4/hour in the Philippines works out in the local currency to be comparable to the salary an electrician makes, and puts our VA firmly in the middle class – while being very affordable for us. You may eventually have several VA’s in different countries, all working part time, so you can cover different time zones.

You are the most valuable person in your business, no one else can do what you do. Is your time better spent marketing, setting up joint-ventures, consulting and whatever else increases your revenue, or is it better spent helping Alice figure out how to download Adobe so she can open the pdf she requested from your site yesterday?

We have detailed instructions on how to outsource just about anything, but for now, just keep in mind that throughout Listen To Your Freedom I am teaching you how to set things up properly right from the start, for the least amount of money, so you can expand easily as you grow. Believe me, you will not save time or money by scrimping on set-up.

Step 4: Choose Your Email Names

Take some time now to think about your email system and how you want to set it up. You might use the same system outlined above, but you may want to make the descriptors more unique. Instead of using “service” for example, you may want to use “concierge” – because it fits your business better.

Make sure you also set up and start using these emails right away. Don’t know how to do all this? O-ho, that’s why the 24/7 live customer service offered by your hosting company, like GoDaddy, is so important! Whatever you don’t understand, or don’t know how to do, just call them! Whether you use a Windows or Apple computer, they can guide you on how to set up the email inboxes on your computer. Also, watch the video above as I walk through the process and make it really easy to understand.

Okay, grab your notebook and write down the email boxes you want to set up, so that you will have them all ready when you go to register your domain and purchase your hosting and email package all at the same time!