How Do I Use PowerPoint or iPages to Create a Book or Course?

Another easy way to create online programs or courses (or simple eBooks) is by using PowerPoint (or iPages if you have a Mac) and then saving your PowerPoint presentation as a PDF. You can import your own artwork or photos into PowerPoint, or use royalty-free images sourced from Fotalia or Dreamstime. I do not recommend you use images from ‘free’ photo sites – here’s why. PowerPoint also has a lot of formatting tools and graphics that make your eBook, course or program look really professional.

BUT you can be a complete techno-phobe and still create an amazing product using PowerPoint! SuZen Maureen had never used PowerPoint before and was scared and intimidated by the prospect. However, her 13-year-old son had used PowerPoint in school and so he showed her how.

If you don’t have a kid or spouse who can help you, you can also watch the free tutorial videos on YouTube as they are very good. So here are a couple of pages from what SuZen created on PowerPoint – this is a great example of a simple, yet effective, How-To eBook:

Leonie Dawson uses PowerPoint to create eBooks in one day. She uses these eBooks as free giveaways to build the relationship with her followers, or to get new signups for her million dollar+ business. Here’s a couple of pages from her eBook, A Message From Your Angels:

To see the entire eBook, you can download A Message From Your Angels here (Right-click and Save As…):

Before you begin using PowerPoint to create YOUR eBook, go over these PowerPoint ground rules, so that when you save your PowerPoint as a PDF file it will not be too big to download easily:

1. Make sure you do not import large size photos to PowerPoint. If you paste the originals from your camera, then yes, they are likely way too large and that will make your pdf file too big for someone to download.

The way around this is to first save your photos as smaller size images. Then import or insert those smaller photos into PowerPoint. If you have a Mac, go into iPhoto and email yourself a HIGH Quality (not Maximum quality) a MEDIUM or SMALL size image of each of them, save the photos from your email to your Desktop (or designated file folder) and then those are the smaller size ones you can import/insert into PowerPoint.

Always use the insert/import function for photos, don’t just copy/paste as this seriously affects file size.

If you don’t have iPhoto or a photo editing software, then use a screenshot software – free ones are SnapNdrag for Mac and Snipping Tool for PC. In that case, you open the large jpg photo on your computer screen, then shrink (zoom out) the image until it’s the size you want (on the page), then use your screenshot tool to take a photo of it at that size. See this video for instructions on how to take a screenshot photo:

2. Also be careful about layering too many ‘effects’ – that will also affect the file size of the finished pdf eBook.

If you follow these two points and your finished PDF eBook is still too big (file size is too large for quick downloading), then here’s a detailed list on everything that could possibly happen to make your finished eBook too big, and so you can check for each problem:

My PowerPoint eBook Is Still Too Big!

If you save your PowerPoint as a PDF file and still find it is humungous, then go through these lists and troubleshoot what else you could have done:

http://office.microsoft.com/en-ca/powerpoint-help/reduce-the-size-of-your-powerpoint-files-HA001116882.aspx

Here’s another great (more simple) troubleshooter:

http://elearningcentralia.wordpress.com/2012/05/04/powerpoint-too-big-to-email/

Save Your PowerPoint As A PDF File

When you have finished creating all the slides in PowerPoint that make up your eBook, then save it as a PDF.

To do that, click on:

FILE -> Save As

Then in the box that opens up, change the file format from .pptx to PDF:

If you want to password-protect a PDF you have created from PowerPoint, you can either use Adobe Acrobat (costs money) or download a free PDF security plugin.

And that’s it – YAY!!! You just created your first PowerPoint eBook – congratulations!

You can now learn how to upload that PDF eBook to your server, so that you can email out a download link to whoever purchases or sign-ups for your eBook.

Look at the example of Leonie Dawson’s eBook I gave you above… this was the name of her PDF file: leonie-angelmsg.pdf

And then this is the download link (I uploaded Leonie’s PDF to my own server):

http://listentofreedom.s3.amazonaws.com/leonie-angelmsg.pdf


PowerPoint is a really fun way to create an eBook, since you can use lots of visuals – photos, graphs, charts etc. Which also means you don’t need to have a lot of text for your eBook to look good – in fact, you can create an eBook in a day! Remember the examples I gave you from Leonie Dawson and SuZen Maureen? What are some PowerPoint eBooks you would enjoy creating?


How Do I Create an eBook or Manual?

In these next few units, we’re going to look at how to write, produce and publish your book, eBook, instruction manual, tutorial, or course manual. Don’t worry, we can also cover selling and delivering that item to your customer when you’re ready. But in this discussion we’re just focusing on product creation and getting it ready to sell.

And if you think it’s hard to write a book, or the idea intimidates you, then be sure and read this article first on how writing a book is as easy as writing a few emails to a friend – really!

But once your book is written, a slew of other questions may ensue: Should you self-publish, or look for a mainstream publisher? Should you do a digital eBook, or get your book printed? And now that you’ve written the book, how do you get it out there to the people who will want or need it?

When you’ve written your first book, or you’re thinking of writing a book, the first questions you need to ask yourself are:

  • Who is my customer for this book?
  • How am I planning to sell/market this book? How will my customer find out about this book?
  • How will they be purchasing? – cash, credit card, online, at bookstore, at my workshops, etc.
  • Where do I want the book to be available? (bookstores, online bookstores, my online shop, my website, my workshops, etc.)

Your answers to these questions will then determine the best method of publishing or printing your book (including digital methods). Let me walk you through the process.

My publishing company, Caramal Publishing Inc. has been going since 1999 and we’ve published hardcover, softcover, eBooks, Kindle books, CDs and DVDs.

I’ve found that for shorter books (up to 100 pages, but ideally not more than 60 pages) people don’t mind an eBook. But for anything longer, they may want the physical book. For many of my longer books, people will buy both the eBook (so they can get started right away) and the printed book.

Kindle and Other e-Readers

The exception to this rule is Kindle (or other e-reader books). If someone likes using their e-reader device, then they will often prefer a book in that format, regardless of length. Although, you also cannot assume that people like to use an e-reader device, as many do not.

The other consideration with publishing on Kindle or other e-readers is readability and ease of navigation. So, if you have a fiction book, then it’s usually fine on Kindle, regardless of length. However, if you have a non-fiction book; any kind of how-to, or reference, or anything else that involves the person dipping in and out, or looking for specific information, then the e-readers can be very annoying to navigate, if the book is longer than 100 pages or so. In this case, you would want to also offer a printed version of the book.

I have a lot of customers who purchase BOTH the hardcover and eBook (which I offer at a substantial discount) so they can get started right away while they’re waiting for the hardcover to be delivered. Or some customers want to also have the eBook so they can access it on their mobile device if/when they want to. And not surprisingly, there are also customers who buy the eBook or Kindle version to check it out first, and see if they like it enough to buy the printed book.

So What Should You Do?

In an ideal world, you would offer your book in all 3 formats: eBook, Kindle (e-reader), and printed (softcover or hardcover). In reality, you should start with whichever version you can afford.

If you have a website with good site traffic, or a good-sized email list, then start by selling an eBook. eBooks in .pdf format are the easiest to format and sell.

Kindle formatting, uploading, entering the SEO keywords, description etc. is a lot more work because it can be quite buggy and then the glitches are time-consuming (and frustrating) to fix. However, you can use a reasonably-priced service like BookBaby to handle all of that for you if you have the budget.

If you don’t have a lot of visitors to your site, or a decent size email list, then who are you going to sell your eBook to? In that case, it may be better to do a Kindle book and invest some time (or money to hire someone) to do it right, with excellent SEO (search engine optimization) elements so that your audience can actually find your book on Kindle, or Barnes & Noble. Again, BookBaby can do all this for you for a reasonable price.

Of course, you could also just link to your book listing on Kindle from your site. The only downside to this is that you are sending people off your site. But the upside is that you don’t have to set up PayPal or any kind of shopping cart on your site.

REMEMBER: There are many ways to skin a goat! Translation: There is no right or wrong way to do things here. I’m giving you all the options and then you have to connect with your gut and make the best decision for yourself at this time depending on your available budget and time constraints. Nothing is carved in stone and you can always do things in stages, or modify as you go along. Take a breath.

Another great option you have available that is super cheap (and even free) is to use an Amazon company called CreateSpace. With CreateSpace, you can upload both your book text and your cover photo and text to a pre-set template they provide. All you need is an Amazon account (free) and a CreateSpace account (also free).

Once you have created your book within CreateSpace, you can either print off anywhere from 10 – 50 copies to get started (at around $4-$5/book), or you can just use Print-On-Demand. Printing on demand means that CreateSpace only prints a book after a customer has purchased it – so you don’t need to invest any money up-front. With print-on-demand, your customer would first buy your book on Amazon, then CreateSpace would print it and ship it out to your customer.

Writing Your Manuscript

When you are creating the manuscript of your book or eBook, the easiest format to create your book in is Microsoft Word (.doc).

After your manuscript is written, what you do with it depends on whether you want it to be:

  • A printed book
  • A Kindle or e-reader book
  • An eBook

For both Kindle books and printed books it can be fairly difficult to do the layout so that it reliably looks the way you want it to and also so that it looks good on the page.

For a printed book, if you are fluent in using InDesign or Quark, you can do the layout yourself. For myself, I always outsource this part. BUT you still must maintain control of making sure your design elements are specified clearly and then you still have to double-check everything to make sure all is how you want it.

I Can’t Write!

Now if the thought of writing a book, or eBook scares you, or sets you off protesting about how you could never do that, or don’t even know where to start. Then let’s take a break right now and I want you to go check out this post on Brainstorm Your Biz, where I show you a method of book writing that is so easy, it requires the same effort as an email to a friend – seriously! After you’ve read it, come back here and we’ll continue on.

Why do I want you to write a book? Because it is the absolute easiest and fastest way to position yourself as an expert. It is also a super easy way to create a free gift for your sign-up box that has a good perceived value. Your first eBook does not have to be a major slog! It can be 10-20 pages long. As long as you have a nice cover, it’s proofread properly, and you’ve laid out the text nicely (yes, I will show you how to do all this), you will have a nice published piece you can sell, or give away to your site visitors after they fill out your opt-in form.

If you’re stumped for ideas of what to write about, go back to your customer’s pain points. Take just one thing your ideal customer needs a solution for and write about that. Or pick one thing that would be fun or entertaining to your customer and write about that.

And remember, you don’t need to physically write the book; you can always voice record it and get someone on Fiverr.com to transcribe it for you. Then get your 3 pickiest, most literate friends or family members to proofread it for you – give it to the first person, make all the corrections, then give it to the second person, make all their corrections, then give it to the third person and hopefully by the time you’ve corrected the errors they’ve found, you’ll have an error-free book!

Kindle and e-Reader Books

For Kindle, Kobo, Nook, iBooks, or other e-reader books, I found the formatting process quite difficult. Sure there are lots of instructions and it doesn’t look too complicated, but unless you have a fiction book (novel) that just scrolls straight through, you can go crazy trying to get it formatted properly.

If you need to have a clickable Table of Contents in your book, or you have diagrams, or headings and sub-headings… then getting your manuscript to appear the way you want on an e-reader device like Kindle is a real hassle. I outsource this to someone who specializes in e-reader platform uploads and I get her to do the complete job for me: Format, upload to Kindle, book description, keywords, author profile, etc.

You can post your job advertising for someone who specializes in Kindle, Kobo, Nook, or other e-readers on Elance.com, or you can use BookBaby.com to do it all for you and upload to multiple e-reader platforms.

Style Guidelines

For any book (whether printed or eBook) I always set up these style guidelines as soon as possible. For sure, my Word .doc that I sent to my layout person adheres to each of these – of course, you could change the fonts and font size for these however you wish:

  • Font size and type (eg. Helvetica 11 pt)
  • Headings (eg. Helvetica, Bold, 16 pt)
  • Sub-Headings (eg. Helvetica, Bold, 14 pt)
  • Sub sub-headings (eg. Helvetica, Bold, Italics, 12 pt)
  • Leading (space between lines) – about 1.2 lines; show me samples and I will choose
  • Page Numbers – Top of page, right corner of right-facing page and left corner of left-facing page
  • Chapter Title Pages – make sure they are always on a right-facing page
  • Front Matter appears in this order: Reviews, Disclaimer & Copyright Info, Table of Contents, Acknowledgements

Creating Your eBook As a PDF File

A PDF file can be made available to your customers as a download, via a weblink, that you send them once they’ve opted in (if it’s a freebie) or paid for it (if it’s for sale). For example:
http://paid-know-about.s3.amazonaws.com/What-Need-Know-About-Probiotics.pdf

Don’t worry, if the how part isn’t clear to you, you’ll learn all about content delivery in the next Module – for now we’re still focused on producing your book. So your customers will receive a file that they can scroll through and read on any computer, smartphone or tablet with PDF reading software (like Adobe Reader, which is free to download). They can even print it out if they prefer to read it that way. On your site or in your shop, you can display your eBook with an image of its cover to make your product look official and professional. Like this:

If I’m creating an eBook, or Report, or Tutorial that I am going to save as a PDF and then email out to people; I create my manuscript following the same style guidelines I gave you above. The only change is that I set the Leading (or line spacing) at 1.5 lines. To do this, you highlight/select your entire document, then click on FORMAT -> Paragraph. Select Line spacing: 1.5 lines and then check the box that says: Don’t add space between paragraphs of the same style. It should look like this:

and then click OK.

If you are creating your eBook, Report, White Paper, Tutorial etc. yourself, then you simply get your Word document (.doc) formatted correctly – as I outlined above – and then save it as a PDF (.pdf).

To save a Word .doc as a .pdf you open your .doc, then click on:

File -> Print

Then click the button on the bottom left that says: PDF -> Save As PDF

Here’s what that looks like:

As you’re saving your .doc to .pdf format, you can also add some security options, so let’s talk about that next.

eBook Security

There are lots of security options for eBooks – but at the end of the day, once someone has bought the eBook, if they want to send it to someone else they can. And why not? We can lend our physical books anytime we want.

The only way you can really deter people from sharing your eBook en masse is to lock it with a password. But they can still email it to their friends, along with the password.

To do this, you simply click on SECURITY OPTIONS when you are saving your .doc as a .pdf and here’s what pops up:

You can then select which actions you wish to password-protect.

Personally, I find it super annoying to have to enter a password every time I open an eBook – annoying enough that I would really hesitate to purchase again from someone who I knew was going to put me through that hassle.

Also be prepared to have your customers emailing you endlessly because they have forgotten or lost the password; if you choose to password-protect anything.

I don’t think you should ever restrict printing an eBook, because many people (especially older people) always print their eBooks out.

It does, however, make very good sense to use the Security Options box to prevent people from copying text, images and other content. I check this box and then I do not give the password out to anyone. Because I don’t mind if people share the eBook, I do not mind if they print it, but I don’t want them to be able to copy/paste sections of it into their blog, or emails, or anywhere else.

For my health stuff, I make more money selling products from my health store than I do selling eBooks, so I do not password-protect my eBooks. I don’t actually mind if people pass my health eBooks around.

I may password-protect the course content PDFs in Listen To Your Freedom though, because I don’t want people making these available for Internet-wide download and devaluing my program. Or rather, I should say, I don’t want to make it EASY for people to share LTYF Modules en masse! But then again, I may not. There are a number of apps you can download that will unlock any PDF – so if someone really wants to rip-off your stuff, they certainly can.

Remember, that at the end of the day, people can swipe and share anything they want – there is always a way. As long as your copyright notice is on your stuff, you can prosecute if need be. But I don’t sweat it too much, as I do believe in Karma (you reap what you sow) so I just leave that all up to the flow of the Universe. So far, I haven’t had to take legal action against anyone.

Okay, so just to re-cap, here are the steps involved in creating your eBook, or manual and here’s the easy way to write the book:

  1. Write manuscript in Word .doc format.
  2. Format all style elements.
  3. Add the cover, front pages, and any back pages.
  4. Have document (including cover) proofread by at least 3 people who are picky, critical and good at spotting mistakes.
  5. After making all the corrections and you think it is perfect, give it to your most picky person for the final proofread.
  6. Save the finished document as a PDF and set Security Options.
  7. Keep the .doc file for future edits and also for Kindle formatting.
  8. If you’re having the book printed, head over here to learn more.

How Do I Compress An MP3 File?

So let’s say you’ve recorded your audio course, or meditation, or audio book, or teleseminar series… and you download it onto your iPod or mp3 player to test it and you realize – oh my gosh, that just ate up a third of my memory! And you wonder, how big are those file sizes anyway?

As soon as you edit an MP3, or add some music to it, or perhaps your settings for your recording weren’t correct, you can end up with a monster file size. Not only is this hard for your customers to download, but if your audios eat up all the room on their iPod, they won’t be in a rush to buy more, because they’ll just remember the hassle. It’s really annoying to have to delete all your music playlists just so you can fit an audio book or course on your device (yes, I speak from experience!).

Okay, so now we know what the problem is, how can we fix it?

Google to the rescue! Just google: ‘how to compress mp3 file’ and it will pull up a variety of instructions depending on which computer and software you have.

If you have a PC, then LAME is an excellent free MP3 encoding software to use. You can use it to either make an MP3 file smaller, or to convert a WAV file to a smaller MP3 file. You can download it and get all the instruction for use here: http://lame.sourceforge.net/download.php

Then here is an instructional video, showing you how to use LAME and Audacity to compress and export MP3 files if you have a PC:

If you’re on a Mac, I am going to tell you how to compress your WAV or MP3 files into a smaller file size – without losing audio quality – using iTunes. I will also share what I found the best compression rate to be: The compression rate will apply to any computer or software (not just iTunes).

First of all, here is a good video that shows you how to use the MP3 encoder in iTunes to make your MP3 files smaller:

After watching this video, I did some testing with an audio recording that consisted of a spoken voice with music in the background. The file was created in Audacity using a voice recording on one track and instrumental music accompanying it on another track.

The original recording was done at 160 kbps (kilobits per second – the data transfer speed) and the finished file was 50.3 MB, which is a bit large.

I then tested compression rates for the file and here are my results:

80 kbps – file size dropped to 27 MB, no noticeable drop in audio quality.

64 kbps – file size dropped to 21 MB. The music sounds the same, the voice is slightly more muffled; has mildly lost the upper treble/sharpness range. MAY be preferable though as voice may feel a bit more soothing.

56 kbps – file size dropped to 16.9 MB. Voice is noticeably more muffled; not good quality for the voice – sounds like a cheap recording. And the music has lost its range and complexity of sound.

I also kept these setting as follows (rather than MONO as the video suggested) as I didn’t want the recording to play only out of one earphone, or only play out of one speaker in the car!:

Sample Rate: Auto

Channels: Auto

Stereo Mode: Joint Stereo

So my MP3 Encoder window looked like this:

ONE more thing: I noticed when playing the file on my computer, that I had to have the volume turned way up. Which may be okay for an iPod, but if someone was playing this recording in an MP3 player that is across the room, or in a yoga studio (for example), then I have not left enough volume for them to increase as needed.

So the way to fix that is in Audacity – I had to go back to the original recording and set the volume level higher before exporting. The current volume needed to be roughly doubled. You can increase the volume on an audio file by first Selecting the entire track (Edit->Select->All) then go to Effect->Normalize the track volume, then Effect->Amplify the track volume:

Then you export your file again. If you have LAME installed, then you can export it as an MP3 file. But if you don’t (or if it’s buggy) then you can export it as a WAV file, then use iTunes to convert the WAV file to an MP3 using the MP3 encoder as shown in the video above.

Of course, the way to avoid the low volume problem is simply to set the recording (audio input) levels higher in Audacity to start with! Or, if you are recording into your iPhone or iPod using Voice Memo, then move your device closer to your mouth.

By the way, for those of you who want a really thorough understanding of what all the options on the MP3 Encoder in iTunes are, here is the complete explanation from the Apple Help Library:

The MP3 Encoder pane contains the following settings.

Extension: This field displays the MP3 file extension (.mp3) automatically after the MP3 output format is selected from the File Format pop-up menu or the (+) pop-up menu in the Settings tab.

Allow Job Segmenting: This checkbox allows you to turn off job segmenting. It is relevant only if you are using Compressor with distributed processing and with multi-pass encoding. (The distributed processing feature is limited to computers that have Final Cut Studio installed.) For more information, see Job Segmenting and Two-Pass or Multi-Pass Encoding.

Stereo Bit Rate pop-up menu: The higher the Mono or Stereo kilobits per second (kbps), the higher the audio quality and the larger the file size. The most common bit rate for stereo MP3 files is between 128 kbps and 192 kbps. Lower bit rates are more appropriate for sound files containing voice recordings (as opposed to music).

Some example settings and uses include:

  • 32 kbps: AM radio quality, suitable for medium quality speech
  • 96 kbps: FM radio quality, suitable for high quality speech or medium quality music
  • 128 kbps: Suitable for good-quality music
  • 256 kbps and 320 kbps: Suitable for music that is near CD quality

Use Variable Bit Rate Encoding (VBR): This setting varies the number of bits used to store the music depending on the complexity of the music. This can help keep file size to a minimum.

Sample Rate pop-up menu: The number of times per second that the music waveforms are captured digitally. The higher the sample rate, the higher the quality and the larger the file size. Don’t choose a sample rate higher than the rate used originally to store the music or you’ll waste space. CD quality, for example, is 44.100 kHz, so choosing a higher rate when you’re encoding from a CD is unnecessary.

Channels pop-up menu: If you don’t have stereo speakers or if your audio files are monaural, choose Mono (mono files are about half the size of stereo files). If you’ll be listening to your MP3 files using your stereo system, choose Stereo.

Joint Stereo: When this checkbox is deselected, your MP3 files contain one track for the right stereo channel and one track for the left. In many cases, the two channels contain related information. When the Joint Stereo checkbox is selected, one channel carries the information that’s identical on both channels, and the other channel carries the unique information. At bit rates of 160 Kbps and below, this can improve the sound quality of your converted audio.

Smart Encoding Adjustments: Select this to have Compressor analyze your encoding settings and music source, and then adjust settings to maximize quality.

Filter Frequencies Below 10 Hz: Filtering inaudible frequencies results in smaller, more efficient files without perceptible loss of quality.

OKAY, did you learn enough about creating audio files? Whew. I know we had to get rather technical in some spots there, but that’s just the way it is sometimes!

How Do I Create An Audio Course?

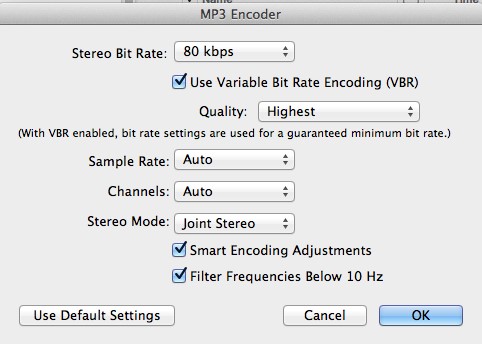
We’ve talked often in Listen To Your Freedom about how people have different learning styles and preferences. So while some people prefer a book, or online course and workbook, others prefer learning via video or audio.

So when you’re deciding which format (audio, video, written) to present your solutions or information in, it helps to take into account all of these factors:

  1. What do YOU enjoy doing? Do you prefer writing, or video, or speaking (audio)?
  2. What does your customer prefer, and what do they need, based on their lifestyle?
  3. What are you able to do, and what can you afford to do at this time? It is better to just produce something simple, rather than waiting for your ideal scenario.

For me, audio is one of the easiest ways to develop and package content. Probably because I find it quite easy to speak, or read aloud, and I make very few mistakes when I’m speaking – so I don’t need to do much editing.

But let’s say you’ve already written a book or eBook. Well, creating an audio version of the book is an easy next step – and some customers will buy both.

Or perhaps you want to provide additional in-depth training in your audio course.

Or perhaps your book, or online course is really huge, so you want to chunk it down into stand-alone units and each unit consists of three one-hour audios.

All you need to create an audio course is a high-quality microphone that plugs into your computer, and Audacity, a free, easy-to-use recording software. Or, you can use a teleseminar recording service, and you dial into it with a corded, land-line telephone (ensures good quality).

Microphone Recording

If you want to use a microphone to record MP3 files directly onto your computer, you have a few different ways to go, Premium, Mid-Level, or Budget Bob. Let’s start at the top…

Premium Recording Set-Up

The Shure PG-42 USB mic is a really good microphone (about $249) that plugs right into the microphone jack on your computer. It will give you the clearest, best quality audio and can be used to record singing as well. Keep in mind though, that for a microphone of this quality, you also need to have a fairly quiet room to record in.

Unless you can completely avoid popping your “P” sounds (which causes a bit of a muffled boom in the recording), you also need to purchase a microphone pop filter. And by the way, the only way you can completely avoid popping your “P”s is to not pronounce them!

The Nady MPF-6 Clamp On Microphone Pop Filter is a good one, at a really good price (about $18).

You then can record onto Audacity (free for both Mac and PC), or GarageBand (Mac) or the very high-end Pro Tools for Mac or PC (really not needed unless you’re recording music).

However, please know that there is NO point in getting super high quality recording tools if you don’t have a soundproofed place to record in! Remember that the finer your equipment, the greater range and quality of sound it will record. So yes, it will pick up the crows outside, your washing machine, someone knocking on your front door, and your chair creaking.

Next, your recording room would also need to be set up to create a good quality or timbre of sound. For example, hardwood floors, bare walls and windows are all hard surfaces that the sound will bounce off of. So you need carpet on the floor, and rugs or thick fabrics covering the walls and windows (or egg cartons work well too).

Mid-Range Recording Set-Up

Now let’s look at the mid-range: A much cheaper mic, that has also gotten rave reviews from podcasters and Internet radio show hosts is the Audio-Technica ATR2100 USB/XLR Microphone. At only $53, it is far cheaper than the Shure mic listed above. But if all you’re doing is recording audio products (no singing) then this will likely be just the ticket. It plugs into your computer via a USB cord. It also comes with a mic stand for your desk, so you don’t have to hold it.

Then you would also purchase this Reduce Pop and Windscreen Mic Cover to place over your mic head and help get rid of those popping-P sounds – since it’s less than $3 you might as well get it, then do a test recording with it and without and see which works better for your voice.

Here’s my test recording, done in my office using the Audio-Technica microphone and the mic cover, recorded using Audacity:

Click the PLAY button [sc_embed_player fileurl=”http://listentofreedom.s3.amazonaws.com/audiotechnica-USB-test.mp3″]

Alternatively, you could wear a headset microphone that plugs directly into your computer. Again, it is best to get one that is corded for best quality and no interference during transmission. Just make sure it is compatible with your computer. Here are two good quality headsets that you could use:

Plantronics Audio 326 Stereo PC (plugs into the microphone jacks on your computer) – note this one is only for use with a PC, it will not work with a Mac, unless you buy an adapter (about $13).

Plantronics Audio 478 Stereo USB Headset Microphone (plugs into a USB port on your computer – so better sound quality) – about $29

Here’s my test recording, done in my office using the Plantronics USB headset microphone, recorded into Audacity:

Click the PLAY button [sc_embed_player fileurl=”http://listentofreedom.s3.amazonaws.com/plantronics-USB-test.mp3″]

Stereo Plug vs. USB Plug

If you get a microphone or headset with an audio/stereo plug (plugs into the microphone jack) it draws power from the computer, and converts your voice into an electrical signal only, and then sends it into the sound card where it can be processed as data.

But if you have a microphone or headset with a USB plug, it directly converts electrical signals into data, which is sent to the computer via USB. This usually results in better sound quality via the microphone.

The other benefit to the USB headset is that when you plug it in, the audio in/recording and audio out devices are automatically switched to the headphones. If you have a laptop, you may be frequently unplugging and plugging the headphones back in, so having the audio setting switch automatically would be a definite plus.

You’ll note with the three microphones above, the Stereo PC headset is less than half the price of the other two. Now you know why. But if your budget is really tight, know that you can still get a good quality audio recording with the Stereo PC headset.

Whichever type of microphone you use, you then can record using Audacity software (free for both Mac and PC), which is also very easy to use. Or Quick Time Player (Mac).

Budget Bob Recording Set-Up

Now let’s see what Budget Bob has to say: Believe it or not, you can also try recording using Voice Memo on your iPod or iPhone. I’ve heard recordings done using Voice Memo that were perfectly good and sellable audio recordings – you just have test repeatedly to get the perfect distance and then you have to maintain that position for the duration of the recording. So basically, you and your device cannot move for the duration of the recording. And of course, you have to record in a fairly soundproof room.

You can also use the microphone on a set of really good cell phone ear buds (in-ear headphones with microphone), plug them into your computer microphone jack – instead of your cell phone – and use the ear bud microphone to record directly onto Audacity software (free for both Mac and PC), which is also very easy to use.

However, for both these Budget Bob options, you must make sure your recording level is set as loud as you can make it, so that people will be able to play your audios in their iPod, or on a stereo system to their yoga class (for example). There’s nothing worse than buying an audio that you can’t turn up loud enough.

So again, set your input levels really high, record a 3 minute clip, then play it back on your computer and on your iPod or cell phone and see if you can turn it down low enough when listening through ear buds and high enough when playing on your computer or player to a room full of people. ALWAYS, always, TEST your stuff!

Basically, whichever recording device you choose – at whatever budget level, you then need to download it to your MP3 player and listen to it through headphones. Then also listen to it on your computer. Make sure it sounds good when it’s right in your ear, in your car, and on your office computer.

Now let’s get into the specific recording how-to’s…

How To Record & Export MP3 Files Using Audacity

Let me start by saying that Audacity is such a great free recording software that I and two of my friends began using it without any instructions whatsoever – it’s just that intuitive.

Of course, any learning curve can be shortened by having some instruction first, so here are a couple of videos that will no doubt save you some time in trial and error.

NOTE: Both these video demo’s are done on a PC.

Install Audacity

Now that you have installed Audacity, you can go ahead and use it to record and also to export .wav files. But, if you want to export the much smaller .mp3 files (which take much less space on your hard drive or iPod!), then you need to first install the LAME encoder.

I know this may seem like a hassle, but trust me, if you’re going to use audio at all, then this is just a one-time setup hassle for something you will use over and over again for years! You do NOT want to send WAV files to your customers or opt-ins as the file will take up a lot of space on their device and they may hesitate to buy any more from you. Always send out MP3 files.

Install Audacity LAME Encoder for MP3 Export

Next, here’s how to use Audacity to record your audio:

Record Audio On Audacity

And lastly, here’s a video I did, showing you how to import an audio, edit the audio, and then export the audio as an MP3 file you can then send to your people, or make available for quick and easy downloading:

Import and Edit Audio in Audacity

Telephone Recording

This is the method I personally use for recording audio courses. If I’m doing a meditation, then I use my friend’s professional studio – cause I’m just that picky. Also, I don’t have music in the background, it’s just my voice, so the recording has to be pretty pristine, with zero background noise.

But to create an audio book, or an audio teaching course, I just use my phone to dial into my teleconferencing account, hit Record, and away I go. Oh, did I mention I clear my house of children, unplug the phones, make sure the laundry is not running and put a sign on the front door first?

I prefer this method because I’m already paying the $47/month fee for my teleconferencing service (InstantTeleseminar.com) anyway. And the set-up and recording are super easy.

If you want to go this route, the key piece of equipment you need to have is a corded, landline phone. I’m talking about one of these:

That means you do NOT use a cordless phone, or a cell phone, as neither gives good audio quality. For example, on this call with Paul Zelizer on Connecting With Your Customers, he was using a cordless phone and halfway through our call it started picking up another person’s conversation, that then got recorded onto our call as well! So I had to do some editing and splicing on that one. In extreme cases, you would need to re-record the missing bits and splice them in – too much hassle! Just use the right equipment the first time.

And your corded phone also needs to be a good quality phone – that doesn’t mean it has to be expensive, but you need to search for one with good audio quality (read the reviews!) like this Panasonic Corded Phone (about $15).

If you’re going to be making a lot of recordings, then I would also get this Plantronics S12 Corded Telephone Headset System to plug into the phone and use the headset instead of the handset. Not only will this be more comfortable for you, but you will get MUCH better audio quality on your recording.

If you think you’re going to be hosting teleseminars or podcasts – anything where you’ll be interviewing someone or hosting live calls, then this is probably the most cost-effective route to go: Get your Instant Teleseminar account and a corded landline phone. I also insist my guest call in from a corded landline if at all possible.

Oh yes, one more thing – you actually need to have a landline in your house or office! This is what we all used to have, before cell phones came along. You can also use a cable-based landline (runs on your TV or Internet cable – not on WiFi), which should be fine, but it is not as good as a fiber optic telephone line.

You will have to examine your particular audio environment and your recording needs and then pick the best solution for you. I have provided you with all the components here, but you will have to mix ‘n match to customize the best solution for your unique needs. See the chart below for a quick overview comparison.

Regardless of the recording method you choose, you will need to ensure your office or house is really quiet, or record at night when everyone is asleep!

One last consideration: Many people are not aware that cordless phones and cell phones give off biologically unsafe levels of radiation. Dr. Charlie Teo – one of the most renowned neurosurgeons in the world – does not carry a cell phone on his body, nor put it to his head. He places it on a table, or a counter, and puts it on speakerphone.

Cordless phones emit even stronger radiation than cell phones – strange, but true. I have lots of information about WiFi and cellphone technology and how to make it safer on my Listen To Your Gut blog (type “wifi radiation” into the Search box). But for now, just know that we do not have any cordless phones in our house – they are all corded phones. And we all turn our cell phones off when we come into the house. Here’s one of the best videos on this topic:

So that is another factor to take into consideration if you’re balking at getting a landline hooked up. A landline can run on either fiber optic or cable. So if you already have a cable TV account, you can also run your corded phone on a cable phone line – just call your cable TV provider.

Oh and do not get a corded phone that also has a cordless handset with it – that defeats the purpose and you will still radiate yourself and the other people in your house.

So to summarize, here are your four options to obtain a good quality audio recording. Keep in mind that for each of these scenarios, your environment must be really quiet – no dogs barking, children playing, phones or doorbells ringing, doors opening or closing, no laundry or dishwasher noise, etc. Many parents find it easiest to record late at night!

Note: you can use Skype to interview someone and record your interview, but only if you are planning on giving the audio away for free. This is because the quality of Skype is just not good enough (in my opinion). Here’s a sample of an interview recorded on Skype and you can see for yourself what I mean about quality:

Click the PLAY button [sc_embed_player fileurl=”http://listentofreedom.s3.amazonaws.com/daniel-vitalis.mp3″]

Of course, since this audio was given away for free and was fantastic content, I did not mind the fluctuating volume levels, or missed words, or occasional static – if I had paid for it, I would not be impressed.

Skype has a section of its site where they provide links to both free and paid software you can use to record your calls.

Audio Recording Methods Comparison Chart

Solution Pros Cons
Shure mic with Nady Pop Filter – you record directly to your computer, using Audacity, as an MP3 file. Fantastic audio quality. Super easy to use – everything in one place. Most expensive (about $270). You cannot interview anyone else. Only you can speak and be recorded – unless you are recording from a Skype call. Need soundproofed and sound-optimized recording room.
Audio-Technica Microphone with Foam Ball Mic Cover – you record directly to your computer, using Audacity, as an MP3 file. Good audio quality. Super easy to use – everything in one place. Great price (about $39). You cannot interview anyone else. Only you can speak and be recorded – unless you are recording from a Skype call.
Plantronics Audio 478 Stereo USB Headset Microphone – you record directly to your computer, using Audacity, as an MP3 file. Good audio quality. Because you are wearing headphones, if you want to record a Skype call, your mic won’t pick up the other person’s voice coming through your computer speakers – so you won’t get any feedback noise and the audio levels from both of you should be good. Plugs in via USB port. Super easy to use – everything in one place. Great price (about $29). You cannot interview anyone else, only you can speak and be recorded – unless you are recording from a Skype call.
Plantronics Audio 326 Stereo PC – you record directly to your computer, using Audacity, as an MP3 file. The cheapest option and will still give you a good audio recording. (about $13) Plugs into the microphone jacks on your computer, which is not as good as a USB connection. Only for use with a PC, it will not work with a Mac, unless you buy an adapter. You cannot interview anyone else, only you can speak and be recorded – unless you are recording from a Skype call.
Good quality Corded landline phone and Instant Teleseminar account – you dial into a conference call platform and their system records your call as an MP3 file. You control the call, speakers (callers) and recording via a Control Panel on the Internet Good audio quality. Easy to use. Lots of other uses too: weekly podcast, or teleseminars, webinars, or interviews, or Internet radio show, or any other purpose where you need to interview someone, or have other people on the audio, or participating via the Internet. Reasonably priced (about $63, then $47/month). Not as good audio quality as a direct microphone. You also need to pay for a landline (cable or fiber optic) if you don’t currently have one operating. Bit more hassle than a mic to your computer as you first have to set up the call (takes about 3-5 minutes), then dial in.

REMEMBER: For ALL audio recordings, to save yourself hours of wasted time, be sure and record a 3-minute test clip first. Then play it back on your computer and on your iPod or cell phone and see if you can turn it down low enough when listening through ear buds and high enough when playing on your computer or player to a room full of people. ALWAYS, always, TEST your stuff!

Here are all my test recordings again, using the different audio recording methods, you can easily compare and then choose which suits your purpose best:

1. Audio-Technica microphone and the mic cover, recorded using Audacity:

Click the PLAY button [sc_embed_player fileurl=”http://listentofreedom.s3.amazonaws.com/audiotechnica-USB-test.mp3″]

2. Plantronics USB headset microphone, recorded into Audacity:

Click the PLAY button [sc_embed_player fileurl=”http://listentofreedom.s3.amazonaws.com/plantronics-USB-test.mp3″]

3. Instant Teleseminar with a corded, landline phone (no headset):

Click the PLAY button [sc_embed_player fileurl=”http://listentofreedom.s3.amazonaws.com/InstantTeleseminar-Test.mp3″]

After listening to each of these, I feel that the Audio-Technica gives the best voice quality, but it will pick up the most ambient (background) noise in the room or house. The Plantronics has the best balance of good voice quality and low ambient noise. The corded phone into Instant Telseminar has an edgy real-time sound to the voice, and like the Plantronics headset, there is low ambient noise. But I think if I used a corded headset plugged into the phone (with noise-cancelling mic) I would get a smoother audio quality.

This Plantronics S12 Corded Telephone Headset System would be my choice in this case, since there is a switch to set the microphone between high and low gain, and there is a dial to fine tune it within each of the settings. Here’s what a Freedomite said about this headset:

Out of the box, I sounded very loud in my own ear piece and if I were typing, you could hear it on the recording. So I set it to low gain, and moved the dial to a lower setting. My voice remained clear in the recording, but not too loud in my own earpiece, and sounds of me typing or moving around could not be heard on the recording. This is fantastic! With my previous headset, I could not turn down the gain this low, so I had to be very careful about background noise.”

When you have recorded your first “real” audio, download it to your MP3 player and listen to it through headphones. Then also listen to it on your computer. Make sure it sounds good when it’s right in your ear, in your car, and on your office computer. After you’ve got the first one sounding great, record the others using the same settings (write the settings down!).

Example: How I Created A $69 6-CD Audio Course

1. Used my Instant Teleseminar account to record my audios. ($47/month).

2. Dialed in from my corded, landline phone (excellent audio quality). Pressed record.

3. Talked for 60 minutes teaching people what I wanted them to learn for Audio 1. Downloaded MP3 recording to my computer.

4. Screwed up a little at the beginning, so used Audacity (free software) to edit my mistake. Exported as an MP3 file and made sure to set my fields for Artist Name, Track Name and Album Title – so that when someone imports my track into iTunes, or their iPod, it shows up properly.

5. Imported the MP3 file into iTunes, checked that my titling and name showed up correctly, and then converted it into a smaller file size MP3 (see instructions here), yet still with excellent quality. Tested it on my computer, my iPod with ear buds, and my car to ensure audio quality and volume levels were good. Made sure there were no spaces between the words of my filename (or people can have trouble downloading the file). Used hyphens or underscore lines to separate words. For example: choose-your-best-idea.mp3

6. Repeated steps 1 – 5 for all six audios

7. Emailed final MP3s to InfoDistributors.com (manufacture CDs and DVDs). They emailed me the design template (instructions) for the artwork for a 6-disc audio program.

8. Got my designer (found on Elance) to create a design from that template (cost $75). I emailed the finished design back to InfoDistributors.com

9. Created a video and a dedicated Page on my website to sell the program (my sales page). I shot the video with my Canon video camera (you could also use an iPhone, or Flip camera). If you want a really slick-looking landing page (sales page) you can either use your designer to create it as a Page on your blogsite, or use a WordPress Plugin called Optimize Press. If you are using Infusionsoft as your CRM platform, then you already have landing pages for your use.

10. Began emailing my list about my new Course, and carried out other marketing activities, like posting on Facebook, affiliate promotions, and a live webinar, or teleseminar to give some great free content, but also promote my course.

DONE!

All you have to do to create an excellent audio course is copy these 10 steps above. You can go ahead and create your content at any time and don’t worry, we will elaborate on Steps 9 and 10 in coming Modules. For now, all you need to focus on is creating your content or products.

NOTE: If I were creating an audio course that was delivered digitally via download links (no physical CDs), then I would skip steps #7 and #8 and replace them with:

7. Uploaded MP3 files to my server. Made sure there were no spaces between the words of my filename (or people can have trouble downloading the file). Used hyphens or underscore lines to separate words instead. For example: choose-your-best-idea.mp3

Emailed my designer to create CD cover art and package art to display in my shop and marketing materials.

You have to think of how YOU would like to receive your product. Personally, I understand that a boxed set of CDs has far more perceived value than a list of download links. However, I also find it super annoying to have to import each CD, one at a time, into iTunes and then transfer them to a playlist on my iPod – which takes about one hour total.

So personally, I may prefer to receive the boxed set of CDs along with all the files downloaded onto a memory stick (USB Flash Drive). That way I feel the specialness of the boxed set, but I can also insert the memory stick into my computer and transfer all the MP3 files to my iPod in about 20 seconds (Infodistributors.com also does custom USB flash drives).

However, I may also not care about the physical CDs and be happy with just the USB flash drive – because that alone is far more convenient than downloading a bunch of files! To communicate more value, you could have the flash drive imprinted with your name or program name and present it in a really nice box, or get a custom shape flash drive, like these, for example:

Or, you could always offer both the physical CDs and the USB flash drive and let your customer choose which format they want!

Lastly, just make sure you took note of #5 above and TEST your finished product to ensure:

  • File size is not too big and is in MP3 format for best compatibility across devices (see below for how to compress files).
  • Audio quality is good – test on both your iPod and computer.
  • Volume range is good (i.e. Can I turn it up loud enough if I’m playing it on my computer, or for a group, and can I turn it down low enough if playing through ear buds?)
  • File name does not contain any spaces – words must be linked with hyphens or underscore. Example: eat-green-foods.mp3
  • Track title shows up the way I want it to.
  • My name shows up as the Artist, and the Album shows up correctly as the name of my audio series

Throughout Listen To Your Freedom, you will hear me telling you to TEST everything before you release it to your customers, or as a freebie to your site visitors. Remember that you can sell a crappy product once, but that customer will not buy from you again. And whatever the quality of your free stuff, your site visitor will expect the same quality from anything they purchase – so make sure your free stuff is GREAT.

NOTE: Many Internet marketers would sell an Audio Course like this for at least $97 or $197. Set your price according to your market and when you’re ready, check out this page for details on how to price your stuff.

My Audio Track Doesn’t Show Up Properly in iTunes or Windows Media Player!

The data that you attach or embed into your audio file that allows other apps to read your info, or show your album cover, are called ID3 tags.

The easiest way to add ID3 tags to your audio is to add the required fields (Track Title, Album Name, Artist/Composer, etc.) when exporting your file from Audacity (see the videos above) as an MP3 file. Here’s what that looks like:

If you also want to show an album cover or have an image show up along with your audio track, then you need to use a special software to attach that image to your MP3, like Jaikoz or Mp3Tag.


Now that you’ve seen some more ideas for how to create an Audio Course (rather than just a single audio), brainstorm a larger project you would like to create in audio MP3 form; either a paid item, or a freebie. Something you could o er as a course, or a series of audios:


How would you like to record it? What equipment do you need to get?


How Do I Create An Audio Product – CD or MP3?

A CD or audio (MP3 file) can be a great item to have for your customers or site visitors since many people prefer to listen, rather than read. Many people even prefer it to video, since you can listen while you run, drive, walk the dog, lie down, or cook.

I’m going to show you how you can create a CD or audio in only ONE DAY and then you can use that CD in any of the following ways:

  • One of the best ways to start or build a relationship with your tribe (site visitors or customers) is to produce a CD or free audio (MP3 download file) that lets them get to know you and gives them some insight, inspiration, encouragement, or instruction. This could be just you talking, or you could interview a friend, colleague, family member, or a known expert in your field.
  • People often prefer audio to a book or eBook. So you could simply read and record your existing book aloud and then offer it as an AudioBook.
  • You can present your solution, or technique, or method in audio format. You could record your how-to manual. Whatever you would do as a book or video, simply record it as an audio instead. Diagrams can always be provided as a PDF (that they can download or view online) if needed.
  • You can also create a CD or audio that adds to and increases the value of an existing product. For example, think about how you feel about the value of an eBook. Now tell me how you feel about the value of an eBook and CD package?

This is called positioning. You may be offering exactly the same information, or same solution, but by adding a CD (which you can create in one day) you have positioned that solution as a “package” and thereby greatly increased the perceived value of that solution.

A Heal Your Insomnia Today eBook may sell on Kindle for $7.99

But a Heal Your Insomnia Kit (eBook + CD + pdf chart) may sell for $27 or $47 or $69 or higher.

So enough about why creating CDs (or MP3 audios) is a great idea, let’s move onto how you can create your CD, or audio product, or freebie, in just one day – AT NO COST. Keep in mind, that on this page, you’re learning how to create content. Here are the details on how to sell and deliver that content to your customer when you’re ready to.

*Note: And if you’re wondering about the sale prices I’m suggesting, that’s all covered here.

Step #1: If it’s just you talking, then record directly to your computer. If your computer has a good built-in microphone, you can just use that, or purchase this cheap, yet fantastic quality microphone from Audio Technica. Or record directly to your cell phone and then export the file to your computer. iPhone has an excellent quality recorder called Voice Memo.

If you would like to include other people on the audio then set up a paid or free teleconference line. This way you can record interviews, focus-group conversations, panel interviews and more. It also lets you conduct live calls with numerous listeners, record the conversation, and use that for your CD.

If you’re going to do this often, then get a paid service like Instant Teleseminar, which is what I use.

Or, go to one of the free providers below and sign up for their service. Keep in mind that the quality of the free lines is not a good and you can have more glitches and quality problems than with a paid service:

www.freeconferencecall.com

www.freeconferencecallHD.com

www.freeconferencecalling.com

www.freeconference.com

Note: you can also use Skype for this step, but only if you are planning on giving the audio away for free. This is because the quality of Skype is just not good enough (in my opinion). Here’s a sample of an interview recorded on Skype from Daniel Vitalis and you can see for yourself what I mean about quality. Click the PLAY button, or, you can download this audio from the link below:

http://listentofreedom.s3.amazonaws.com/daniel-vitalis.mp3

Of course, since this audio was given away for free and was fantastic content, I did not mind the fluctuating volume levels, or missed words, or occasional static – if I had paid for it, I would not be impressed.

Step #2: Learn How to Use the Service. Learn the basic steps for calling in, recording your call and then downloading the mp3 file. You can learn how easy it is to use Instant Teleseminar here, or each of the free services has their own instructions.

Step #3: Choose a Topic. Select a topic you can easily talk about for at least 30 minutes without having to refer to notes or think too hard. Or read (with energy and lots of expression!) from your book, or tutorial you have already created.

Step #4: Set Your Purpose. What is the one most important thing you want listeners to be able to DO by the time they’re done listening to your audio? What ONE problem do you want to help them solve? What ONE solution are you going to give them?

Step #5: Choose 3-5 Main Points. Your audio doesn’t need to be long. Choose three to five main points or subtopics you want to talk about.

Step #6: Make an Outline. For each of your 3-5 points, add another 3-5 bullet points to flesh out the subtopic. Be sure to include information that will help listeners achieve the objective you set in Step #4 above. Your information has to lead to action, or it has no value.

Step #7: Include a Call to Action. Once they listen to the audio, what do you want them to do next? Call you? Order a product? Make an appointment? Visit a webpage for more info? Share the audio with a friend? Decide what to have them do next and include that at the end of your presentation.

Step #8: Practice. Run through your presentation at least once to make sure it flows properly and that you are comfortable presenting it.

Step #9: Record Your Audio. Call into the conference line, or get your computer ready to record (use Audacity or Quick Time Player) start the recording, then deliver your presentation. If you make a few “flubs”, don’t worry. You can also use the free recording software called Audacity to edit out your mistakes. See my Audacity instructional video below. When you’re finished, save or download your MP3 file to your computer.

Step #10: Edit Your File if needed. Edit out any mistakes – use a free editing/recording software called Audacity. Add an intro or outro if you like. Then your audio is ready to go. See my video below for how to edit mp3 files using Audacity. If it is in another format, like m4a or wav, then convert to mp3 (see Tech 3 for instructions on how to convert audio file formats).

When you title your mp3 file, make sure there are no spaces between words (or people can have trouble downloading your file). You can use hyphens or underscore lines to separate words instead. For example: choose-your-best-idea.mp3

Step #11: Host Your File. Host your MP3 file on your website server, on Amazon AWS or even on DropBox.com. Copy the link to the hosting location and use it in emails, on your website, anywhere you’d like.*

Step #12: Also Create a Physical CD if you like. Transfer your file to a CD and you’re ready to go! If you don’t have many customers or site visitors, you can print labels yourself from an office supply store and mail them out personally. But if you have a larger list or customer base, then you can have a run of professionally replicated CDs made with covers and cases to match.

In that scenario, you would email the final MP3s to InfoDistributors.com (they manufacture CDs and DVDs) or some other replication company. They will send you the design template (instructions) for the artwork. You can create your CD cover art for free. CDs also make great direct mail items or giveaways at networking events. You may want to hand out a presentation on CD instead of just a business card.

That’s it! Follow these 12 steps and you’ll create your audio product, or a free giveaway for your sign-up list, in just one day!

As promised, here’s how to use Audacity to record your audio:

Record Audio On Audacity

Lastly, here’s a video I did, showing you how to import an audio, edit the audio, and then export the audio as an MP3 file you can then send to your people, or make available for quick and easy downloading:

Import and Edit Audio in Audacity


Now let’s brainstorm your ideas for a free audio or CD you could give to your people…


What great give-away, or freebie CD, or audio MP3 could you create that would make your website visitors and people on your email list LOVE you. What would be useful, helpful, fun, or entertaining? Would it be a solo audio, interview, teleseminar, lecture?:


How Do I Get My Digital Products To My Customers?

Once you have your digital content ready – an MP3 audio file, or a PDF eBook, or a Video tutorial, a photo tutorial, a webinar (video), or teleseminar (mp3), or online course, etc. – you’re going to be asking yourself: Now how do I get this great product (or freebie) to my customer?

There are a number of ways you can deliver content digitally once the person has paid for it, or, in the case of a freebie, signed up for it. Or, perhaps you want to go against everything I’ve been teaching you and just make it available as an instant, one-click download in your blog post! No problem, these fulfillment methods will work in every scenario.

Three Ways To Deliver Digital Content

I’m going to go through each of these in detail as we go through this unit, but here’s the overview. Whether you are fulfilling a paid order, or sending a freebie, there are three easy ways you can deliver your eBook, MP3 audio, webinar, teleseminar, online course, report, manual, etc.:

1.  For eBooks, PDFs, or audio downloads: You can send the person an email with a download link for the digital content right there in the email.

2. For free content hosted online: You can send the person an email with a weblink (hyperlink) to wherever the digital content is hosted online. This method is usually used to deliver free content, like a blog post, a YouTube video, or an online article.

3. For video, audio, or membership programs: You can email the person a link to a hidden webpage on your site. You can also make this page password-protected. On the page is the download link(s) for the digital content. Or if it’s a video, the video is embedded right into the page, so they can watch it there. This method is usually used to deliver video or audio content. In the case of a membership program – the entire program contents is hosted online on a password-protected site. So customers just need the URL (website address), their username, and password emailed to them upon purchase.

Rules Red MarkerDigital Content Ground Rules

But first, here are your ground rules to keep in mind for EVERY piece of digital content you offer people:

1) File Naming – Make sure your file names do not have any spaces in between words – this can result in broken links during download and you will get a much higher number of customer complaints and frustration. Newer computers can handle download links with spaces between words, but people using older machines cannot – that’s where your customer service complaints will come from. So best just to format your file names (whether mp3, or pdf) with no spaces between words – use a hyphen or underscore instead of a space.

For example:  Part 1-How It All Began – Turning Inward 1.mp3

Should be: Part-1-How-It-All-Began-Turning-Inward1.mp3

But personally, I find this file name too long and would change it to: part1-turning-inward.mp3

That way, I could see the file name in my viewing window on my device, or in my car. ALWAYS think about how people will be USING your stuff. And then use it yourself and get it out to friends and family to test it for you as well. Pay attention to the details.

2) Audio File Format – For audio files, make sure your files are in MP3 format (not .wav or .m4a etc.). If you convert your audio files to mp3 format, you will be able to get them much smaller, with the same quality. For example, a WAV file that is 117 MB can be reduced to an MP3 file of 16 MB with no loss of quality. So your files will take up much less space on your customer’s iPods, computers, etc. Also MP3 has greater compatibility across all devices – so everyone will be able to play your files on their device. Here’s a tutorial on how to convert your audio file format.

3) Print File Format – Make sure all your digital print products (eBooks, reports, white papers, charts, slideshows, PowerPoints, artwork etc.) are in PDF format. Do not make any of your written text available in it’s original format, example: a .doc or .txt or .jpg file as these file formats can be changed without your permission and they also make it really easy for people to swipe your content – just copy/paste as is! When you save your content as a PDF file, you can click on Security Options and also:

  • Password-protect the pdf, so that no one can open it up unless you give them the password.
  • Password-protect the pdf contents against being copied (no copy/paste allowed) or printed.

For my own content, I do not password-protect the ability to open or print the pdf. However, I do password-protect the ability to copy/paste content from the pdf. I also have a legal copyright notice on my PDFs and I also give people instructions on what they need to do (credit me and give out my website) if they want to share or quote from my stuff. Note that I am using ‘PDF’ and ‘pdf’ interchangeably, as both are correct nomenclature. Here’s a tutorial on how to convert your documents to PDF format.

4) Video File Format – Most people will not have a lot of memory free on their Computer and Cinema - 3Dcomputer (or device) to actually download a video for viewing. And it also takes a long time to download a video file, so this is best avoided. In the coming units I am going to show you the best ways to deliver video-based courses, or content and how to host your video files. But in the rare case they do need to actually download the video, and for whatever reason you need to do this, then .MOV is the best file format to use and the most compatible across devices.

You can also easily upload your videos to YouTube, or Vimeo, or other online players as .MOV files. Here are the detailed instructions for formatting your .MOV file at the best settings for upload to both YouTube and Vimeo.

Detailed Instructions – How To Deliver an MP3 Audio, eBook, or Report

Okay, now that you’ve got your product saved in the correct format and ready to go, I’m going to guide you through the steps needed to be able to deliver that product to your customer in the simplest way:

  1. Upload the product to your server.
  2. List the product for sale in your shop or on your sales page.
  3. Set up your autoresponder email(s) to go out to the customer upon purchase.
  4. Make a test purchase.

Let’s go through each of these steps in detail and then I also have a video where I will walk you through each step – feel free to watch the video first!

data center design1. Upload the product to your server. This is where you first upload your piece of content (MP3 audio, PDF eBook, report, etc.) to your server. Your server (ISP) is where you have your site hosted. You can either upload PDF files using your blog interface – see Tech 2 for detailed instructions.

Or your server’s helpdesk will be able to instruct you in how to upload a file (mp3, pdf, doc, etc.) to your server and then how to get the download link to that file. This is why you need to make sure you’ve chosen an ISP with 24/7 live help. So call them, or ‘chat’ with them and have them walk you through it, step-by-step.

If you expect to be uploading a lot of large file content – like audio files – then you may want to also get an account with Amazon’s Cloud Server. A cloud server never runs out of room and you can have hundreds or thousands of people downloading content simultaneously with no glitches or slow-down. This is called Amazon Web Services (AWS) and you can learn more about their very cheap cloud hosting (I pay about $3/month) here: What Is Cloud Computing?

It is VERY easy to upload files to your Amazon cloud server (and then copy the download link) using a free plugin for Firefox Internet browser, called Amazon S3. No logging in each time, a couple of clicks and it’s done. You can download it from here:

http://www.s3fox.net/

Here’s a great video that shows you step-by-step how to set up your Amazon S3 Organizer for easy uploads to your Amazon cloud server:

Now that you’ve got both your Amazon cloud server account, and you’ve set up your Amazon S3 file uploader, here’s the video I promised: Where I show you exactly how to upload an audio file, or an eBook, or PDF Report to your Amazon cloud server and then deliver that digital content to your customer. This video is about 30 minutes, but it is packed full with useful strategies, including approaching affiliates with your first product and why you should ask for feedback after each purchase:

This video is packed with step-by-step explanations, along with marketing and positioning advice, but if you’re computer savvy and you only want the fast-track instructions, jump to 25:16 mins.

I prefer to use Amazon Cloud to host my content because it can handle unlimited file size and unlimited traffic, but also because the Firefox S3 plugin makes it so darn easy! Even though I use Chrome for some of my Internet browsing, I still keep Firefox just for that use.

But of course, you could use your existing server, if you prefer – the one that hosts your domain and website – to host your digital products. You simply go to the Help Center for whichever hosting server you are using and find the instructions for your hosting plan, or you can phone them and get them to walk you through it.

For example, the instructions or help for uploading files to GoDaddy hosting are here. Note there are different instructions depending on which type of hosting you have, and which type of file manager. There are also restrictions on file size – which shouldn’t be an issue, unless you are uploading video files.

And as we discussed, you could also upload PDF files using your blog interface – see the instructional video for how to do that in Tech 2.

2. List the product for sale in your shop or on your sales page. If your shopping cart has an eBook delivery system, then grab the download link for your PDF product – after you have uploaded it to your server (see the video above for instructions on how to get the download link). Then follow the instructions provided by your shopping cart.

If you don’t have a shopping cart yet, see Module 10.7.

Here’s how we list a new product for sale on my health site, where we use BigCommerce for our shopping cart. You can follow the same steps with whichever shopping cart you are using:

If you cannot afford a shopping cart yet, then use a PayPal “Buy Now” button on your webpage to process the sale and use step 3 below (your email platform) to deliver the product via an email with the download link. PayPal has easy instructions for how to do that.

Here’s a video showing you exactly how to add a PayPal “Buy Now” button to your WordPress page or post:

Note: Remember when pasting code to your site, paste it in TEXT mode, not Visual mode. See the WordPress tutorial videos in Tech 2 if you have any difficulties.

Here’s a tip for you: When you’re creating a sales page with your PayPal ‘Buy Now’ links, try to make the page visually appealing with photos (or even video), not just text. And always have a photo of what your product looks like – this is very important!

Remember, you can always create your own covers for your products – then just take a screenshot of it at the size you want for your sales page, or product listing.

Large photos slow down your page load time (time it takes to appear in the browser window), so always use the smallest image you need to keep your site fast – no more than 2 seconds maximum load time. You can check your page load speed with this free service from Google.

If your eBook or printed book is for sale on Amazon, then you can put a full book listing and description on your Shop Page, but have the title, image and Learn More… buttons link to your Amazon book (be sure and use your affiliate link!).

3. Set up your autoresponder email to go out to the customer upon purchase. I show you exactly how to do this in the video you watched above. But here it is again and for just the part on creating your order fulfillment email, start watching at 11:20 minutes.

After you have written your fulfillment email (the email that delivers the product download link or instructions to your customer), enter it as an autoresponder (pre-set, automated email) to your email marketing platform (like GetResponse).

4. Place a test purchase. Your final step is to go ahead and buy your own product yourself. This will reveal any glitches (and there will be at least one!) in your process and give you a chance to fix things before your customers get peeved and leave your site! Make sure that:

  • It is easy to purchase
  • You receive the order fulfillment email quickly
  • You can download the file
  • The file works (open it) and looks the way it should
  • There is a way to contact you in case of any problems
  • All your sales writing and instructions are clear, free of typos, and easy to understand

Testing rigorously – and I’ll say it again throughout the program – is so important. You will find glitches and issues everywhere when you test, especially when you’re new to your systems. I’m saying it now, because if you’ve made it far enough that your customer is actually buying from you, it is your job to make that process seamless for them.

good-jobDTA smooth purchasing experience will increase the chance of your customer returning to buy something else, or recommending you or your product to someone else. Specifically, because the perceived value of a digital product can be less than a physical product (and many buyers might be new to digital products), you need to deliver something convenient to buy, download and use. This makes the speed and ease of digital delivery into an added bonus, instead of a hassle. Every complication, error, or time-suck in your process, even if it’s fairly benign, will frustrate your customers – and that’s the last thing you want to do!

This isn’t just about sales – though that’s a big motivation to test, test, test your shopping cart, buying sequences, digital delivery, and autoresponders – it’s also about building the integrity of your brand and product, and it’s about maximizing the experience of that brand and product for your customers…which of course, still translates to sales at the end of the day (or at the end the email sequence!). Seamless delivery, access to support, attention to detail (even, or especially, when you’re using an informal tone) and ease of use translate to respect and care for your customers. If they’re giving you their money, you owe them this much. And the best thing is (I don’t think this will ever get old for me)… all this care and precision can be automated, so it doesn’t take any extra effort to provide that high level of customer experience for every single customer!

On the flip side, once your products and sequences are out there, they represent you and your brand. So if you haven’t tested them and they go out to your list, any glitches and issues are on you to clean up, apologize for, and compensate your customers for if necessary. That said, you have to be willing to make a few mistakes or you’ll never get into action! Not to mention, cleaning a mistake up really well can sometimes be an opportunity to deepen a relationship – have you ever had a small complaint at a restaurant or store, and received a sincere apology and an upgrade you didn’t even expect? Sometimes the grace with which a business responds to a complaint not only makes up for the mistake, it increases the customer’s loyalty. So do your best, but don’t let perfectionism interrupt your progress – when you invariably make a mistake, don’t get defensive: take the feedback with gratitude, and follow your intuition to not only fix the mistake and meet your customer’s needs, but also to improve your systems for the next buyers.

Okay, now go ahead and get your first product set up for sale and delivery to your customer! Don’t forget to also send an email asking for feedback as I showed you in the video. Let’s plan it out in your notebook…


A product or freebie I’m going to set up for digital sale and order fulfillment is (eBook, report, audio, video) and how I’m going to do that:


*Don’t forget to set up your email asking for feedback a week or two after you’ve sent the freebie!


Your Content Delivery Plan

No doubt you will refer back here as time goes on and as you create new and different kinds of content or products.

So let’s just boil it down to the basics, take out the how-to details, and hopefully crystallize digital content delivery for you.

Basically, when you are deciding how to deliver digital content to your customer or opt-in (someone who has opted-in, or signed-up for a free piece of content), you have 3 ways to deliver that content:

1.  You can send the person an email with a download link for the digital content right there in the email. For example:

2.  You can send the person an email with a weblink (hyperlink) to wherever the digital content is hosted online. This could be a blog post, a YouTube video, or an online article. Like this:

3. You can email the person a link to a hidden webpage on your site. You can also make this page password-protected. Then on the page you have the download link(s) for the digital content. Or if it’s a video, the video is embedded right into the page, so they can watch it there.

Here’s an example where I have done both; embedded a video AND provided download links for the digital content (PDF eBooks). And yes, this is the hidden, password-protected page that people are given access to after purchasing the product:

One important caution about embedding videos: If the video is not yours, you run the risk of the video suddenly being deleted and then you look unprofessional to your customer. To prevent this happening, you either need to check your videos regularly. OR you need to use a plugin like this:

http://en.savefrom.net/user.php?helper=ff

to download those videos and save them to your desktop. You would then upload each video to your private Vimeo account (for example) and the grab the code for your own Vimeo video and embed them in your webpage from there. This is what we’ve done for the LTYF program as we found public videos were continually deleted or moved.

Now, you could upload these videos to your free YouTube account, but then you run the risk of getting tagged for copyright violation – since it is publicly viewable that you swiped the vid.


Okay, now it’s your turn. Go through each of your products (or freebies) now and map out how you are going to sell and then deliver each of them to your customer after purchase. Points to include in your plan:

  • File format (mp3, pdf, etc.)?
  • YouTube (public) or Vimeo Pro (private) videos?
  • Webpage, hidden page, password-protected page?
  • Email with download link and photo of cover?
  • Download links for audio on webpage, with or without audio player?
  • eBook, report, manual, tutorial security, or non-secured?

Which method are you going to use to sell your products – PayPal “Buy Now” buttons on a webpage, or, a shopping cart? Check out this page if you’re not sure which to use.

Also write down the email sequence that will follow each purchase (Thank-you email, Feedback email, etc.):

Write down how you will deliver each product or freebie to the person that purchases, or signs-up or opts-in to your free offer. Remember the 3 ways to deliver digital content are:

  1. You can send the person an email with a download link for the digital content right there in the email.
  2. You can send the person an email with a weblink (hyperlink) to wherever the digital content is hosted online. This could be a blog post, a YouTube video, or an online article.
  3. You can email the person a link to a hidden webpage on your site. You can also make this page password-protected. Then on this hidden, password-protected page you have the download link(s) for the digital content. Or if it’s a video, the video is embedded right into the page, so they can watch it there.


How Do I Deliver Audio or Video With My Book?

So let’s say you’ve published your softcover or hardcover book, and it’s available for sale on Amazoan, in Barnes & Noble bookstores, and on your site. Or you’ve published your e-reader book on Kindle, or Nook.

But you have an audio, or series of audios that are an integral part of the book. How can you make sure that Susie Smith, who buys your book from Chapter’s bookstore in Calgary, can receive those MP3 audios?

Remember, if this was an eBook purchase from your site, you would simply email the download links for the audios.

But you don’t have Susie Smith’s email and you don’t even know that she bought your book in her local bookstore. Or, how about Susie bought your Kindle book on Amazon – you still don’t have her email address.

I’m going to show you how to deal with this situation first (delivering audio), then I’m going to show you how to be able to provide video in the exact same situations.

Adding Audios To a Printed or Kindle Book

To be able to supply an unknown reader with your audios, you simply have instructions like this as part of the book text; which sends them to your site or hidden page where you give them the download links for your audios:


For the audio guide that accompanies this book, please go to:

www.mysite.com/guide-me


This webpage can be a hidden page, or it can be a password-protected page. If it’s password-protected, you would then have instructions like this in the book:


For the audio guide that accompanies this book, please go to:

www.mysite.com/guide-me

and enter the password: SWIMMING


Make sure these instructions appear on the page where you talk about the audio and also at the end of the book.

Or if you want, you can make the password a bit trickier by having something like this:


For the audio guide that accompanies this book, please go to:

www.mysite.com/guide-me

The password is the first word of the first sentence on page 26.


Here’s a real-life example of how someone has done this from a softcover book I bought on Amazon, called Full Body Presence by Suzanne Scurlock-Durana, where she gives you 5 audios that go along with the book. Here’s the sequence of events:

1. I bought the book

2. On page 11 and page 185 of the book, the website and password is given where I can download the audios:


To download the free audio tracks
for this book or order a CD
for a small fee plus shipping, visit

www.healingfromthecore.com

Click on the Full Body Presence download link,
and enter the password presence.

or write to us at

Healing From The Core
P.P. Box 2534
Reston, VA 20195

2. I go to the site and this is what I see:

Although it looks like you have to enter all your personal information, you actually don’t, and it works with just the password and the Image Verification fields filled in. NOTE that I don’t recommend you set your webpage up like this! This is way too confusing and she must get a lot of customer service questions about this process. I’m going to show you a method you can use that is much simpler and clearer for your reader or customer.

After I SUBMIT the form, it goes here:
http://www.healingfromthecore.com/FBPAudio.html

HOWEVER, as I said, there is a much simpler way for you to set up exactly the same thing on your handy-dandy WordPress site in three easy steps, that is also less confusing for your customer:
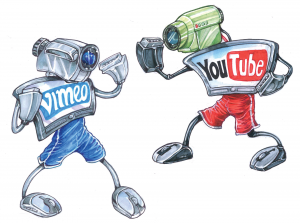
How To Create A Password-Protected Page

1. Put something like this at the beginning and end of your book:

For the audio guide that accompanies this book, please go to:

www.mysite.com/guide-me

and enter the password: SWIMMING

2. Set up a hidden page (see instructions above) on your site called “Guide Me”, this will ensure the URL for that page is: www.mysite.com/guide-me and then list your audio titles along with their download link on that page.

You could either structure your downloads in the way shown above, with Click here to download… Or, you hyperlink the actual audio title, like this:

Welcome to the GUIDE ME audio downloads page.

For each of the files below, simply Right-click on the link,
then Save As… to save the mp3 file to your computer or device.

CHAPTER 1 AUDIO
Right-click here to download the audio: Choosing Your Best Idea

CHAPTER 4 AUDIO
Right-click here to download the audio: Multi-Purposing Your Content

etc.

In both cases, you would create the link to the MP3 audio file by using the Insert/Edit Link button – try this video if you don’t know how to add a hyperlink to text. Here’s an example of what it looks like when you add the link:

Finish setting up all your links. And of course, have an introduction or some explanatory text on the page before you list the download links.

3. When you go to publish that page, here’s what the PUBLISH box on the top right hand side looks like. See where the Visibility is set to Public?:

You can change this and set the Visibility to Password Protected. Simply click on the Edit link next to Public and enter your chosen password:

Then click Update. Or if you haven’t published it yet, then click Publish.

When someone enters the URL you gave: www.mysite.com/guide-me

Here’s what they’ll see:

Note: If you want to also offer the option to PLAY your audios online, you can install the free plugin Compact Audio Player. Here are instructions on how to install a plugin.

Adding Videos To a Printed or Kindle Book

The process for adding a video to a printed book is actually very simple.

You simply take a screenshot of the video and then place that in the book as a jpg photo. Underneath the video you give the YouTube URL where the video is located. So it may look like this:

If your book is being printed in black and white, make sure you test to make sure your color images will print nicely and not be too dark!

Alternatively, you could follow the same format as we used for providing audio with a book (see above) and have a dedicated page at the front and back of the book that says something like this:

Helpful Video Content!

I have a number of helpful instructional videos
that go along with this book. Please visit the
book’s video page to view them:

www.ListenToYourColon.com/videos

Again, you could choose to make this a hidden page, or a password-protected page. If it was password-protected, you would change your book notice to appear like this:

Helpful Video Content!

I have a number of helpful instructional videos
that go along with this book. Please visit the
book’s video page to view them:

www.ListenToYourColon.com/videos

And enter the password: intestine

Pretty simple eh? And your readers will love the multimedia content. Personally, I think the second method of sending them to a video page on your site is better than prompting them to type in YouTube URLs.

Alright, now that you are simply brimming with tools and ideas, let’s come up with YOUR plan to get your content out there

How Do I Create A YouTube or Vimeo Video?

YouTube has always been a great (and free) place to upload your videos, but it’s even better now, since Google bought it. Google is improving YouTube so that your YouTube channel offers more options and ad revenue opportunities, videos are now getting better search engine rankings (due to improved keywording facility) and there are more post-upload editing and annotation tools (where you can add a website, or instructions to a finished video) available.

A possible downside to Google purchasing YouTube is that they are making it a lot more commercial and this likely will result in less usage over time and people switching to other video platforms that are less ad-happy. But that may take years to occur and for now, it is still the best free video platform to use.

Google has also improved the Help and tutorials sections of YouTube and has some great tutorials on how to produce good videos that grab and hold your viewers attention. However, when you are just starting out, you may want to avoid these as they may work against you by intimidating you and making it look complicated!

One of the first videos I ever shot – that contains a bunch of things I would never do again – is still considered helpful enough to people that it is fast approaching a million views. So at the end of the day, don’t worry about anything and just share something that is useful, or solves a problem, or offers hope, or makes people laugh. That’s really all you need to do and you will automatically get better as you go along.

When you do a YouTube video, remember to tell your viewers you have detailed info or a free report about that topic on your blog – then give the link orally and also put it as a hyperlink in the video description field (ABOUT section), so they can click directly to it. Remember, the goal of all your YouTube videos is to get people to sign-up or opt-in to your email list on your site.

Vimeo has a very basic account available for free and then their paid plans start. They also don’t have the advertising monetization that YouTube has. And obviously, being that YouTube is owned by Google, which video platform is going to get better search engine ranking?!

However, if you want to have a more professional look to your videos, or you want to be part of a developed artistic (filmmaker) community, then Vimeo is definitely better. And if you want to offer private videos, for example, where your videos can only be viewed on your website, or within your membership area, then you’re going to need Vimeo Pro ($199/year).

I use Vimeo to host the WordPress tutorial videos and some of the other content videos on this site. But you’ll notice that I use YouTube for much of the simple how-to vids and other content that helps spread the LTYF program to potential customers.

Whether you choose to go with YouTube, or Vimeo, or both, the same instructions apply throughout this module.

But I’m Ugly, or Camera Shy!

If you don’t want to feature yourself in your videos – although keep in mind a number of homely people have very popular channels, so you don’t actually need to look good – there are a number of ways you can still upload excellent videos without ever filming yourself:

  • You can get your kids to appear instead of you. Some of my most popular videos feature my daughter Zara, people often enjoy her more anyway!
  • You can produce videos using pictures with you doing a voiceover. Any video editing software, like iMovie (for Mac) or Windows Movie Maker (free), makes it easy for you to create a video using jpg photos. Then you can easily record a voice track to narrate your video, using the same software. This way you can create videos that are instructional, or funny, or tell a story, or educate.
  • You can create a slide presentation (with text and photos) using PowerPoint or Keynote. Then you save the slides as photos (jpgs) and import the photos into your video editing software (iMovie or Windows Movie Maker). Paste a track of music, or record a voiceover and you’re done. If you have Keynote (Mac) you can actually save the presentation directly to video.
  • Either way, it’s a good idea to have a customized background for your slides that contains your website’s URL on the top right corner or bottom right corner. Or have your site URL appear at the beginning and end of your presentation. This way you can drive visitors to your site even if your video is embedded on other sites – in which case your YouTube description and link will not appear. Watch how to create a video using PowerPoint:

  • Here’s another super-easy way to create an inspirational slideshow video directly on YouTube:
  1. Visit the upload page on YouTube
  2. Click Create under Photo slideshow.
  3. Upload photos from your computer, or select photos from an existing Google+ photo album, and click Select
  4. Drag and drop the photos to rearrange them. When you’re done, click Next
  5. Select an audio track from the library under “Audio”, or select No audio to have your slideshow play without music. (Note: You won’t be able to upload audio files from your computer).
  6. Click Upload when you’ve finished making your slideshow
  • Perhaps you are doing tutorial videos that involve showing people what you’re doing on your computer screen. Perhaps you are showing them how to use a software, or format a document, or perhaps you want to show things that are on the Internet. In these cases, you would use a Screencast software to record what’s happening on your computer screen. This is also called Screenshot Video.

The best free screencast software for Mac is Quick Time Player. Good paid screencast software for Mac includes Screenflow and IshowU HD. The best free screencast software for Windows PC is Screencast-O-Matic or CamStudio. Two of the best paid screencast software for Windows are Camtasia and SnagIt (SnagIt is much cheaper than Camtasia, but with good capability).

When you are making screencast videos, try to record the screen at 640×360 (16:9) so that the videos do not appear fuzzy. If you can’t do it in 360p, you can set it at 480p (854×480). Do not upload screencast videos in 720p unless you have no other option.

  • Use a “whiteboard” to draw pictures or figures that illustrate what you’re talking about. Many math instructors use this method, but it’s also become popular for selling products and courses where they have a professional illustrator drawing pictures of people and scenarios as they talk. You can do-it-yourself by drawing stickmen, writing words, drawing arrows, circling text, etc. as you speak.
  • Most people use their iPad (Bamboo Paper – Notebook is a free app that works well), or a special drawing tablet that hooks up to your computer for this. You can get these drawing tablets with a medium screen size, or a small screen size (cheaper). Personally, I prefer the medium size (8.5″x5.3″) since I find it difficult to write or draw small.
  • Do a Skype interview with someone and just show and record them on the screen! I have had people do this with me a number of times and I don’t mind at all. Or you can have them large on the screen and you in a much smaller box, so less visible. Free software to record the Skype interview are Quick Time Player for Mac and Free Video Call Recorder for Skype for PC, available here: http://www.dvdvideosoft.com/products/dvd/Free-Video-Call-Recorder-for-Skype.htm

Remember, when you are making screencast videos, try to record the screen at 640×360 (16:9) so that the videos do not appear fuzzy. If you can’t do it in 360p, you can set it at 480p (854×480). Do not upload screencast videos in 720p unless you have no other option.

But I Don’t Have a Decent Video Camera!

Oh this is SO not a barrier to doing videos – let me tell you why… Leonie Dawson built her business to half a million dollars shooting all her videos from her laptop camera. Even while breastfeeding. Really. People do not care, they just want you to be real. Be yourself and your tribe will feel instant recognition and follow you. The rest will mosey on their way – which is good, because they’re not your customer anyway.

No video editing software? No problem. Just shoot short videos, start to finish using your mobile phone, or a Flip video camera (less than $99 and even cheaper used) – which plugs directly into your computer for uploading. You don’t need to add titles displaying your website, you can just give it verbally at the beginning and again at the end.

Are you out of excuses? If video is your thing, or if your site visitors really like video, or your message is a perfect fit with the medium of video, then get your butt in gear! Just start with the simplest, shortest vids you can manage and know that you will get better over time. It’s all good.

That’s really all that’s needed and you can literally start tomorrow. Let’s get your ideas flowing…


Jot down a quick list of video ideas; topics you’d like to present and how you’d like to create the videos for these:


Video Production & Marketing Musts

Whichever way you decide to create your videos, there are a few things you can do to maximize your video marketing:

Give Out Your URL – Always add your website to your video in a spot that cannot be cut without losing the content. Your videos will get picked up and featured on websites and blogs all over the world and you don’t want to lose this opportunity to market your site! It’s also a good idea to verbally give out your website URL during your video as well.

Offer More Stuff – At some point in your video, direct the viewer to your website for more information, or a free eBook, or a detailed blog post, etc. You can add an “annotation” (like a note) to your videos on YouTube that goes to your webpage when someone clicks on it. You can also put a link to your site or page in the video description field that appears underneath your videos.

This is another place where you can implement the “give your best stuff for free” mandate. If you want to use video to advertise a program, or course, or service, or consulting that you offer – make videos that offer specific solutions or help. Use the video(s) as your chance to show people how good your stuff is. This is why you want to give some of your best stuff away for free. You want people to watch that video and be absolutely convinced that:

  1. a)    You really know your stuff, they can trust you, you know what you’re talking about
  2. b)    You are a great teacher and they will be able to learn easily from you because you explain things so well, or you really motivate them, or you’re funny and enjoyable
  3. c)    If you are selling a video-based series, they also get to see the quality of your video and be assured they won’t be disappointed

Here’s an example of a video that delivers in spades on all of the above:

  • The demonstration is clear and concise
  • The camera is set up well and you can see clearly everything as he demos
  • The title is catchy and holds a promise (which he delivers on)
  • At the end of the video (which is a good length – approximately 7 minutes) he directs you to his website where you can buy his full-length training program and get more excellent quality instruction – just like you just watched.

This video has been watched over 1.2 million times, so he has gotten LOTS of free advertising for his brand, his course and his website from this video – and he deserves it!

Ask Viewers To Subscribe – You can build your YouTube Channel subscribers faster if you ask people (usually at the end) to subscribe to your channel. Your subscriber’s will be automatically notified when you post new videos and you can also email them directly if you have a special offer (but be respectful, you don’t want to anger them and make them unsubscribe).

Be Yourself & Have Fun – You will always engage the viewer better if you are free in yourself and allow your true personality to shine through. You are not a professional news anchor, so don’t try to be! Just have fun and deliver the goods. People will be patient with all kinds of quirks if they sense you are sincere and they get value from your content.

Use Royalty-Free Music – Don’t put any copyrighted music in your video without permission! Expensive lawsuits are never fun. Here are some music resources you can use when the time comes, the tracks on these sites are either royalty-free or very low priced (as low as $1.99):

However, keep in mind that royalty-free only applies to non-commercial uses of the music. Unfortunately, the definition of “non-commercial” is pretty nebulous. From what I’ve seen I would say that it is okay to use the music on a video or page where you are not selling anything – but then you must give the full music credit on the page, or at the end of the video. You cannot use the music IN or as part of the product you are selling (video, audio, etc.) without purchasing a commercial license for the music.

YouTube does have music partnerships with some record labels – or some people have written to the music publisher and obtained permission to use the song – which is why you will see some videos with copyrighted music.

However, there is currently no easy way to discover which songs you can use, so I find it less time consuming to just use royalty-free music – or create your own! Don’t forget Garage Band on iMac– that is a very easy way to start creating your own music and I’m sure there are other apps and free software for easy music creation – just Google it!

If you have a little cash (like $17 or so) and you’re ready to brand your videos by creating a Video Intro that appears at the beginning of every video, then it is worth buying a music track from somewhere like Audio Jungle which will give you some high quality music, but also help to maintain exclusivity (i.e. less people will use paid music vs. free music). For example, this composer on Audio Jungle will give you a good idea of the variety available and how it all works: MojoMusic

The music that plays at the beginning of all the Listen To Your Freedom videos is a ‘video logo’ that I purchased from AudioJungle. Video logos are very short (around 20 seconds) so sell for under $20. The longer tracks of 2 – 3 minutes are more expensive ($30 – $80). The cost of the music varies depending on whether you want to use it only for free content, or whether you’ll be charging for the end product. Or whether you want to use it for one purpose only, or multiple purposes.

Publishing or uploading your videos to YouTube or Vimeo is also very easy as most video editing software (and some video cameras) have one-click uploads to YouTube and often Vimeo.

Monetize Your Vids – You can also click a few boxes on your YouTube channel that tells YouTube you would like to run advertisements on your videos. YouTube will attach the ads automatically to the beginning of your video, or run them along the bottom; whichever option you select. If anyone watching your video clicks on the ad, or watches the entire ad, you receive a few cents in revenue from YouTube. It may not sound like much, but over time, you can build up to $50 or $100/month for essentially doing nothing.

If you select to play the ads that run before your video starts (True Stream or Skippable ads) they are more annoying to your viewer, but they pay a higher ad revenue than the ads that just run along the bottom (which you can close immediately by clicking the X). You might want to upload two videos and put a different ad type on each one, then monitor them to see if having the ad at the beginning affects your watch time (the amount of time people spend watching your video).

It is not enough to track Views, because someone may click to watch your video, encounter an ad and immediately click away. This will still show up in your video view count, but it doesn’t really have any meaning.

If you don’t want to bother to test, then just run the least annoying ads to start with. Once your videos pass a few thousand views, then experiment with using the True Stream ads.

For my videos, I use the low-paying ads that run along the bottom until my videos hit 10,000 views, then I switch them to the True Stream (skippable) ads that run at the beginning  – where people can skip after watching 4 seconds:

As you can see above, I also run the Display Ads in the sidebar beside the video – this is just an ad on the page, so doesn’t affect the video or viewership at all.

If you had a video that went viral, or passed a million views, then you could definitely switch to the ads that play in full before your video starts – people are not allowed to skip them – as these pay the highest revenue. But otherwise, I wouldn’t use these ads, or you are likely to severely limit your views, as most people will not sit through the ad.

Take YouTube To The Next Level

If you find you adore doing videos and want to make this a major part of your site promotion (marketing), then YouTube itself has a ton of fantastic (free) tutorials showing you how to make a really superb channel and deliver top quality content:

http://www.youtube.com/yt/creators/

Jody Jelas also has some fun video tutorials and here’s a good one:

Another cool tool is to use a ready-made video intro template – where the music and images are already done for you (you just customize it to your name, site, tagline, etc.). These are also really cheap (less than $10) and you can see a great selection at VideoHive.net

You may also want to customize your content by making use of YouTube trends. If you can create videos for your niche that are related to the currently trending videos, you may be able to piggyback on the trend and get a good number of eyeballs on your videos too. This is probably best used if your stuff is entertainment-based, or you sell trendy products, or your demographic (your customer profile – see Module 4) fits with the viewing audience. Visit YouTube’s official blog to see the latest trending videos.

Lastly, you can also drive some related-content fans over to your channel by leaving useful comments on related videos (other people’s videos in your niche or about your topic). If your comment is liked, your comment will be placed at the top of the comments listing for that video and a lot of visitors will click on your username – which then links to your channel bringing in fresh visitors.

Again, your business is based on your top interest, or passion; you know you’ll be active in that niche and reading or watching other people’s content anyway – don’t miss this super-easy opportunity to leave a thoughtful or helpful comment which takes you only seconds to implement. NEVER use this opportunity to sell yourself, that will just turn people off and get you marked as a spammer.

Just Be Yourself!

At the end of the day, take all the ideas and tools in this Module and stick them in your tool belt for easy access, but above all, just be yourself!

If you are just truly, authentically YOU in your videos, your tribe will find you AND you will have the most success that way too. Don’t try to behave like you think a healer/fashionista/guru/carpenter/designer/chef/coach or beauty queen (to give a few examples) should behave. Just be YOU and share your thoughts, tools, energy, humor, process etc.

For example, Bunny Meyer may not strike you as a particularly mainstream beauty guru. She dyes her hair both black and blond and refers to her fanbase as “the swamp family.” Her self-described hairstyle, “messy and imperfect,” is a true reflection of her uninhibited personality. But Bunny’s openness, self-deprecating humor and strong, confident voice have helped her develop a loyal audience.

Her videos include product reviews, daily outfits and funny rants, averaging 180,000 views each. She has over a million subscribers and an Etsy store where she sells stickers, buttons and travel cups. Because of her large fan base, she has sold over 700 items on Etsy.

Of course, if she knew about LTYF, then she could monetize that million+ fanbase way beyond a few items on Etsy, product endorsement deals and YouTube ad revenue! But never mind, when she’s ready I’m sure she’ll realize she can develop her already lucrative business even further.

What can you learn from Bunny? Viewers tend to respond to authenticity and confidence. You should consider fully embracing what makes you unique, no matter how different you may seem. Whatever you are likely running yourself down for, or wishing was different about you, is probably your unique selling point!

Overwhelmed?

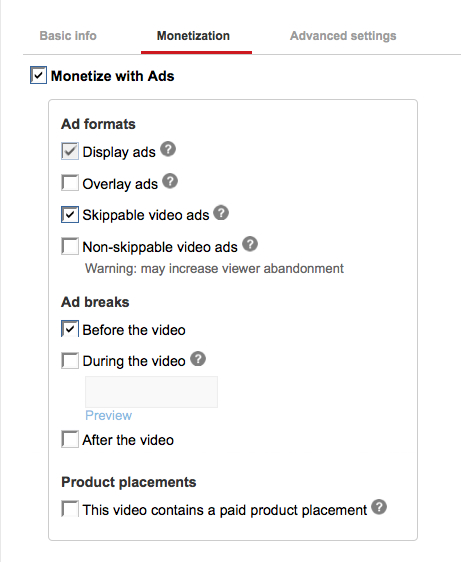
I know I covered a lot of options in this unit. But please know this is so that, as your skills grow, you can keep returning here for ideas.

You do not have to do or even understand most of the techniques covered in this section to get started! The most important items – that you can get going on right away – are:

  1. Get your YouTube channel set up – choose a username that is the same as your site if you can get it, or your own personal name.
  2. Upload your first video – remember, the first time you do something is always the hardest. So just shoot the simplest, shortest video (2 minutes is great) you can, give out your URL, and just begin the process of throwing yourself, your ideas, your solutions out there.
  3. Add the keyword tags to your video that will categorize it so that people searching on that topic can find your video. Just imagine you were searching for your video, what would you type into Google? And those are your keywords. You can also always add your name as a keyword, so people can easily find you. See the next unit, Module 17.8, for how to choose the best keywords for your content.

For now, let’s just get your first video up there – remember the first time you do anything is always the hardest! After that first time, you mow down all your blocks (by taking action) and it becomes easy-peasy!

Now take action!


Your YouTube channel name: ____________________________________________________
Topic for your first, short, easy video:_______________________________________________
Keyword tags for when you upload your first video:______________________________________


Remember, that if you don’t like YouTube, you can always use Vimeo instead. You can get a basic account on Vimeo for free.

One last thing for those of you who really want to run with your video channel and make sure you are uploading the best quality videos you can…

Best Settings For Uploading Quality Videos

Following are the formatting and uploading guidelines that YouTube and then Vimeo prefer; to give your viewers the best quality videos to watch.

Simple YouTube Video Formatting Instructions

Step 1: Open your file with a video editing tool like iMovie, Final Cut Pro, or Quicktime Pro.

In iMovie, select Share > Export Using QuickTime
In Finalcut Pro, select File > Export > Using Quicktime Conversion
In QuickTime Pro, select File > Export > Export: Movie to QuickTime Movie

Step 2: Next, verify your settings by clicking Options à Video settings

Compression Type: H.264
Frame Rate: 30 is preferred. 23.98, 24, 25, 29.97 are also acceptable.
Data Rate: Automatic
Key Frames: Automatic
Frame Reordering: Unchecked

Audio/Sound settings

Format: AAC
Click Show advanced settings and choose Constant Bit Rate as encoding strategy

Other settings

Size: Choose the original size of the video
“Prepare for Internet Streaming”: Fast Start

Make sure that you’re using one of the following formats (YouTube prefers .mp4):

.MOV
.MPEG4 (.mp4)
.AVI
.WMV
.MPEGPS
.FLV
3GPP
WebM

Step 3: Go ahead and UPLOAD your video to YouTube!

Advanced YouTube Video Formatting (Encoding) Settings

Recommended bitrates, codecs, and resolutions, and more

Container: .mp4

No Edit Lists (or you may lose AV sync)
moov atom at the front of the file (Fast Start)

Audio Codec: AAC-LC

Channels: Stereo or Stereo + 5.1
Sample rate 96khz or 48 khz

Video Codec: H.264

Progressive scan (no interlacing)
High Profile
2 consecutive B frames
Closed GOP. GOP of half the frame rate.
CABAC
Variable bitrate. No bitrate limit required, though we offer recommended bit rates below for reference
Color Space: 4.2.0

Frame rates

Frame rates should match the source material. For example, content shot in 24fps should be encoded and uploaded at 24fps. Content recorded at 30fps should be uploaded at 30fps. Content shot in 720p60, should be uploaded at 720p60. Content at 1080i 60, should be deinterlaced, going from 60 interlaced fields per second to 30 progressive frames per second before uploading.

Bitrates

Standard quality uploads

Type Video Bitrate Mono Audio Bitrate Stereo Audio Bitrate 5.1 Audio Bitrate
1080p 8,000 kbps 128 kbps 384 kbps 512 kbps
720p 5,000 kbps 128 kbps 384 kbps 512 kbps
480p 2,500 kbps 64 kbps 128 kbps 196 kbps
360p 1,000 kbps 64 kbps 128 kbps 196 kbps

High quality uploads for creators with enterprise quality internet connections

Type Video Bitrate Mono Audio Bitrate Stereo Audio Bitrate 5.1 Audio Bitrate
1080p 50,000 kbps 128 kbps 384 kbps 512 kbps
720p 30,000 kbps 128 kbps 384 kbps 512 kbps
480p 15,000 kbps 128 kbps 384 kbps 512 kbps
360p 5,000 kbps 128 kbps 384 kbps 512 kbps

Resolutions

YouTube uses 16:9 aspect ratio players. If you are uploading a non-16:9 file, it will be processed and displayed correctly as well, with pillar boxes (black bars on the left and right) or letter boxes (black bars at the top and bottom) provided by the player. If you want to fit the player perfectly, encode at these resolutions:

1080p: 1920×1080
720p: 1280×720
480p: 854×480
360p: 640×360
240p: 426×240

The YouTube player automatically adds black bars so that videos are displayed correctly without cropping or stretching, no matter the size of the video or the player.

For example, the player will automatically add pillarboxing to 4:3 videos in the new 16:9 widescreen player size. If the player is re-sized (i.e. when embedded on another website), the same process takes place so that 16:9 videos are letterboxed when the player is sized to 4:3. Similarly, anamorphic videos will be automatically letterboxed when shown in either 16:9 or 4:3 sized players. The player can only do this if the native aspect ratio of the video is maintained.

You can adjust the fit of your video in our player after uploading your video by using formatting tags.

If letterboxing is added to a video before it is uploaded (i.e. in the case of creating a 4:3 video from a 16:9 master), the widescreen player will add pillarbox bars too, resulting in black bars all around the video (windowboxing) and a bad viewing experience.

Go to YouTube’s Help section for any other questions you might have.

Vimeo Video Formatting Instructions

In order to compress, or format, your video to be uploaded to Vimeo, you will need to export your video from your editing software (like iMovie) into a format that Vimeo accepts.

For the best quality video, export your video as a Quicktime or Mpeg4 (mp4) movie, using these settings:

Codec: H.264

A codec is the format in which your video will be encoded. Vimeo accepts most major video codecs, but for best results we recommend using H.264. If you’re uploading High Definition (HD) video, choose the High Profile H.264 setting instead of Main Profile.

Advanced H.264 settings: To make your uploads extra smooth, choose the following advanced settings whenever possible.

Closed GOP
CABAC (to reduce your file size)

Here are some codecs that will not work on Vimeo: G2M2, G2M3, Canopus HQ.

Frame rate: 24, 25, or 30 FPS (Constant)

Vimeo accepts videos with frame rates of 24 (or 23.976), 25, and 30 (or 29.97). If you know the frame rate of your footage, it’s best to encode your final video at the same frame rate. However, if your footage exceeds 30 FPS (frames per second), you should encode your video at half that frame rate. For example, if you shot at 60 FPS, you should encode your final video at 30 FPS. If you’re uncertain what frame rate you shot at, set your frame rate to either “Current” or 30 FPS. If there is an option for keyframes, choose the same value you used for frame rate. Important: Always choose “constant” frame rate instead of “variable” frame rate.

Bit rate: 2,000 – 5,000 kbit/s (SD) / 5,000 – 10,000 kbit/s (720p HD) / 10,000 – 20,000 kbit/s (1080p HD)

Bit rate (aka data rate) controls both the visual quality of the video and its file size. In most video editors, this is measured in kilobits per second (kbit/s). When you have the option, choose a “variable” bit rate and set the target to at least 2,000 kbit/s for standard definition (SD) video or 5,000 kbit/s for HD. Plus and PRO members have the option of uploading 1080p HD footage, which we recommend encoding at a bit rate of at least 10,000 kbit/s.

Resolution: 640 pixels wide (SD) or 1280 pixels wide (HD)

Common resolutions for SD video include 640 x 480 px (4:3 aspect ratio) and 640 x 360 px (16:9 aspect ratio). The most common setting for HD video is 1280 x 720 px (16:9 aspect ratio). Plus and PRO members have the option to present their videos at 1080p. 1920 x 1080 px is the most common resolution for 1080p video.

AUDIO

Codec: AAC-LC (Advanced Audio Codec)

For best results, we recommend using AAC-LC (low complexity) for the audio codec.

Data rate: 320 kbit/s

For best results, encode your audio at constant rate of 320 kbit/s.

Sample rate: 48 kHz

For best results, set your audio sample rate to 48 kHz. If your working setting is already less than or equal to 48 kHz, leave it as is.