
Jini & Audelina (c) Linda Bickerton-Ross
This page is packed full of the secrets to my super powers! I’m going to show you exactly how I managed to build a million dollar business, while raising 3 fabulous kids, dealing with health challenges, and enjoying my passions like art, horses and yoga.
And no, I’m not an energizer bunny-woman with glazed eyes, because I drive myself so hard! I’m actually very peaceful and fun-loving – if I wasn’t, my horses would refuse to hang out with me!
I’m also an “earth mother” type with my kids – I breastfed for five years, the kids slept in our bed. I’ve taught my kids how to cook, sew, knit and crochet! Well, truthfully, the boys never made it past sewing, only my daughter carried on. Oh – proud Mama moment, here’s my daughter Zara, with the organic cotton baby blanket she knit for her new cousin:

Every unit in this module is dedicated to giving you all of the tools and processes I’ve developed to be able to live a full, vibrant life – health, kids, money, animals, peace, hobbies, sports, contentment – the whole shebang, can be yours.
But just before I tell you how, I’m going to give you a brief list of the major projects I’ve accomplished this last year – whilst raising three children, pursuing my passions of painting, horse riding and yoga and spending time with my husband, family and friends. I’m giving you this list now, because I want you to take the tools I’m going to give you in this module to heart and put them into action. So, in the last 12 months I:
- Wrote and published 8 new eBooks
- Revised and published the second edition of one of my hardcover books
- Launched 2 new websites and 3 new YouTube channels
- Shot, edited and uploaded 11 videos.
- Conducted and published 3 teleseminars
- Began work on 2 new healing programs; one is 40% finished, the other 60% finished
- Began writing the course material for a new business program (LTYF!), as I write this it’s 70% finished.
- Wrote and published 51 blog posts
- Set up 3 joint-venture deals with product distributors and provided them with all the materials needed
Now remember, that was all accomplished while raising 3 kids, painting, horse riding, doing yoga and spending plenty of time with family and friends. And that list does not include the ongoing running of my businesses, customer service, managing my team, etc. Our revenues increased 25% during that year.
I’m telling you this because I want you to know that I am not presenting you with nice theories here, but I am giving you the actual blueprint for how to live a well-rounded, balanced life, yet be super successful and productive in your business too.
And the reason I’m working so hard to convince you to adopt my time management strategies is because I want YOU to be super successful too! Nothing turns my crank more than seeing others increase their freedom and bring forth their magnificence – it’s the reason I’m here.
Of course, you may need to tweak the strategies I’m giving you. But for the top strategies I’m giving you on this page, please just try them out first – ideally for one month, but even if you just test them for one week that should be long enough to see the difference. But don’t just test out one or two, you have to adopt ALL of the strategies in this unit, at the same time, to experience the same results. Here we go…
Emails Last
Do not EVER come to your desk at the start of your work segment and open up your email program. Emails are black holes that almost never contribute to your bottom line. But more importantly, they also fragment your concentration and wreck your energy focus for the important tasks you need to get done.
 If your business does have time-sensitive elements that come in via email, then go back to the email setup I gave you and make sure that all those time-sensitive emails are sent to your Urgent Biz mailbox and that is the ONLY mailbox you look at in the beginning of your work day.
Also make sure your “new email” sound (of a new email hitting your Inbox) is turned OFF.
So when can I check and respond to emails?
Set the last half hour of your work slot to check your emails and respond to or handle the most important ones. Then, the rest of your emails can be answered here and there as you’re taking care of your kids, riding the bus, or have 5 minutes here and there.
Think about it: Emails do not require focus or extended concentration to deal with. They are the ideal task to fit in here and there. Put the chicken in the oven, then go do some emails. Drive your kid to hockey and do emails while you wait for him. Waiting in the dentist’s office – do your emails.
For those of you who avoid WiFi (like I do) you do not need to have your device turned on while you’re reading and replying to emails. Just download all your emails, then put your device into Airplane Mode while you reply to all of them. Then send them all in one batch and back to Airplane Mode. Of course, it’s best if you don’t hold your device while sending or receiving data – just put it down somewhere and if you can go outside that is best for reducing your radiation exposure.
Surfing, Watching Videos and Emails from Friends
These types of emails and Internet activity may appear in the same place as your work stuff, but they need to live in a completely different category in your brain. You need to think of web surfing, watching YouTube vids and checking out things friends sent you as ENTERTAINMENT or chill-out activity.
They belong in the same time slot as watching TV, reading novels and watching movies.
So set yourself the amount of time each day you need to spend on entertainment. For me it’s 2 hours and I spend it reading a book in bed, right before I go to sleep. I’m not a big TV fan, but my husband is and that’s his way to chill out for an hour or two before bed. If TV is your thing, then make sure you record all your stuff and watch it later so your time is not wasted by sitting through ads!
Most people don’t realize how much of their time is sucked into the TV or surfing the web – which contributes very little to your quality of life.
Turn Off Your Personal Phone
The easiest way to manage phone interruptions is to have a separate business line and personal/home line. Then, when you are working you ONLY answer the business line.
However, I realize that when you are just starting out, you often don’t have the budget for two phone lines. Although don’t forget, you can get a second business number from Grasshopper (worldwide) for a very cheap price – so be sure and check that out.

Young beautiful woman waiting for call isolated
In the meantime, if you don’t get many business calls, then just completely turn off your phone for at least half your work time. Then check messages and spend some time returning only your business calls and leave your phone on if you are waiting for people to call you back. But again, only answer the phone if it is a business call. Let your friends, family etc. go to voicemail.
If you don’t need to wait for any callbacks, then turn your phone completely off again, and continue working.
If you don’t turn your phone off, but set it to vibrate, it is going to result in the same splintering of focus as the ‘ding’ of your email inbox – and that’s exactly what you need to avoid to get quality work done.
I think of my work time as ‘dropping into a zone’ and I need to stay there, I need to stay completely in the flow to be able to work with maximum efficiency. Any noise, notifications, bells, or even music provide varying levels of distraction from the kind of pure focus that will enable you to work at anywhere from double to quadruple the speed of everyone else.
And this will not be stressful! Pure focus is actually rejuvenating and vital. Think of an athlete – after running the fastest 100 metre race they can, do they say, ‘Wow, that was really stressful.’ No. They may be physically tired, but they feel pretty good about giving it their best.
Some people think they work better with music, than without. Again, I say, test it! When I’ve had my kids test this with homework, they’ve all found they do better work, much quicker without music – even when they were convinced the music helped them.
If you’re doing tasks that don’t require focus, like answering emails, or sorting bills, or editing a document for line spacing, etc. then sure, no problem, music is not going to be an issue.
But I’m talking about creating products, or marketing materials, or other important activities that directly contribute to your bottom line.
Plug The Leaks In Your Energy
 The final key for this unit of foundational strategies involves some introspection and stepping into your ‘observer self’, to determine where you are leaking your lifeforce energy.
Indians call lifeforce energy ‘prana’, Chinese call it ‘chi’, Japanese call it ‘ki’. It doesn’t matter what you call it. It is the foundational energy that gives us vitality, vibrancy and energy to do all the things that are important to us. Notice I said ‘important’ not ‘urgent’!
Maybe you find yourself wanting to move ahead with your business, passionately desiring the life of your dreams, but you seem to be moving at a snail’s pace. Or you take one step forward and then one step back, or even two steps back. If any of this rings true, then it is likely you are leaking your lifeforce energy out of your body somewhere.
This can be a difficult phenomenon to recognize in ourselves. Close friends or family can probably see it much more easily and clearly than you can. So either ask them for their insights, or step into your ‘observer self’ and take a look at your actions over the week.
Imagine yourself standing off to the side, or up near the ceiling, looking down at yourself – this is your ‘observer self’. So while you are going about your day, talking, eating, etc., your observer self is standing over there, watching you – not judging, just watching and observing.
See if you can observe the instances, or patterns in your life where you get thrown off track, or distracted from your purpose; the places that drain your energy and leave you feeling tired and ‘who cares’ or ‘screw it’ about your goals or vision.
For many people, relationship dramas are a primary leak-hole for their lifeforce energy. Let’s say you’ve just sunk into writing your eBook and you’re making great progress with chapter two. Then your doorbell rings, or your phone rings and it’s your sister, or your mother, or your best friend and they’re distraught, or raging, or sobbing. Feels really important that you rush to their side, doesn’t it? Perhaps it boosts your self-esteem; it makes you feel important, or needed.
 But your observer self, looking on, notices that this type of drama occurs on a weekly basis. And maybe each new dramatic event takes 2 – 3 days of dialogue, support, or assistance to resolve. It takes up your time and your energy. When you sit down to work on your book again, you feel drained. You can’t think of much to say and you can’t stop thinking about poor mum, sis, friend, etc.
You must save your lifeforce energy for your business or you will not be able to bring forth your passion and vibrancy to all the people who need it. No excuses. And no exceptions. The tools that I’m going to give you in this module will help you to set stronger boundaries around your time and energy, so that you will have strategies and boundaries in place to handle events like this. But your first step is awareness.
If you do not realize where you are leaking your lifeforce energy (and time!) then you will not be able to stop it.
Others may leak their lifeforce energy into their TV set, or web surfing, or texting, or Facebooking, or by living vicariously through their children or partner.
You MUST save your lifeforce energy for your business.
In the example I gave above, if you had turned off your phone during your work slot, would your distraught friend or family have been able to reach you? If you have a commitment to yourself that you do not come out of your office during your work time, would you have answered your doorbell?
You may even have to have a conversation with the drama queens in your life and let them know that you will not be answering the phone or door during your office hours. And then expect them to test you! Prepare yourself for the test, so that you don’t cave, but stick to the boundaries you’ve set. Take a closer look at some of the challenges leaking your lifeforce – and what you can do about them – in writing…
Think about ways you currently leak your lifeforce energy – and ask your friends and family members for their insight if you need to. Look at relationship drama, TV, web surfing, texting, Facebooking, overeating, living vicariously through your kids or partner, etc.:
Now what can you do to set boundaries around your time and energy, so that you preserve your lifeforce energy for your business and manifesting your purpose here on earth?
Create a Task List right now! Write down the top 3 tasks you need to get done a.s.a.p. (as soon as possible) to create these boundaries. Don’t forget to put checkboxes in front of each task:
Let’s talk about some other ways you can set your boundaries and focus your energy on what’s important to your life.
Focus On Important Tasks Not Urgent Tasks
 Being able to discern between tasks that are urgent (gotta do this now!) and important (these will still matter next month or next year) is an essential skill to develop.
So how can you discern which tasks need to be done today, during your work time, and which can be put off and accomplished later?
The simple test is to ask yourself this question: If I DON’T do this, will it make a difference to my life or my biz one month from now?
Let’s look at some tasks that may feel urgent, but when you apply the ‘matter in one month?’ test, you realize they are not important at all:
- Answering all my emails.
- Cleaning my messy kitchen.
- Organizing my computer files.
- Dealing with my Facebook messages.
- Watching my son’s soccer game, when my spouse is going to be there, and I’ve already attended 3 games this month.
- Learn a new photo editing program.
- Feed the cat.
Not one of these things is going to make a difference to your business or your life in one month’s time, so they must NOT be allowed to take up your work segment. They can all be dealt with after you’re finished working and are moving about the rest of your day.
Okay, now let’s look at some tasks that will pass the ‘matter in one month test’ as you realize they are actually important items that need to be dealt with:
- Write my weekly blog post
- Pin a photo with a quote to my Pinterest account
- Write an email to someone whose work I love, about possibly collaborating
- Apply salve to my daughter’s bleeding knee and settle her on the couch with a movie and a snack
- Pick up the phone and talk to two of my customers
- Write one chapter of my eBook
- Record a half hour audio
- Go for lunch with my bestie and brainstorm my latest product idea – take notes.
Do you see the difference? You have to discipline yourself to be ruthless about not letting urgent items creep onto your to-do list or interrupt your work slot. Because they feel urgent! They feel like they’re really important, but when you apply the ‘matter in one month’ test, they are not.
Let’s try it out right now. Look at your day and create two lists of Urgent and Important tasks. Of course, some items can be both, but then they just go to the top of the Important list. So, right now, today, divide your tasks up (using the ‘matter in one month’ test) into Urgent and Important tasks.
URGENT
_____________________________
_____________________________
_____________________________
_____________________________
_____________________________
IMPORTANT
_____________________________
_____________________________
_____________________________
_____________________________
_____________________________
Multi-Tasking Is Not Efficient
 I know I’m going against the current zeitgeist here when I state that multi-tasking is actually not an efficient way to work. Sorry! But that’s the truth and here’s why: When you allow (or force) yourself to focus on only one task at a time, you will complete that task much faster. And the quality of work you produce will be much higher due to your intense, laser focus on that one thing.
I’m a mum with 3 kids, 2 cats, a dog, 3 horses and a huge house and yard – trust me, I have plenty of opportunities to multi-task! And when I’m not in my work zone, I multi-task like a banshee. My office or work time is the place where I use my self-discipline to get rid of everything else and just focus on ONE task at a time.
Create Your Task List
Remember that self-discipline is a ‘muscle’. The more you use it, the stronger it gets and the easier it is to use. So here’s how you create that focus on completing only the important tasks – one at a time – in your work slot:
- WRITE DOWN each of the things you need to get done that pass the ‘matter in one month’ test.
- Now number those tasks in order of priority and logistics. For example, you can’t upload your eBook to your shop page until you have the eBook cover completed – so the cover has to be done first.
- Add a checkbox next to each task.
- Have that task list right on your desk, where you can see it the second you walk into your work space and sit down.
- Use your self-discipline to force yourself to complete the tasks in order and to make sure you do not start any new tasks until ALL the tasks on your list are completed.
- Place a tick in each checkbox as soon as you complete each task.
Here’s an example of a priority-ordered task list:

This may sound very simple. But until you actually implement this system, you will not realize its value. The most important parts of this system are the ‘writing it down’ part and the ‘checkbox’ part. Go ahead and try it, you’ll see.
If you get great ideas while you’re working – use your self-discipline to force yourself to stay on task and not go off on a tangent. You can thank yourself for the great idea, jot it down in the margin of your to-do list and carry on.
Again, it is really important to write down that thought, or great idea, because you need to get it out of your head and down on paper. Now your head is clear again and can focus on the numbered tasks on your list. If you don’t write it down, it will keep popping up as you’re working, “Don’t forget about…” and then you’ve lost your focus and slowed yourself down.
Remember at the beginning of this unit, when I wrote this?
… for the top strategies I’m giving you in this first unit, please just try them out first – ideally for one month, but even if you just test them for one week that should be long enough to see the difference. But don’t just test out one or two, you have to adopt ALL of the strategies in this unit, at the same time, to experience the same results.”
Let’s re-cap each of the strategies again to make it easy for you to implement and test:
 Close my email app. Do not look at emails until the last half hour of my work segment. Then check my business email box only.
- Do not use the Internet for ANYTHING other than completing the tasks on my to-do list. If I don’t need the Internet (I’m writing, or recording, etc.), I close my Internet browser.
- Completely turn off my phone (home or cell) at the start of my work slot. If I need to check for messages, I check only once and then turn it off again.
- Figure out where I’m leaking my lifeforce energy and STOP. Put up strong boundaries around my time and energy.
- Create my Task List and start working through the checkboxes.
That doesn’t sound so hard, does it? And you certainly don’t need to wait until your business is up and running to implement these strategies – you can start right now. Remember, when you’re working through the modules in LTYF, that IS your work time!
Okay, now that you have your foundational strategies for revving up your super powers, let’s carry on and build the rest of your framework…
 Jo Barnes (one of my husband’s friends and a fellow Brit) is doing exactly what I keep telling you to do: Give great stuff away for free!
 DOWNLOAD
 If you use any social media right now, you’re probably used to seeing ads all over it, usually targeted somewhat at you. A lot of people get anxious about knowing how to use social media “properly” to promote their business. The truth of the matter? Social media algorithms change, and the tricks you learn or figure out or pay for become less effective or obsolete over time. And even though you get instant feedback in terms of likes, comments, views and shares, none of that necessarily contributes to making an actual sale. What people see on social media is momentary, and then they’re on to the next thing. And if the formulas change, they might not even get to see your content. There is still absolutely nothing that compares to a
 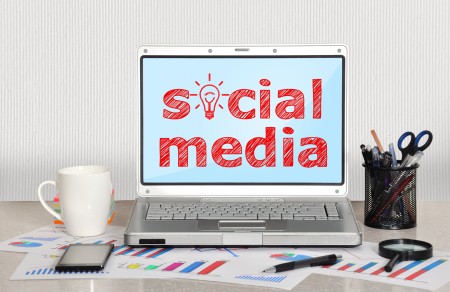 I also outsource much of Pinterest, because although I enjoy choosing and pinning pictures, my time is better spent creating the in-depth content on my blog and videos. My VA then grabs this content and pins it to Pinterest, Instagram, Facebook, Google+ and Twitter.
 Daymond John is the founder and CEO of the $5 billion clothing company FUBU and he manages his own twitter account – because he’s always on his cell phone and he enjoys tweeting!


 YouTube
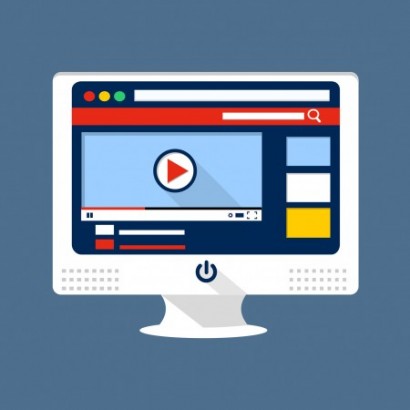 Vimeo
Vimeo The best free screencast software for Mac is Quick Time Player. Good paid screencast software for Mac includes Screenflow and IshowU HD. The best free screencast software for Windows PC is Screencast-O-Matic or CamStudio. Two of the best paid screencast software for Windows are Camtasia and SnagIt (SnagIt is much cheaper than Camtasia, but with good capability).
 Offer More Stuff – At some point in your video, direct the viewer to your website for more information, or a free eBook, or a detailed blog post, etc. You can add an “annotation” (like a note) to your videos on YouTube that goes to your webpage when someone clicks on it. You can also put a link to your site or page in the video description field that appears underneath your videos.
 YouTube does have music partnerships with some record labels – or some people have written to the music publisher and obtained permission to use the song – which is why you will see some videos with copyrighted music.
 Monetize Your Vids – You can also click a few boxes on your YouTube channel that tells YouTube you would like to run advertisements on your videos. YouTube will attach the ads automatically to the beginning of your video, or run them along the bottom; whichever option you select. If anyone watching your video clicks on the ad, or watches the entire ad, you receive a few cents in revenue from YouTube. It may not sound like much, but over time, you can build up to $50 or $100/month for essentially doing nothing.
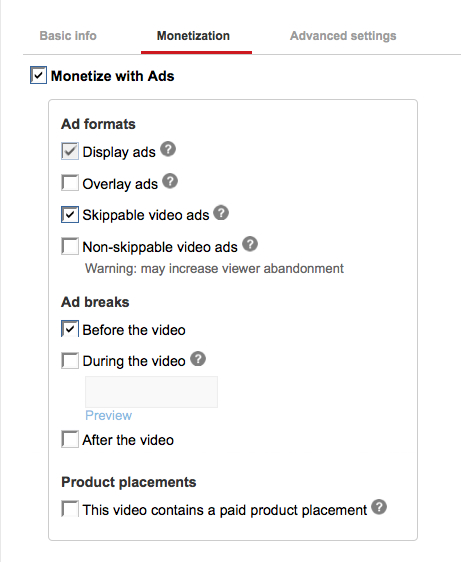
 I know I covered a lot of options in this unit. But please know this is so that, as your skills grow, you can keep returning here for ideas.
 Advanced YouTube Video Formatting (Encoding) Settings
 A codec is the format in which your video will be encoded. Vimeo accepts most major video codecs, but for best results we recommend using H.264. If you’re uploading High Definition (HD) video, choose the High Profile H.264 setting instead of Main Profile.
 As you are browsing around the Internet, whenever you read a blog post or forum post that catches your eye, or ends up being helpful, or perhaps you have some helpful comments to add, be sure and post a comment.
 We’ve all seen how quickly a great quote can go viral. Quotes also cause your reader to connect more deeply with you – because a resonant quote shows that you understand how they feel, or you share a frustration, but also a hope, or provide encouragement, or humor to lighten their day. And again, no matter which type of quote you post, a short quote is very easily and often shared among friends and family members (free marketing for you!).
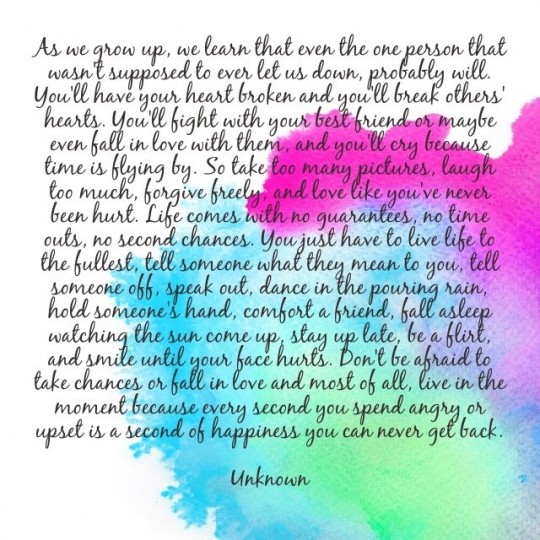


 Let’s say I have a cooking site and I sell my own recipe books on the site. And you have an amazing new kitchen gadget that will cut food prep time in half. So you send me an email with a link to a demo video and then follow up with a phone call.
 Answer: Are you likely to get more sign-ups to receive a free gift than you are purchases for a product people have heard about once? Sure you are.
 So now that you understand the monetary value of an affiliate program and how you can use it to introduce new people to your stuff and drive lots of extra traffic to your site, how do you choose which affiliate program to use? If you’re already using an affiliate program, can you still make it work for you, or will you need to switch to something else for better function or compatibility?
 What’s the difference between customer relationship marketing (CRM) and email marketing? The short answer is that email marketing is how you turn your site visitors into your customers and CRM is how you grow your existing customers into great customers. But let’s get into exactly what that means and how it’s done.
 Let’s say I’m selling a book on mouse traps and I want to find out if the trap is working well for people. I can have an autoresponder email set up in my email marketing platform to be automatically sent out 20 days after the book purchase, which asks the customer for feedback.
 You have an eBook on how to be a pro longboarder. This eBook is a combination of text and demonstration videos.
 You have an online DVD course that shows people how to purchase an antique armoire from a flea market and refinish it to showpiece quality.
 You have a series of audio-based healing sessions using hypnosis for different conditions: Stop smoking, lose weight, bedwetting, anxiety, insomnia, etc.
 Your back-end email marketing system can be amazingly complex, depending on how big your business is and how many ways you want to be able to interact with your people. Or, it can be fairly simple and basic and you can build it slowly as you go. I’ll give you a

Recent Comments